

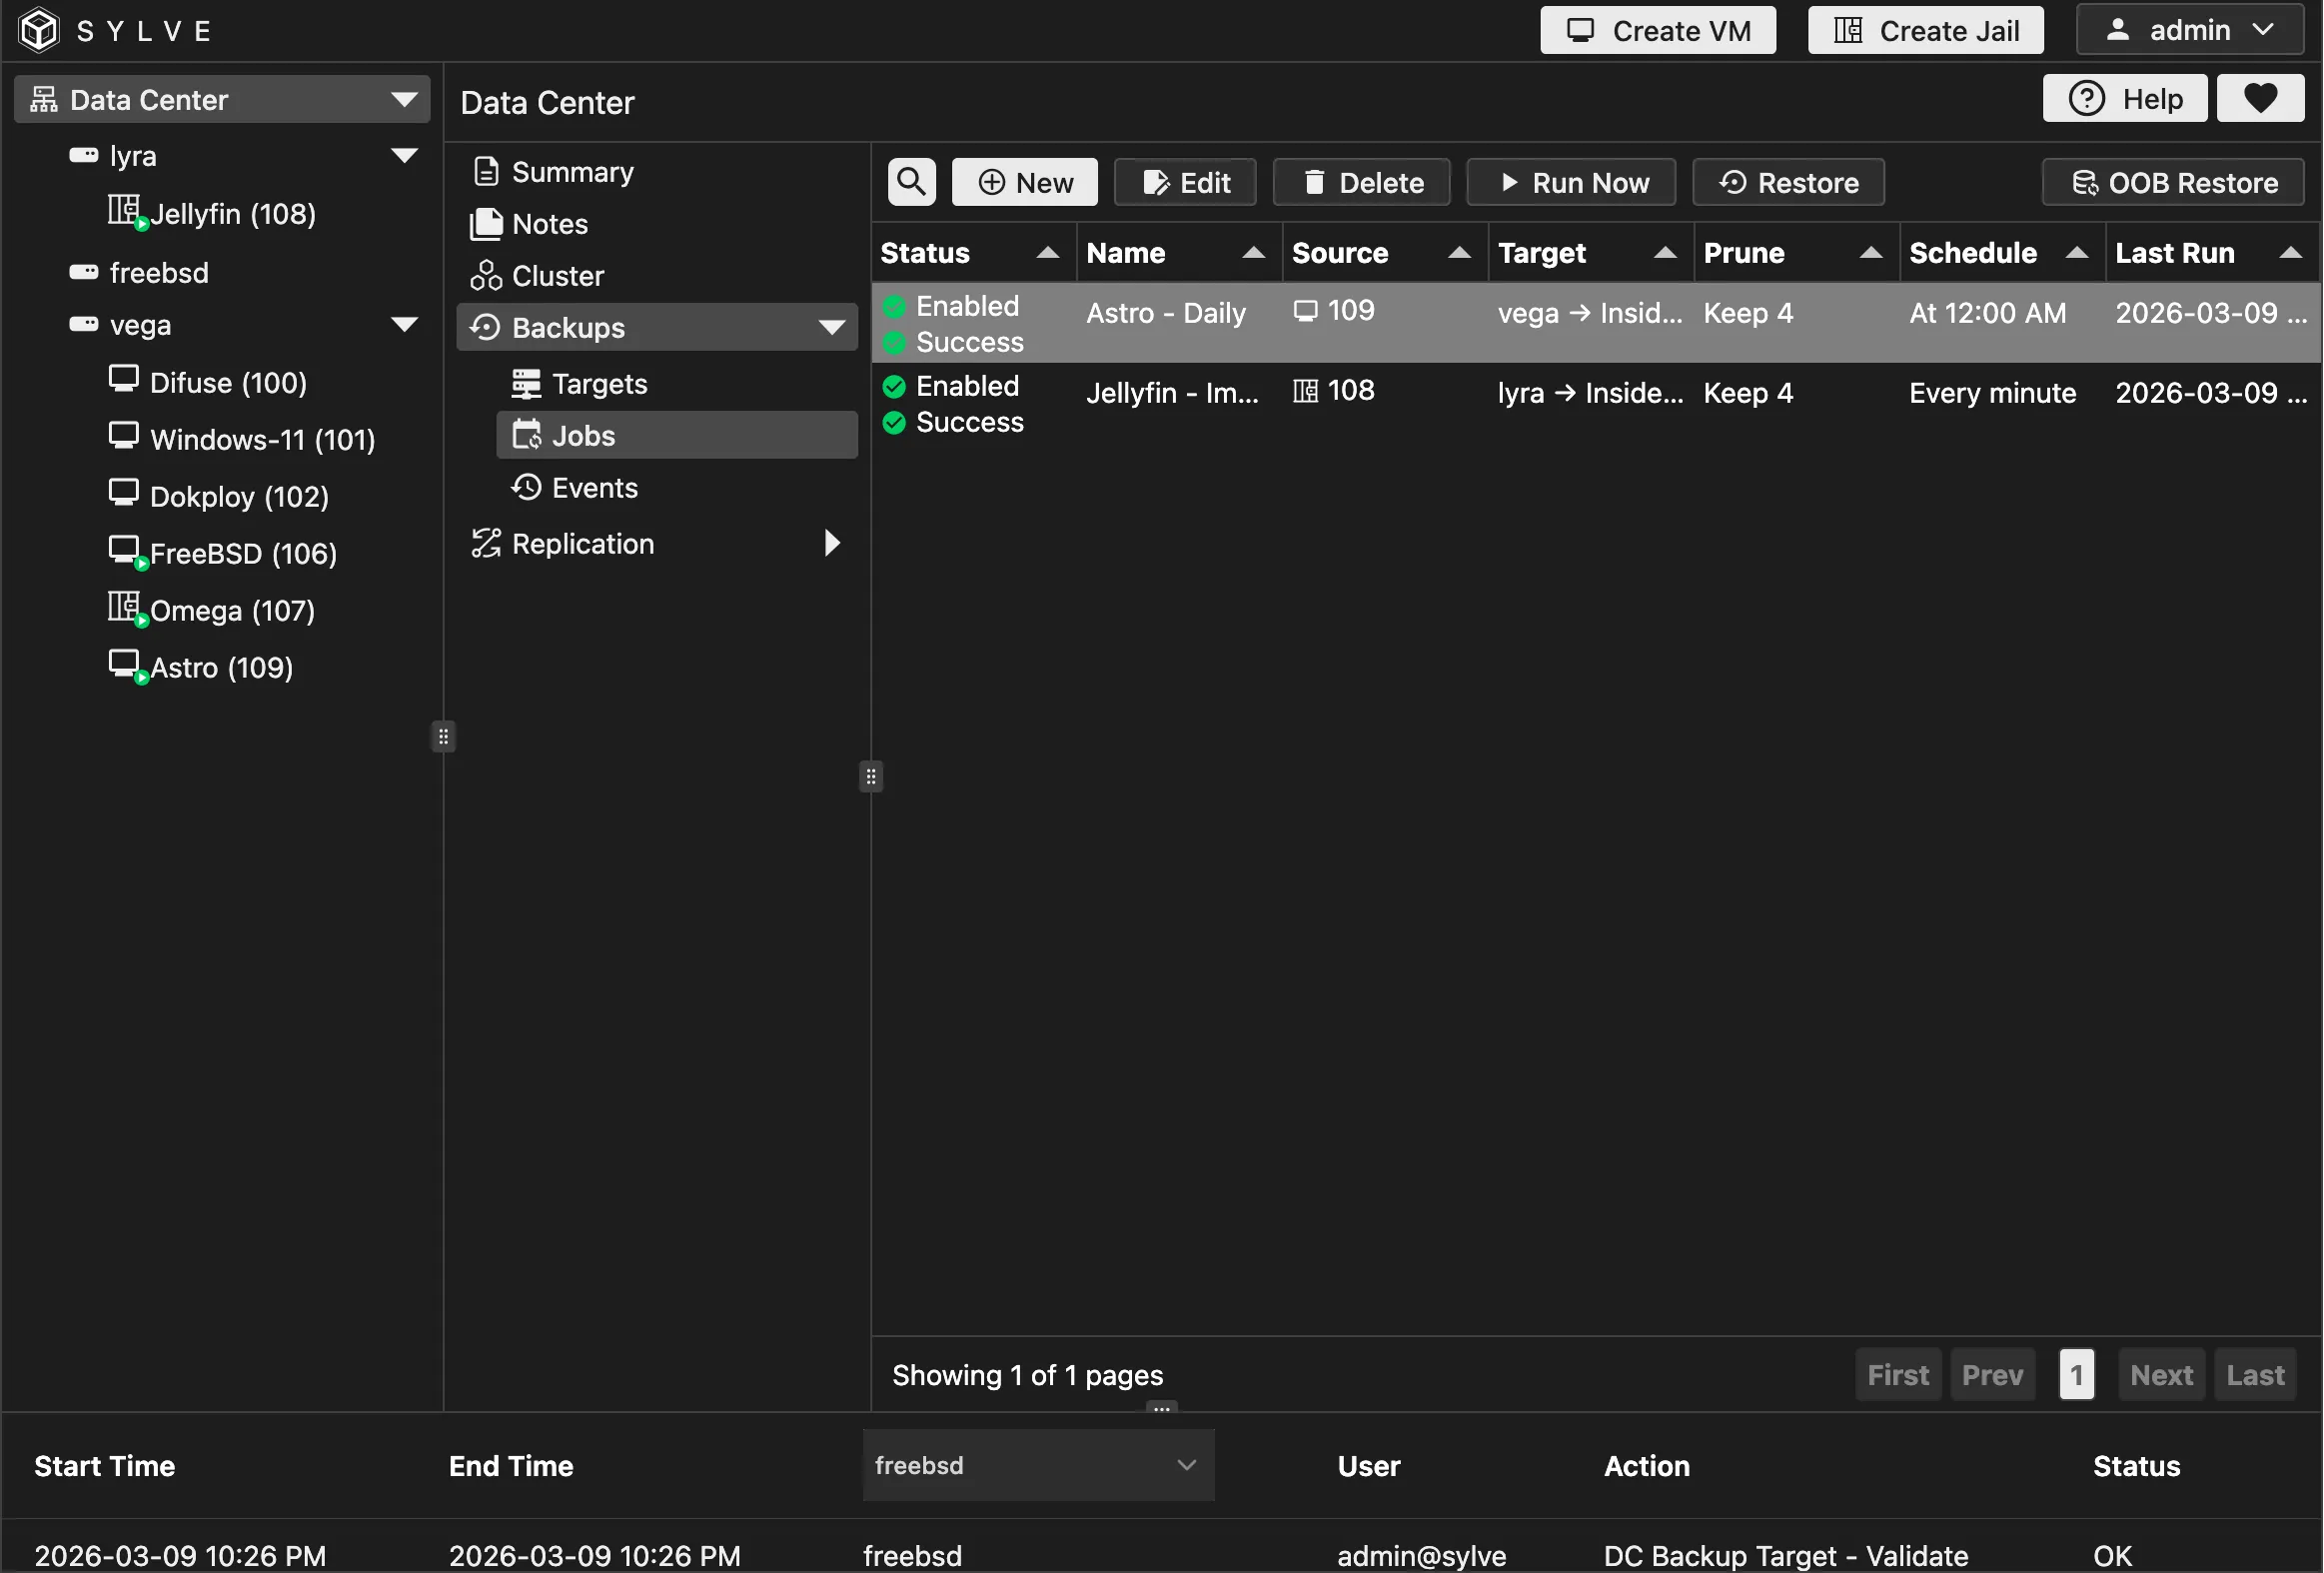
Jobs
In this section, you will learn how to create backup jobs and restore data from existing backups.
A target defines where backups go.
A job defines what to back up, when to run, and which node should run it.
Creating a Backup Job
Section titled “Creating a Backup Job”Go to Backups → Jobs, then click New.
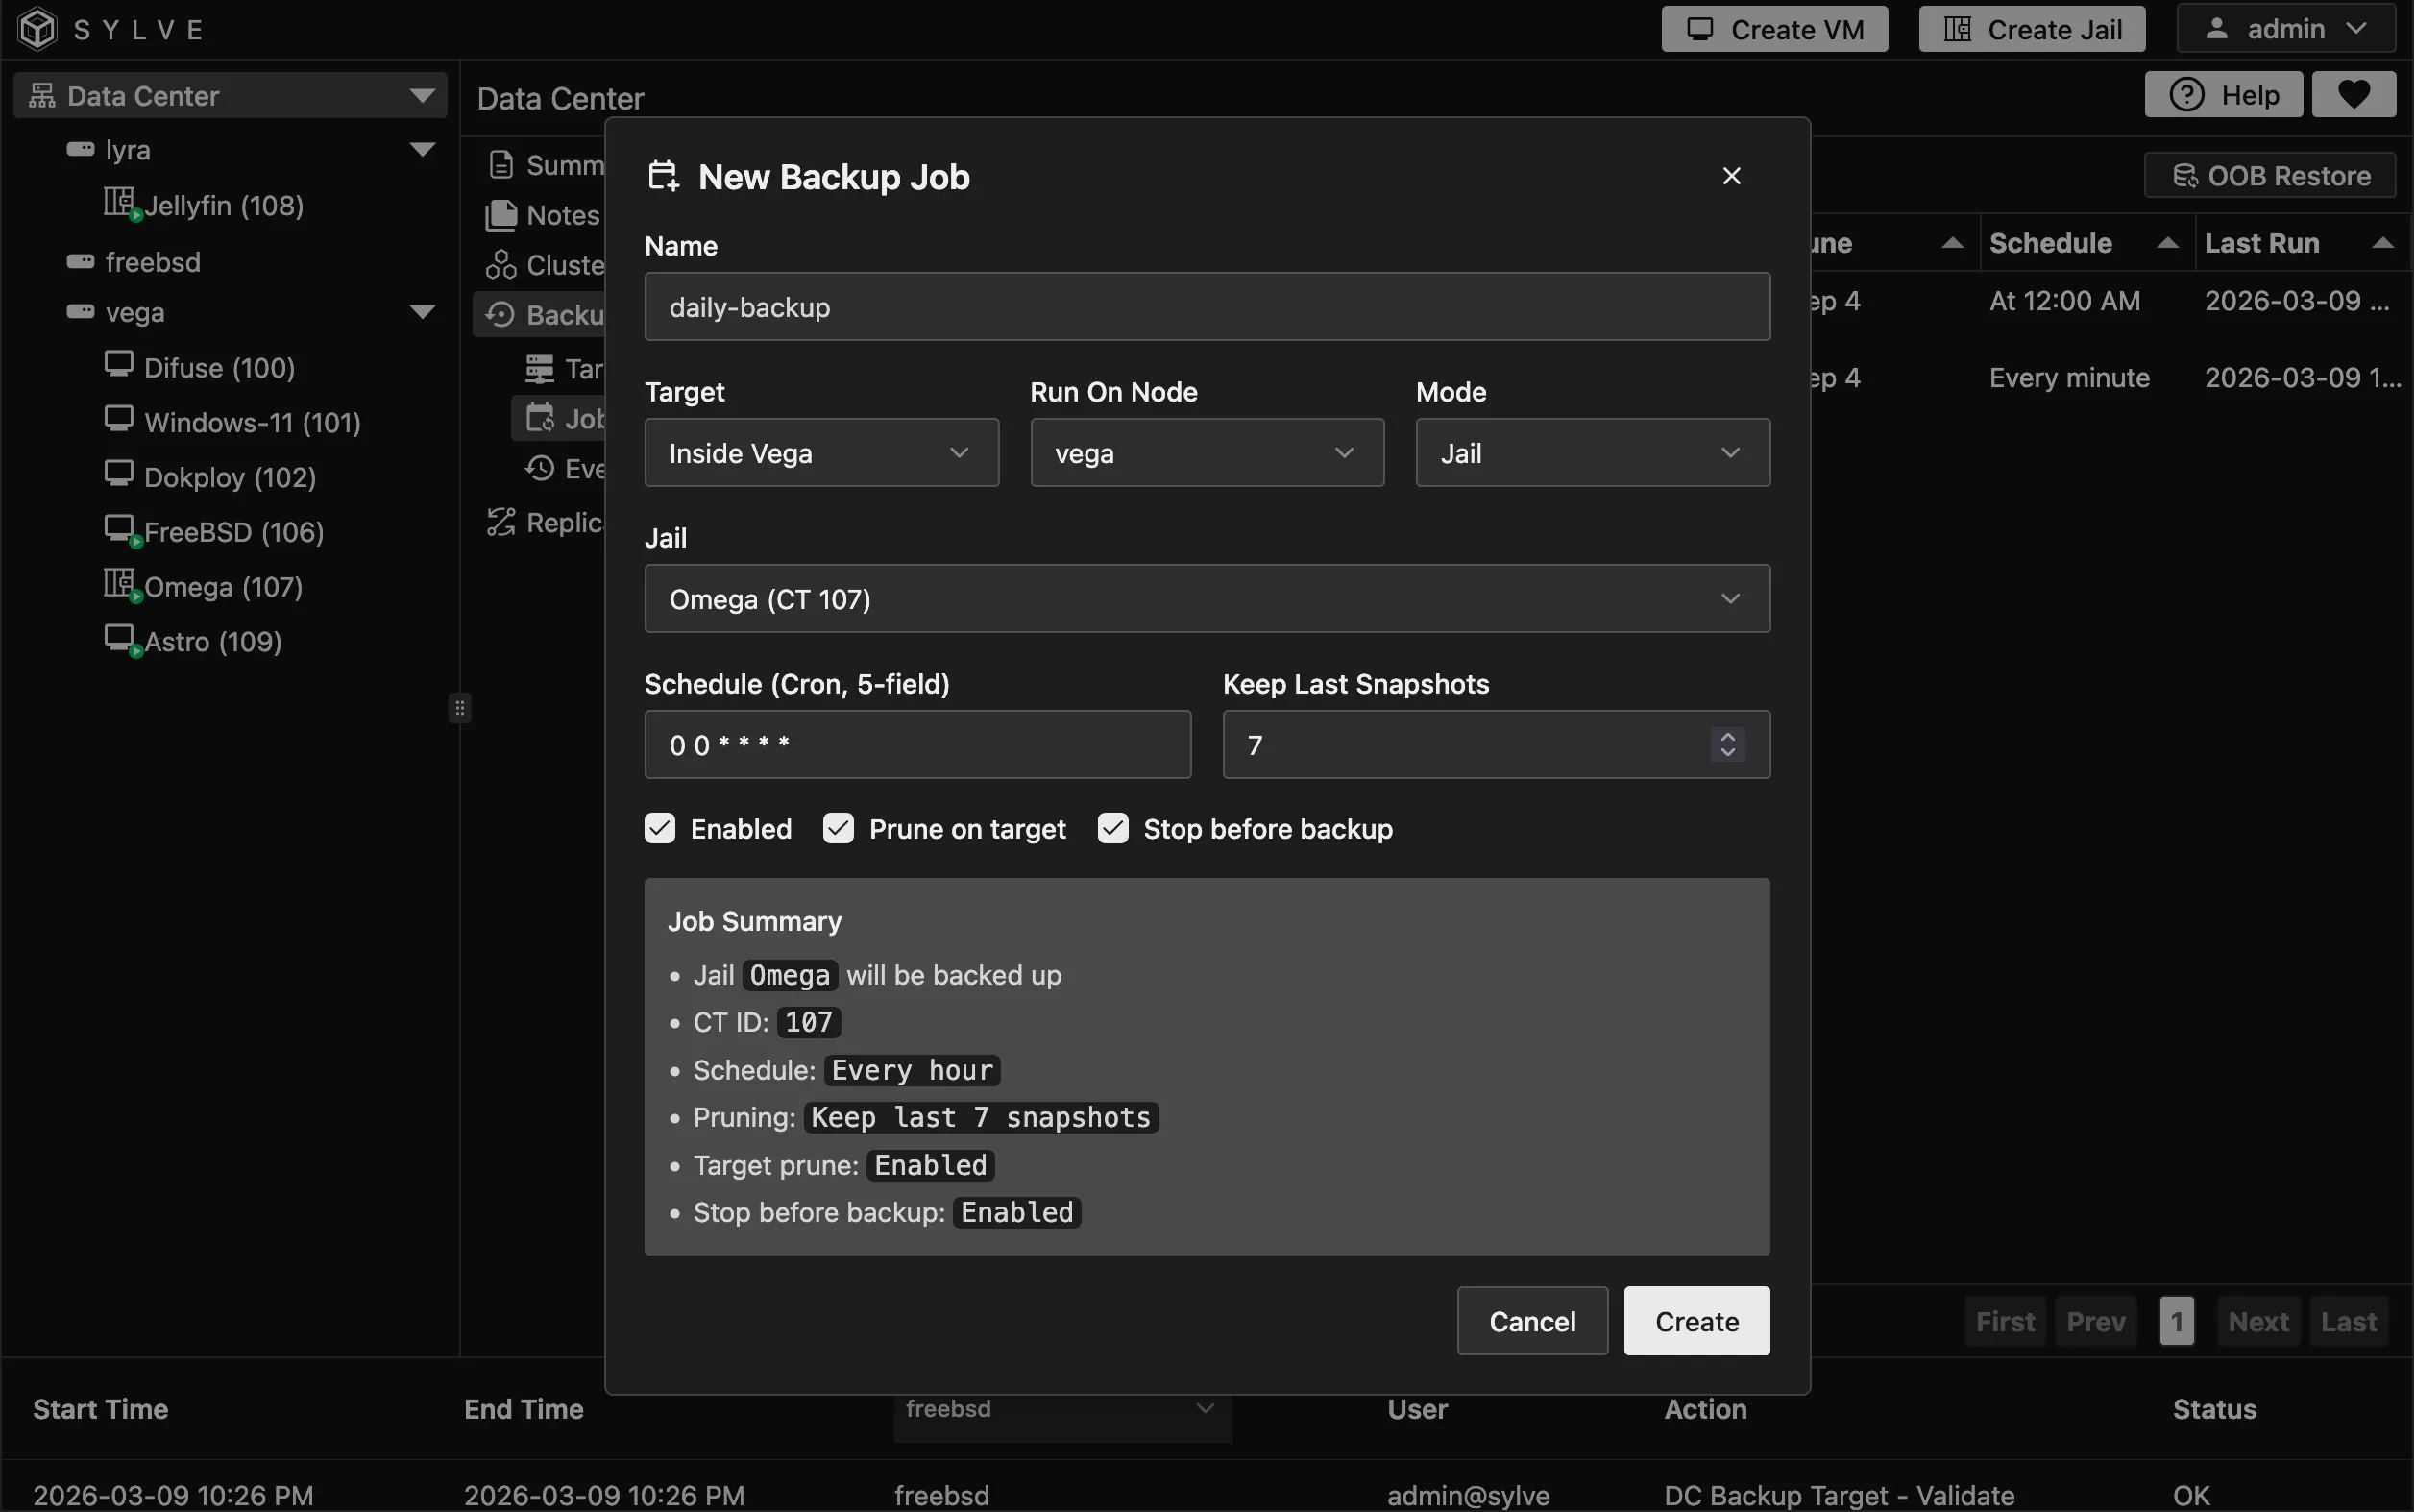
Job fields
Section titled “Job fields”| Field | Description |
|---|---|
| Name | Friendly name for the job. |
| Target | Which backup target this job writes to. |
| Run On Node | Node that executes this job. In clustered setups, choose the node you want. On standalone systems, this is automatically set to the local node. |
| Mode | Determines what is being backed up: Single Dataset, Jail, or Virtual Machine. |
| Source Dataset / Jail / VM | The specific dataset, jail, or VM to back up, depending on the selected Mode. |
| Schedule (Cron, 5-field) | Backup schedule using cron syntax (for example, 0 * * * * for hourly). |
| Keep Last Snapshots | Number of snapshots to retain for pruning. Setting 0 disables prune count enforcement. |
| Enabled | If disabled, the job is saved but will not run on its schedule. |
| Prune on Target | Enables snapshot pruning on the backup target. |
| Stop Before Backup | Stops the guest before the backup begins when applicable. |
Editing / Deleting / Running Manually
Section titled “Editing / Deleting / Running Manually”Select a row in the Jobs table to use context actions:
- Edit: Update target, schedule, source, and options.
- Delete: Remove the job.
- Run Now: Trigger an immediate run without waiting for the schedule.
Understanding Generations and Lineage
Section titled “Understanding Generations and Lineage”During restore flows, snapshots are grouped by Generation. A generation is created when a backup job runs after a successful restore, and it represents a new backup lineage. Each generation contains snapshots taken during that run and subsequent runs until the next restore that creates a new generation.
Restore from a Backup Job
Section titled “Restore from a Backup Job”Use this when you want to restore from snapshots produced by a specific job.
From Backups → Jobs, select a job, then click Restore.
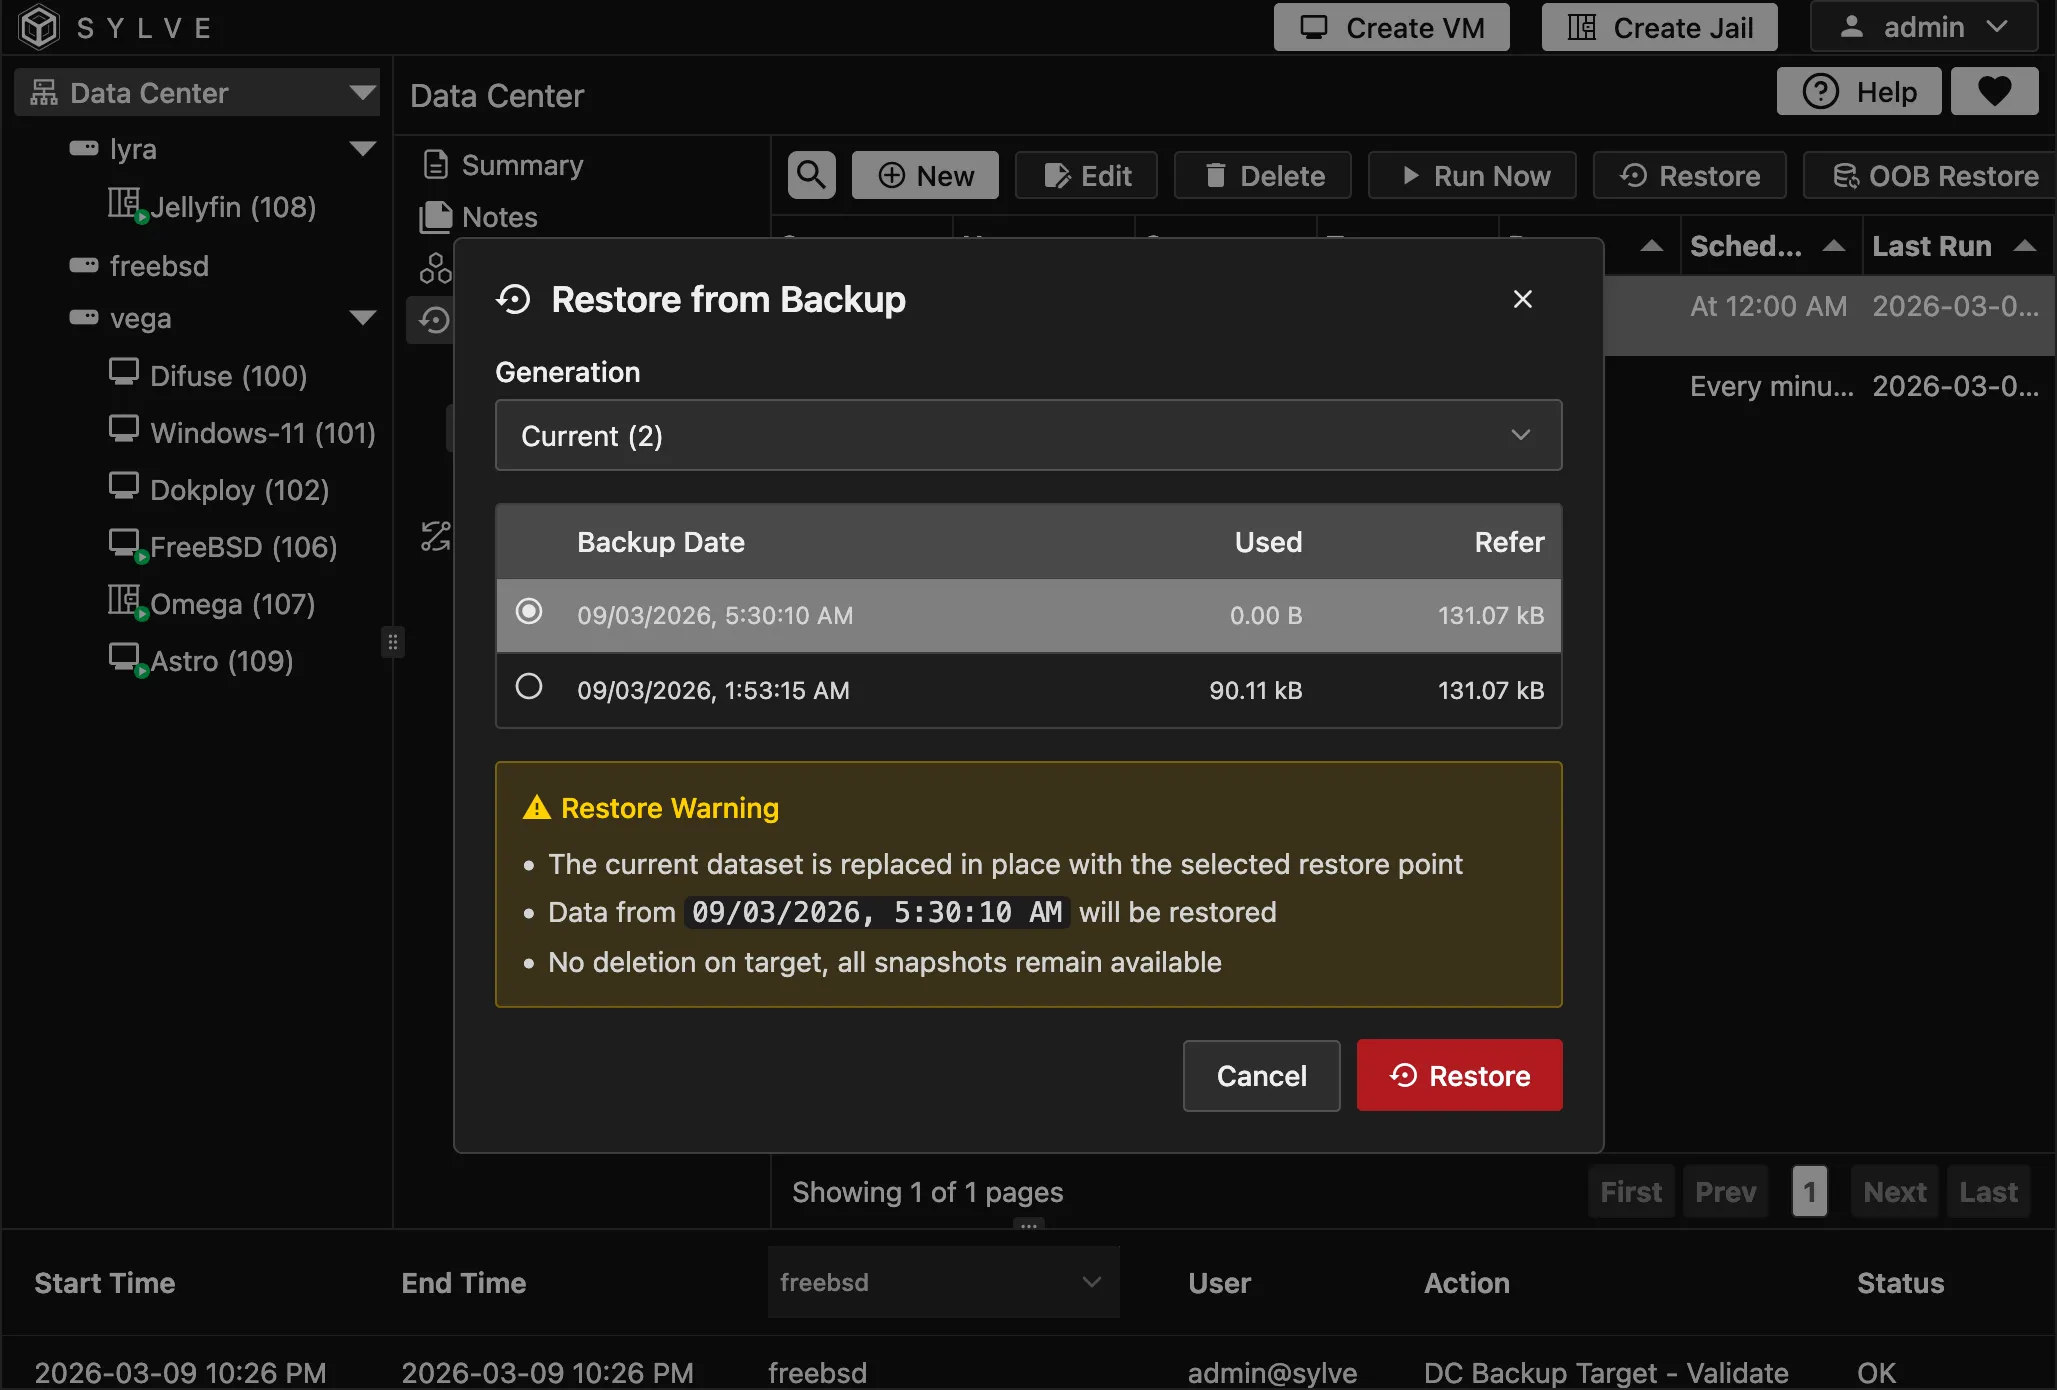
- Select a Generation.
- Select a Snapshot.
- Review the restore warning.
- Click Restore.
What happens:
- The destination dataset for that job is restored in place.
- Existing snapshots on the target are not deleted.
- Progress and result appear in backup events.
Out-of-Band (OOB) Restore
Section titled “Out-of-Band (OOB) Restore”Use OOB Restore when you want to restore directly from a target dataset/snapshot, independent of a specific job context.
From Backups → Jobs, click OOB Restore.
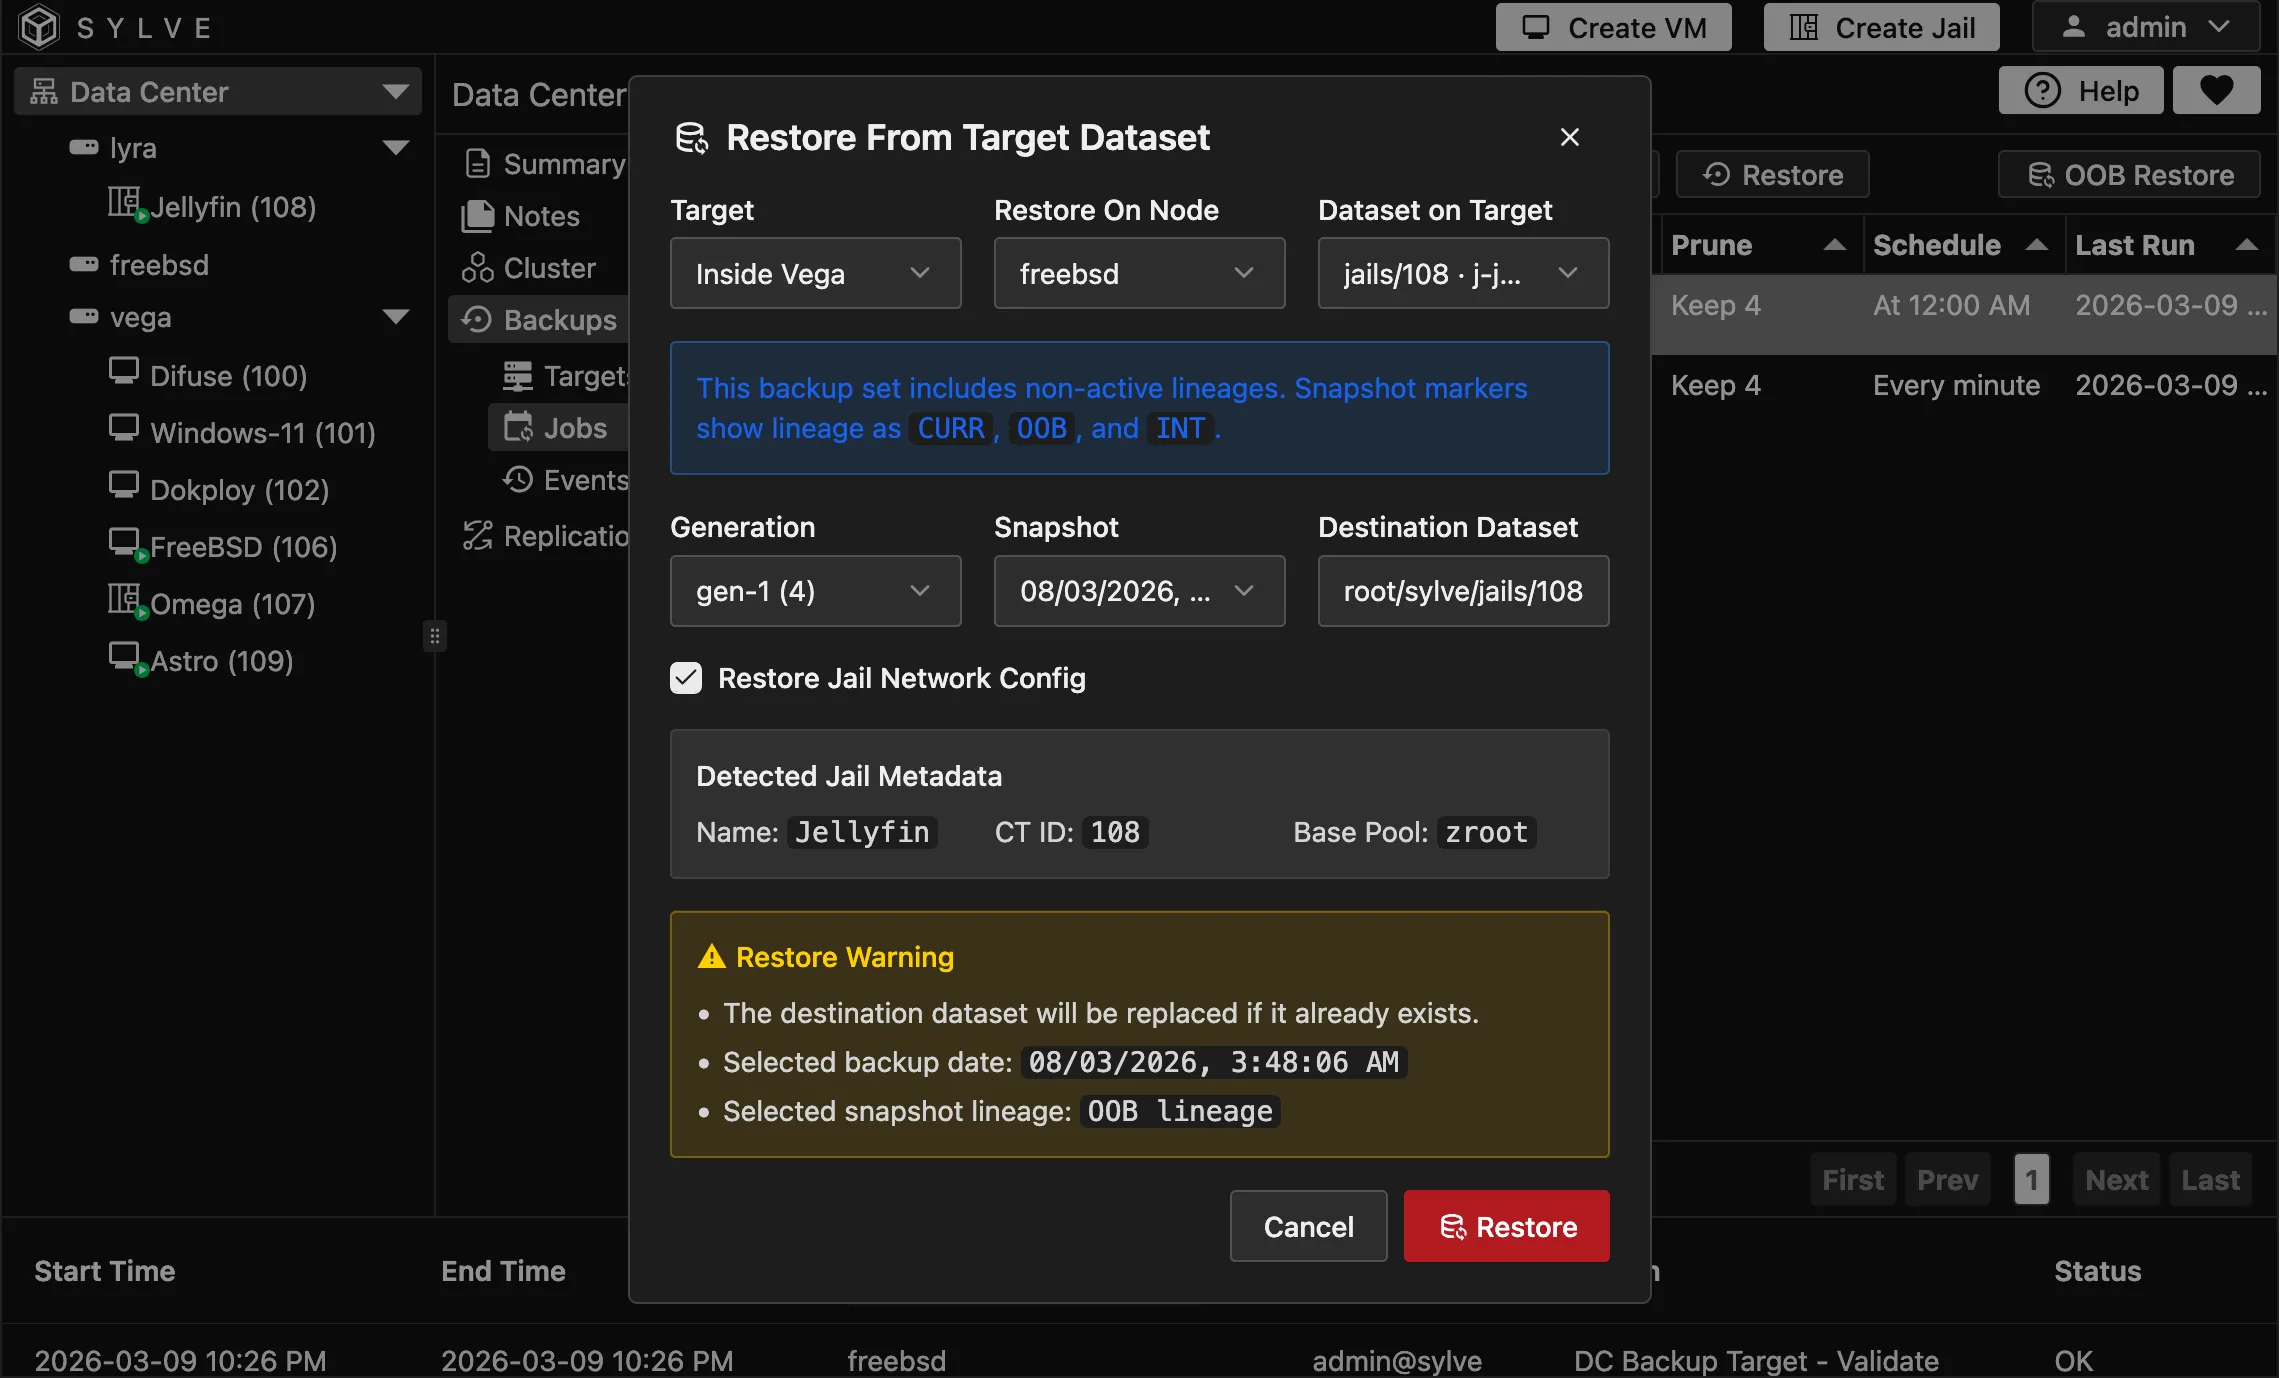
OOB Restore fields
Section titled “OOB Restore fields”| Field | Description |
|---|---|
| Target | Which backup target to browse for snapshots. |
| Restore On Node | Node where restore should happen. In clustered setups, choose the node you want. On standalone systems, this is automatically set to the local node. |
| Dataset on Target | Source dataset from the target to restore. |
| Generation | Snapshot generation group to restore from. |
| Snapshot | Specific restore point to use. |
| Destination Dataset | Local dataset path to restore into. |
| Restore Jail/VM Network Config | When restoring a jail/VM, this option restores network configuration metadata (IP address, MAC address, etc.) along with the dataset. |
If Jail/VM metadata is detected, the UI will show inferred details (name, CT ID / RID, pools/base pool), and can auto-suggest destination dataset paths.
OOB restore flow
Section titled “OOB restore flow”- Pick Target and Restore On Node.
- Select Dataset on Target.
- Choose Generation and Snapshot.
- Confirm / adjust Destination Dataset.
- Click Restore.