
Disks
The Disks page lists the physical and virtual disks visible to a node. Select a disk row to reveal the actions that apply to it, such as viewing S.M.A.R.T. values, running a S.M.A.R.T. test, initializing GPT, creating partitions, or clearing a partition table.
Disk inventory and wearout
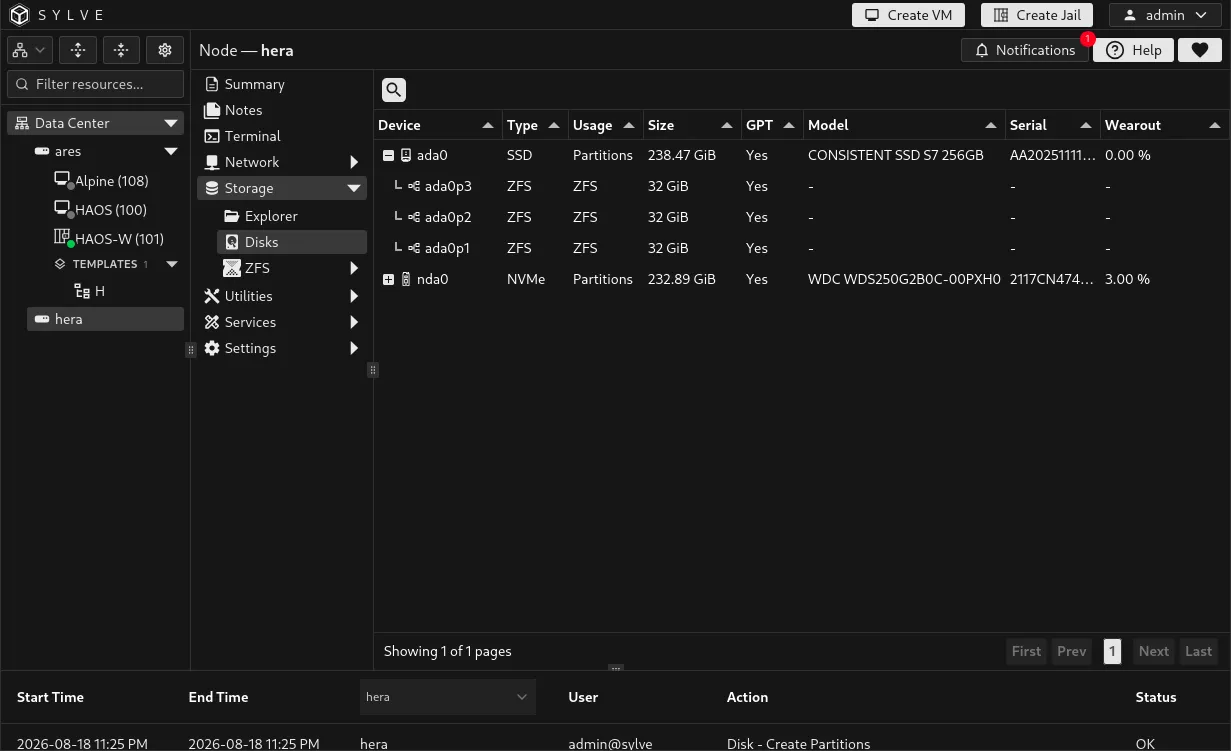
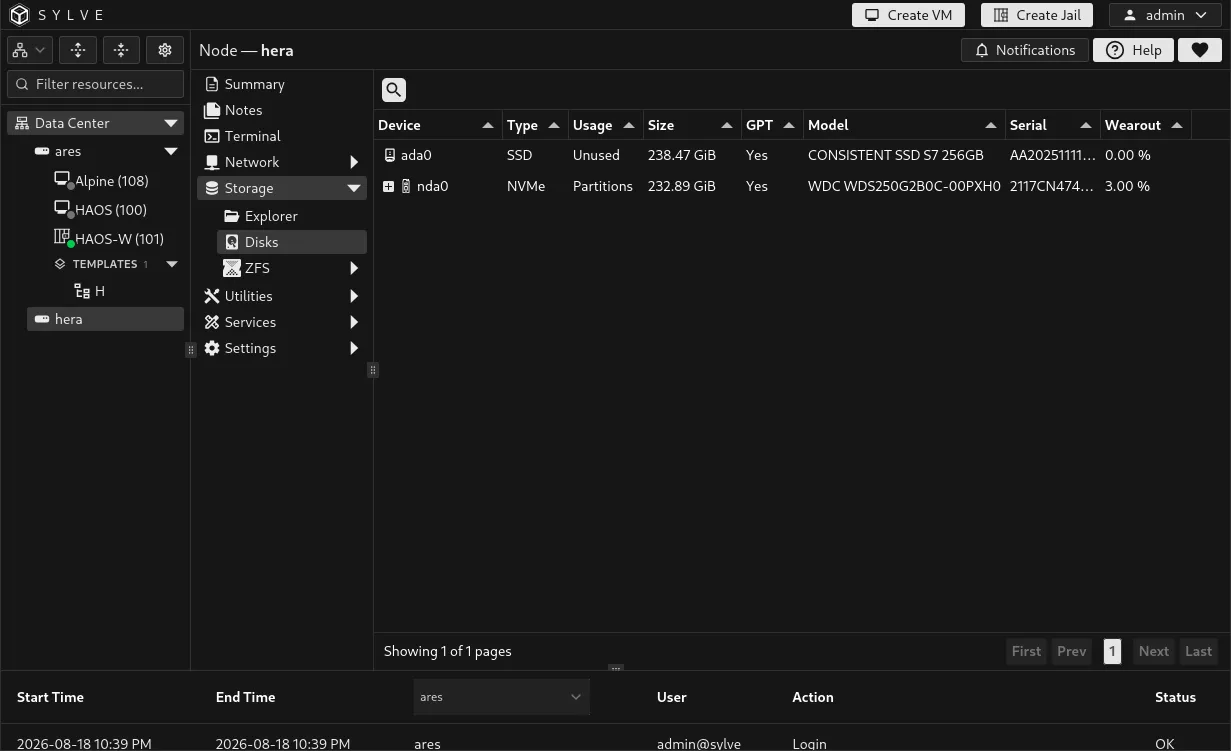
Section titled “Disk inventory and wearout”Each parent row represents a disk. Expanded child rows represent its partitions. The table shows the device name, type, usage, capacity, GPT status, model, serial number, and wearout. Use the search field to narrow a long list of disks.
Wearout is the percentage of an SSD or NVMe device’s rated endurance that the device reports as consumed. A lower value is better. For NVMe, Sylve uses the drive’s Percentage Used S.M.A.R.T. value. For ATA SSDs, it uses a verified model- and firmware-specific interpretation of the drive’s endurance attribute, rather than guessing from its name. SCSI devices can report their wearout directly. Hard disks show N/A, and Unknown means the drive did not provide a supported, valid value or its endurance interpretation is not verified. Unknown wearout does not trigger wearout threshold alerts; S.M.A.R.T. health and error monitoring remain active.
S.M.A.R.T. values
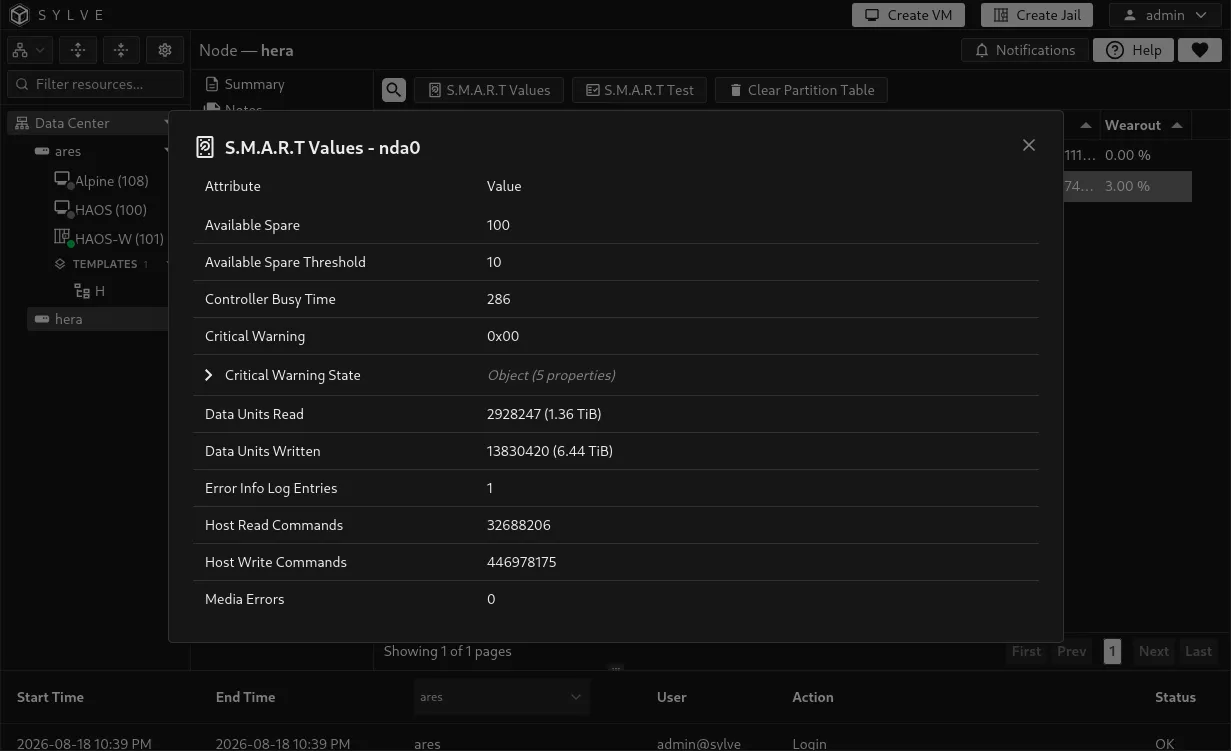
Section titled “S.M.A.R.T. values”Select a physical disk and choose S.M.A.R.T. Values to inspect the health information reported by the drive. Sylve presents the data in the form that is most useful for the device:
- NVMe drives show a summary of controller health, including critical-warning flags, spare capacity, percentage used, temperature, power cycles, power-on hours, data units read and written, unsafe shutdowns, media errors, and error-log entries.
- ATA and SATA HDDs or SSDs show their S.M.A.R.T. attribute table. Each row includes the attribute ID and name, normalized value, worst recorded value, threshold, raw value, and raw string.
- Devices that do not expose S.M.A.R.T. data do not offer this action.
Use these values together with the disk’s health status and vendor documentation. A single counter is not a complete diagnosis.
Acknowledging historical error counters
Section titled “Acknowledging historical error counters”For a disk with a stable physical identity, dismissing a supported historical-counter warning acknowledges that counter’s current value. Sylve applies this to ATA reallocated sectors, NVMe media/data-integrity errors, and SCSI uncorrected-error totals (tracked separately for read, write, verify, and non-medium errors). For example, acknowledging a count of 4 keeps it quiet across Sylve restarts and notification-history cleanup. A confirmed increase to 5 creates a warning showing the increase from 4 to 5 (+1). Dismiss All acknowledges each eligible counter independently.
Historical counters have separate warnings from active faults, even when both occur in the same sample. Pending sectors, ATA offline-uncorrectable sectors, NVMe critical-warning flags, low available spare, S.M.A.R.T. failures, overheating, and critical wear-out are not silenced by historical-counter acknowledgement. Unknown or model-dependent attributes are not automatically treated as historical counters.
Counts remain visible in S.M.A.R.T. values; acknowledgement does not mark the disk healthy. A decrease or reset does not lower the acknowledged baseline or report recovery. Replacement disks do not inherit acknowledgements. Disks without a stable physical identity retain ordinary dismissal behavior.
S.M.A.R.T. tests
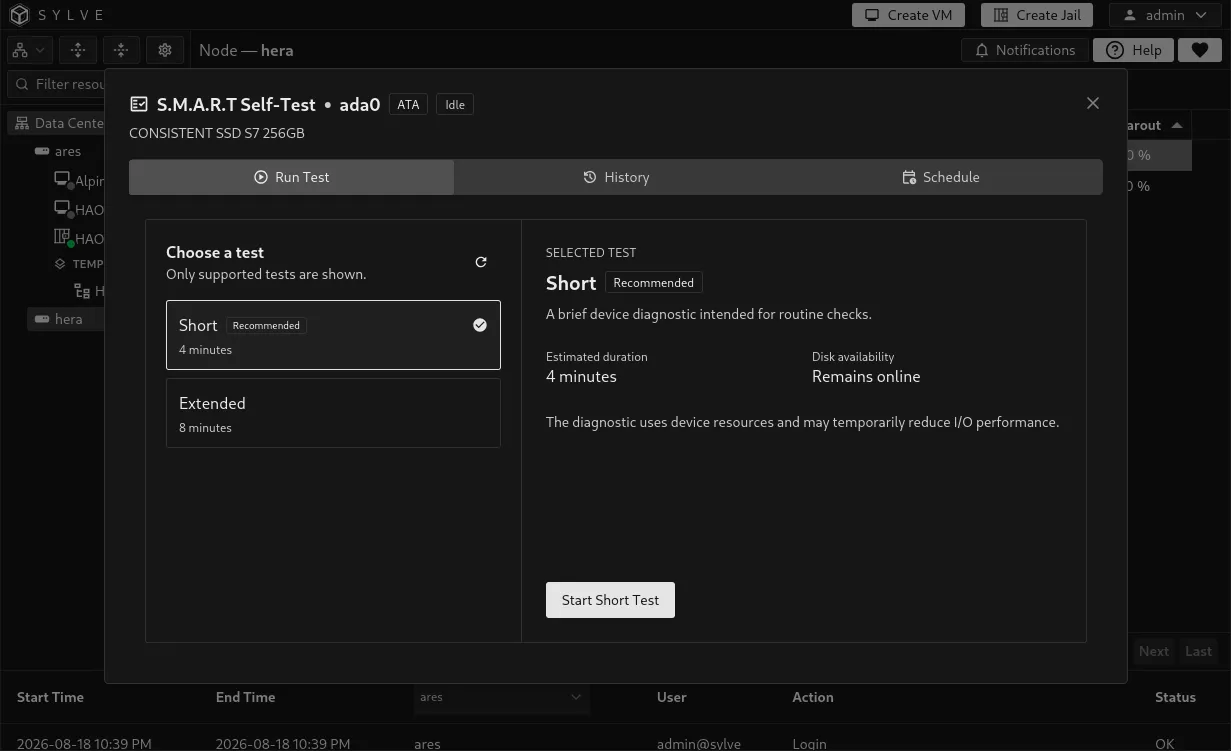
Section titled “S.M.A.R.T. tests”Select a disk with S.M.A.R.T. data and choose S.M.A.R.T. Test. The dialog has three tabs: Run Test, History, and Schedule. Sylve shows only the test types supported by the selected device.
Running a test
Section titled “Running a test”The Run Test tab lets you select a test and start it. A Short test is a quick diagnostic and is the recommended routine check. An Extended test performs a more thorough media diagnostic and can take several hours. Some drives also support a Conveyance test, which checks for transport-related damage.
The selected test keeps the disk online, but it consumes device resources and can temporarily reduce I/O performance. The duration shown by Sylve is the drive’s estimate, not a deadline. Actual time and progress depend on the device, its firmware, and current activity.
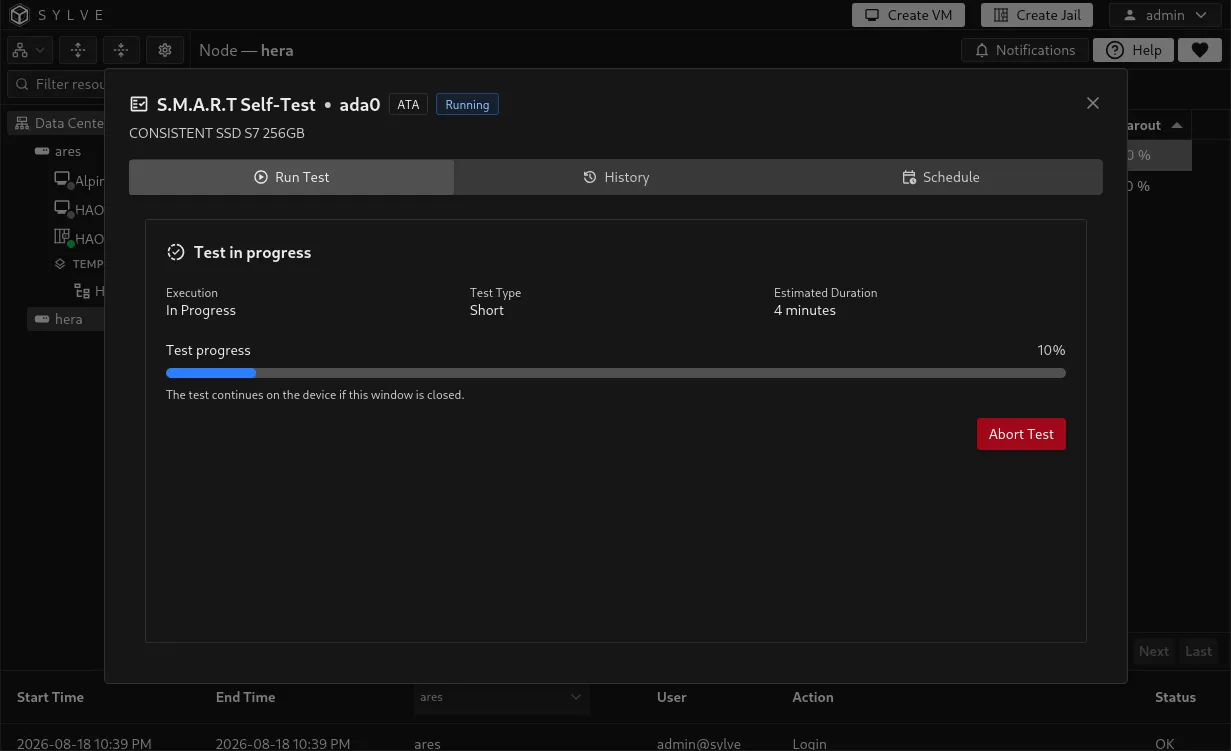
While a test is running, the dialog shows its execution state, type, estimated duration, and progress when the drive reports it. A test continues on the device after the dialog is closed. If the device supports aborting tests, Sylve also offers Abort Test.
Historical results
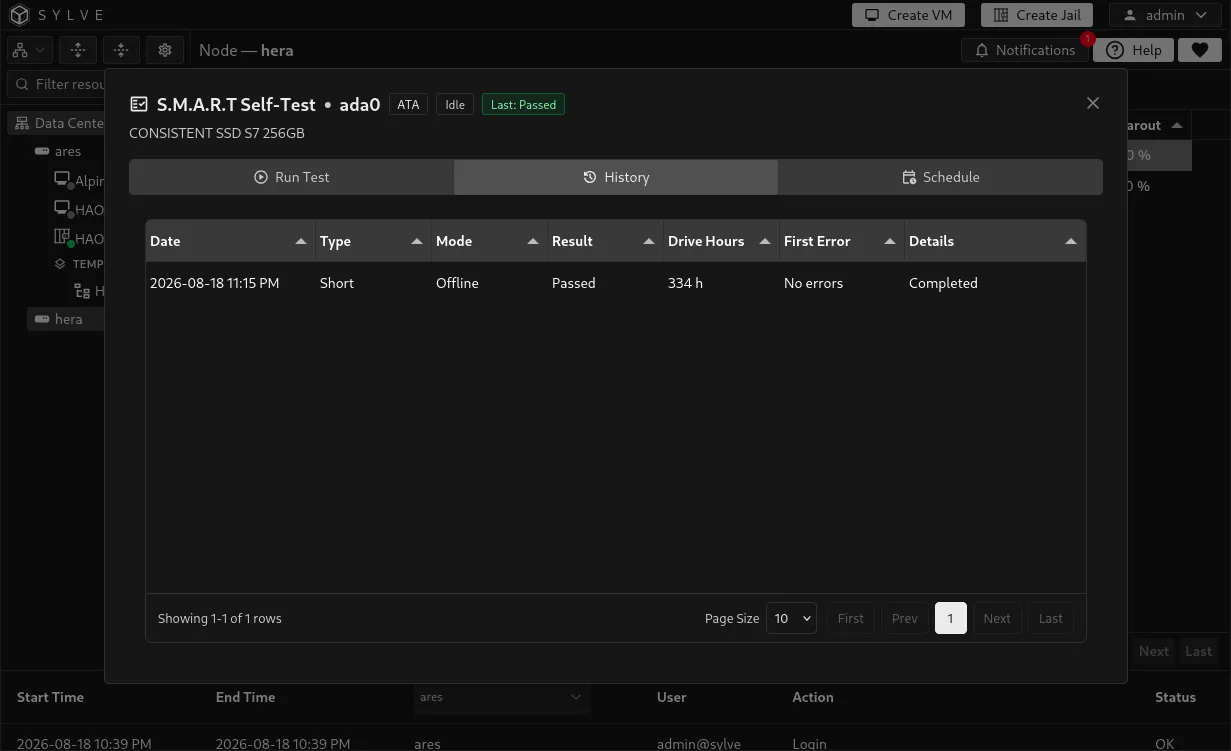
Section titled “Historical results”The History tab records the self-test results returned by the device. The table includes:
- Date: when the result was recorded, if the device provides a timestamp.
- Type: the diagnostic that ran, such as Short or Extended.
- Mode: the test mode when the protocol reports one. NVMe does not report this mode.
- Result: the reported outcome, including passed, failed, aborted, or in progress.
- Drive Hours: the device’s power-on hours at the time of the result.
- First Error: the reported namespace or first failing logical block address, if available. A completed test with no reported error is shown as
No errors. - Details: additional status, remaining progress when stopped, and protocol-specific diagnostic details.
Scheduling tests
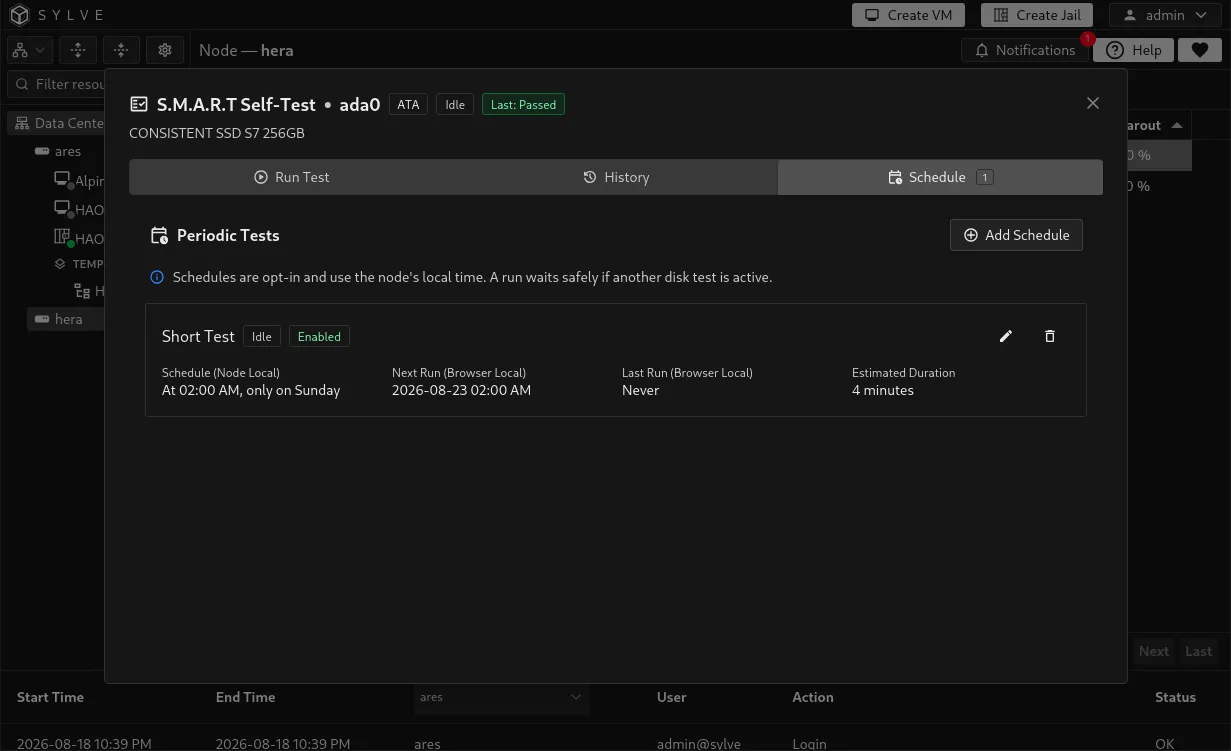
Section titled “Scheduling tests”Use the Schedule tab to create recurring Short or Extended tests for a disk. Select Add Schedule, choose a supported test type, then select a preset or enter a cron expression. Schedules are opt-in and use the node’s local time. Sylve displays the next and last run times in your browser’s local time.
Schedules require a stable disk identity, such as a unique serial number or LUN identifier, so they remain associated with the same physical drive if its device name changes. Only one schedule of each test type can be configured per disk. If another disk test is active, a scheduled run waits in the queue until the shared test slot is available.
The example below has an enabled Short test scheduled for every Sunday at 02:00 on the node.
Clearing a partition table
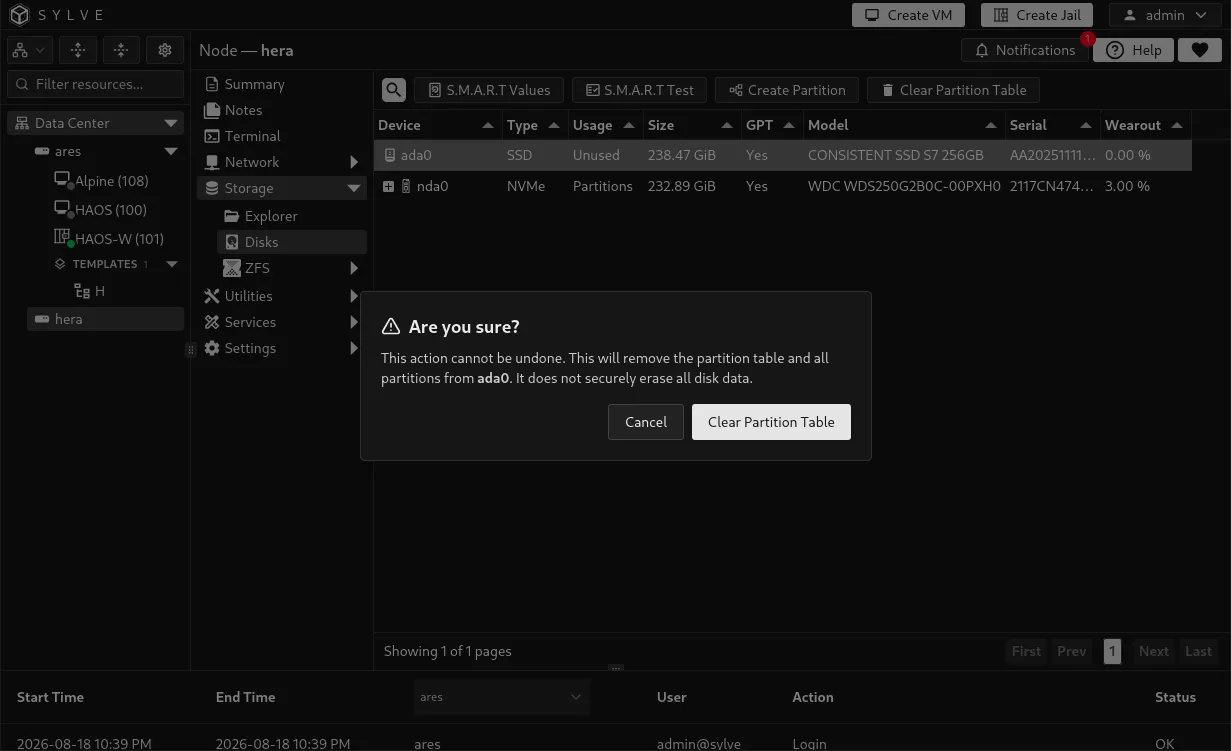
Section titled “Clearing a partition table”Clearing a partition table removes the table and all partitions from a disk. It does not securely erase every data block on the device. This action is available for an unused disk or a disk that currently has partitions, but not for a disk in use by ZFS.
Select the parent disk row, then choose Clear Partition Table and confirm the warning.
Initializing GPT
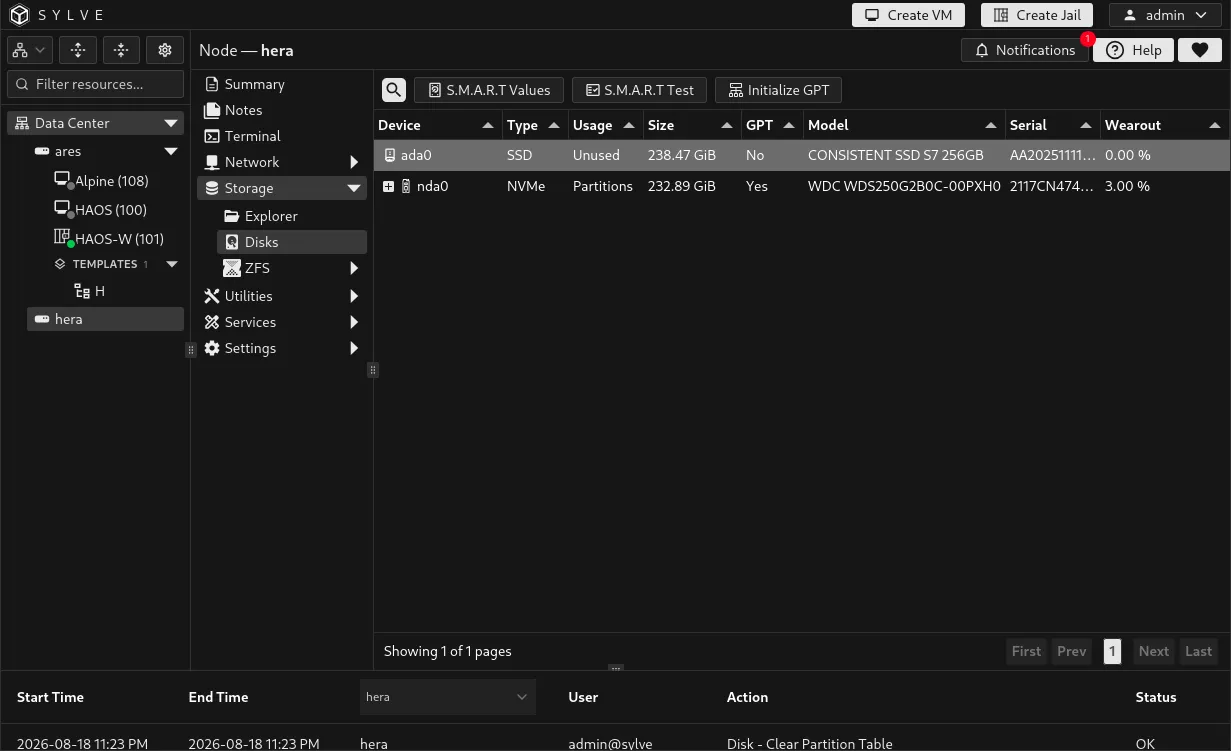
Section titled “Initializing GPT”An unused disk without a partition table offers Initialize GPT. This creates a GUID Partition Table, which is required before you can create partitions in Sylve.
Creating partitions
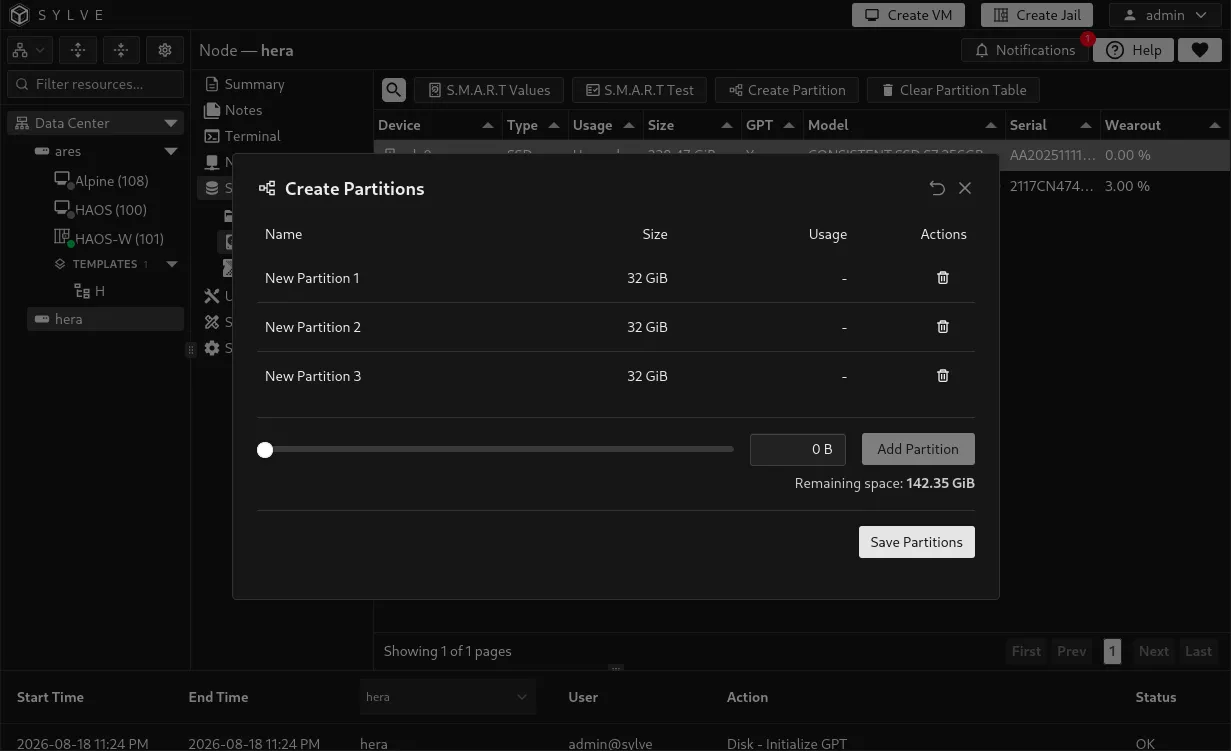
Section titled “Creating partitions”After a disk has a GPT partition table, select its parent row and choose Create Partition. Specify the size for each partition, then review the proposed layout in the partitioning dialog. Sylve requires at least 128 MiB of free space before it enables partition creation.
This example creates three 32 GiB partitions. The sizes and number of partitions are up to you, provided they fit in the remaining space on the disk.
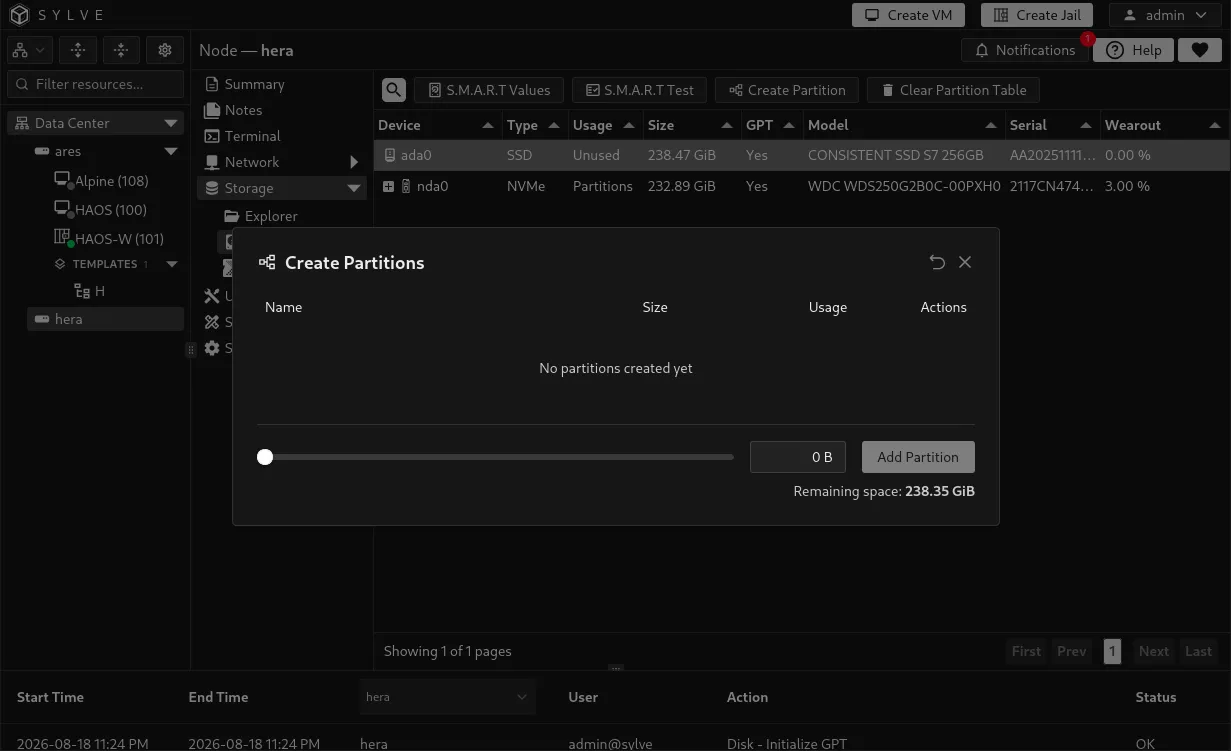
Review the partition list before selecting Save Partitions. Saving creates the partitions on the disk, and the new entries then appear as child rows in the table.