
Simple Samba Share
This guide creates a private SMB file share from start to finish. You will enable Samba, prepare a user who can authenticate, create a ZFS filesystem for the files, publish it as an authenticated share, and connect from GNOME or macOS.
The examples use these values:
| Item | Example |
|---|---|
| ZFS pool | zroot |
| Filesystem | zroot/shared |
| Share name | Shared |
| PAM and Samba username | alex |
| Sylve node address | 10.10.30.103 |
Replace them with values appropriate for your node and network. The client must be able to reach TCP port 445 on the Sylve node.
Before you begin
Section titled “Before you begin”You need an initialized Sylve node with:
- A ZFS pool selected for management.
- The Samba Server service enabled.
- A Samba 4XX package installed on FreeBSD.
- A network address reachable from the client computer.
If this is a new installation, select the storage pool and Samba Server during Initialization. Sylve checks for an installed Samba 4XX package before it accepts the configuration. For example, install the package available for your FreeBSD release as root:
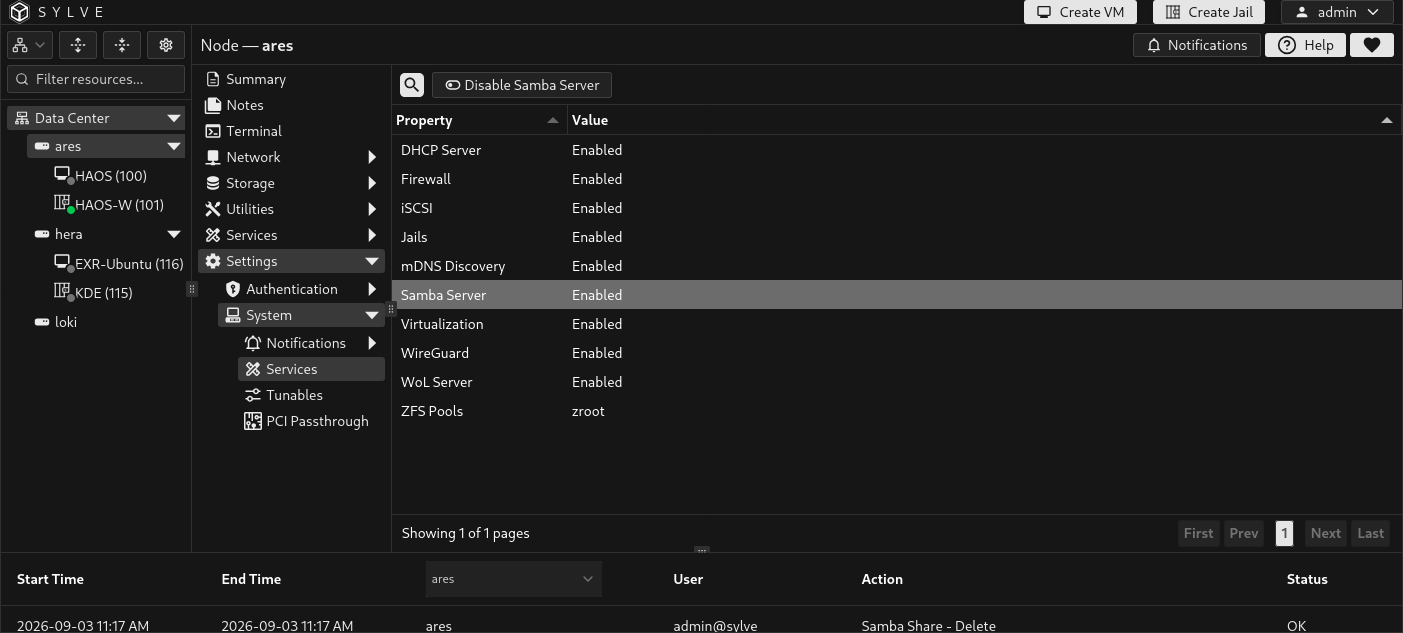
pkg install samba419If the node is already initialized, open Settings → System → Services, select Samba Server, and select Enable Samba Server. Restart the node after changing the service setting. After signing in again, the Storage → Samba section should appear in the navigation.
Open Storage → Samba → Settings and review the server identity and selected interfaces. The defaults are suitable for a simple share. Keep Advertise Samba (mDNS) enabled if you want compatible clients to discover the server automatically. Direct connections by IP address work without discovery.
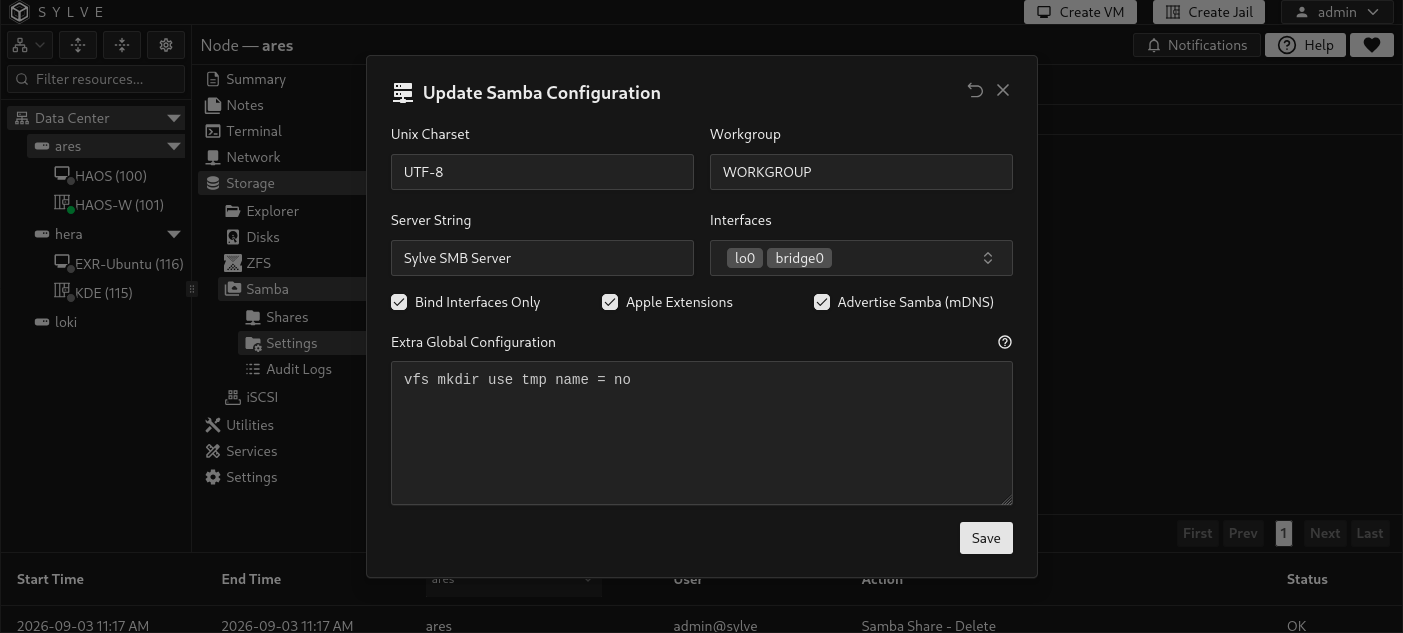
The screenshot includes an example under Extra Global Configuration. This advanced field is optional and can remain empty for the share created in this guide.
Prepare an account
Section titled “Prepare an account”An authenticated share needs three related pieces:
| Item | Purpose |
|---|---|
| PAM user | Provides the Unix account and identity used for filesystem permissions. |
| Samba user | Stores the SMB password for the same username. |
| Share permission | Grants that user read or write access to this specific share. |
A Local user alone is not enough. Use Settings → Authentication → Users → PAM and either create a new account or import an existing Unix account.
Option A: Create a new PAM user
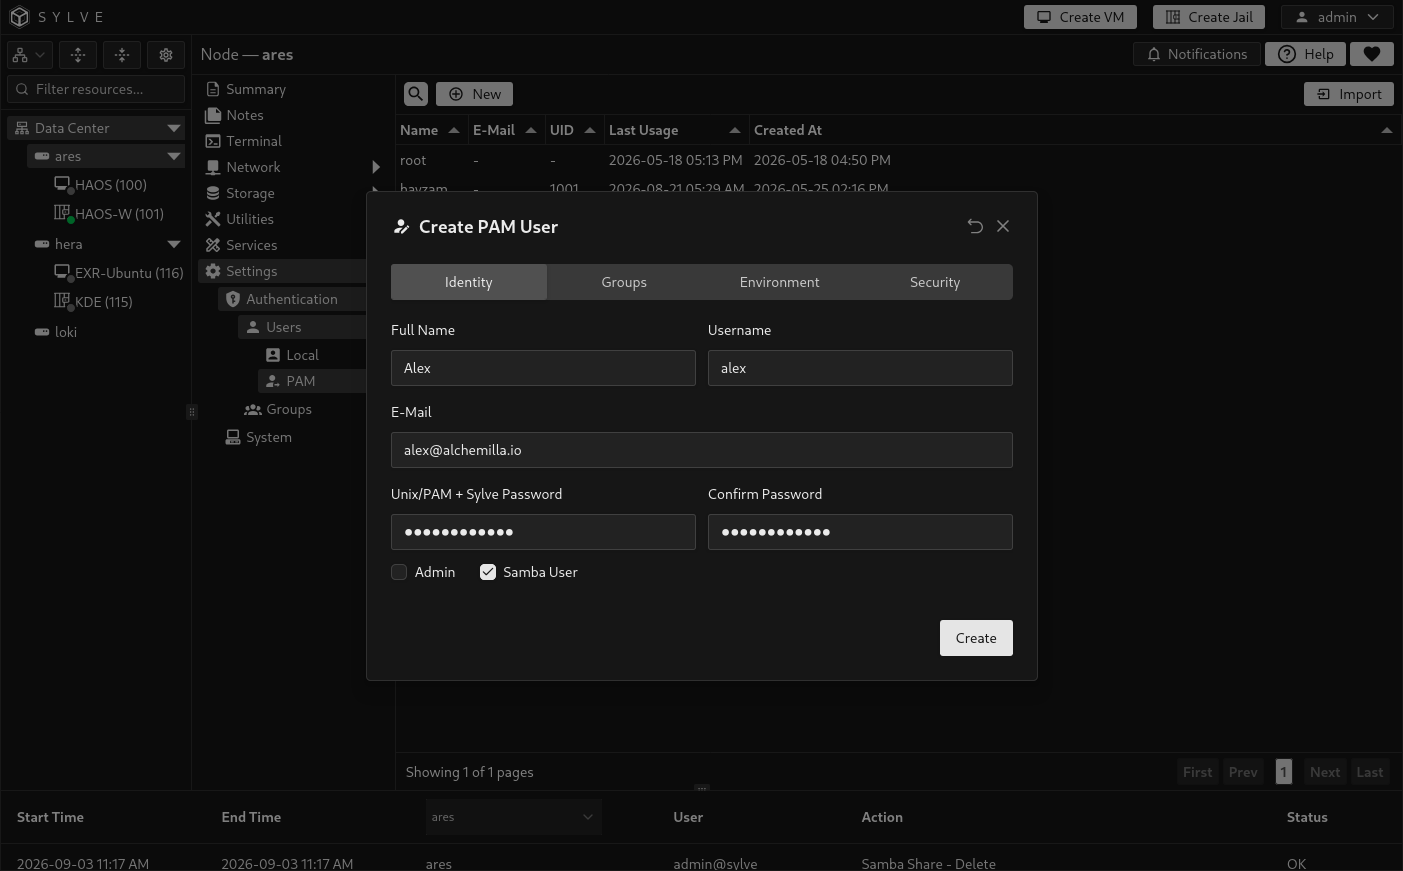
Section titled “Option A: Create a new PAM user”Select New and configure the Identity tab:
- Enter the person’s full name and a username. This guide uses
alex. - Enter and confirm a password of at least 8 characters and no more than 72 UTF-8 bytes.
- Leave Admin disabled unless this person must administer Sylve.
- Enable Samba User.
The submitted password becomes the Unix/PAM password, Sylve password, and initial Samba password. Samba keeps its own credential, so later password changes are not synchronized automatically.
On the Groups tab, enable Create new primary group for a simple per-user account. Keep the default UID, /nonexistent home directory, /bin/sh shell, and Security settings unless the account also needs an interactive Unix login. Select Create.
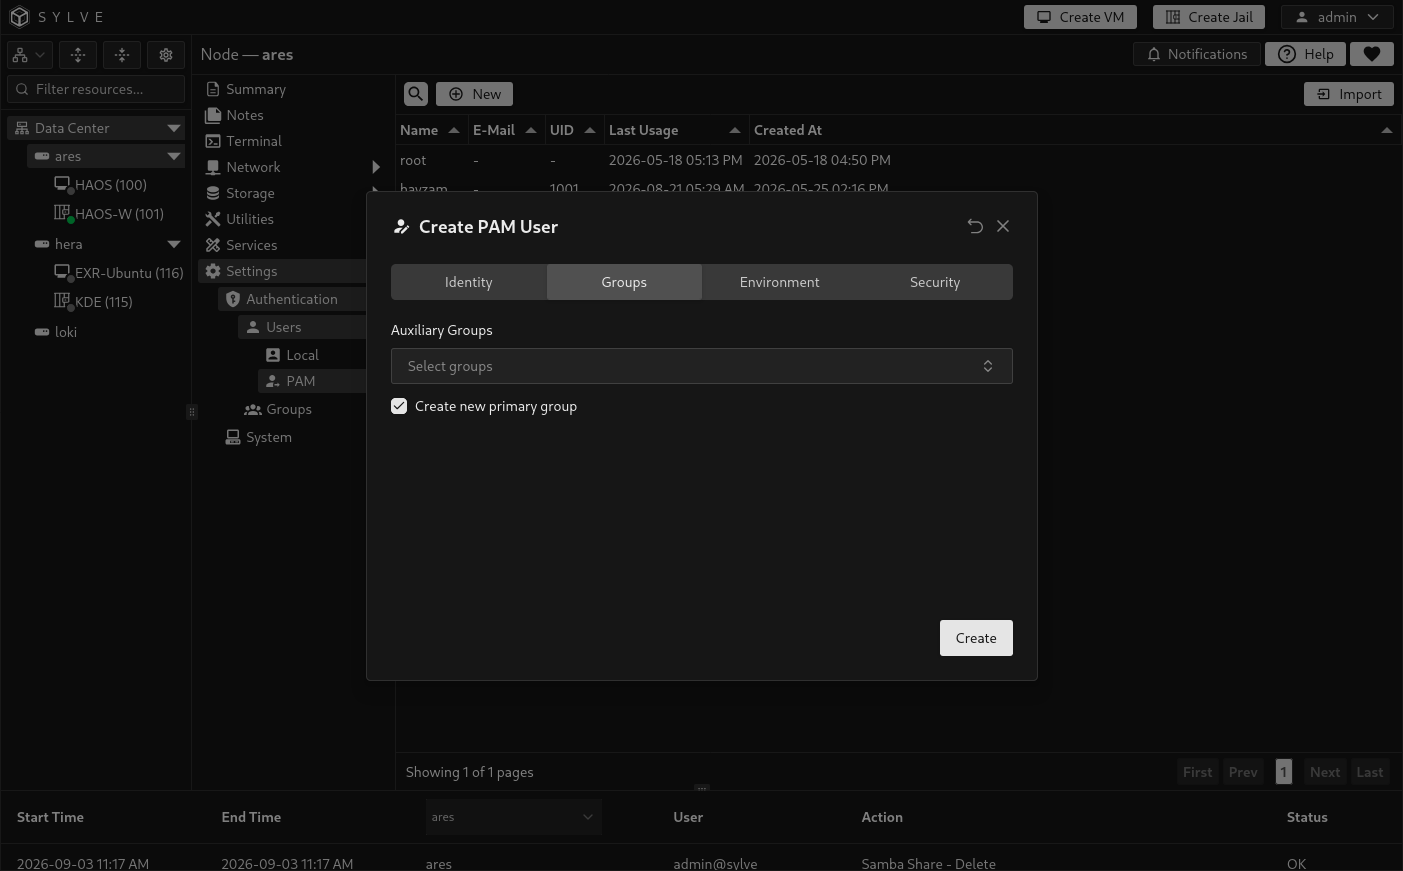
Continue to Create the filesystem.
Option B: Import an existing Unix account
Section titled “Option B: Import an existing Unix account”If alex already exists on FreeBSD, select Import, choose the account, and select Import. The optional Sylve Password controls Sylve sign-in only. It does not set the Unix password and does not create a Samba credential.
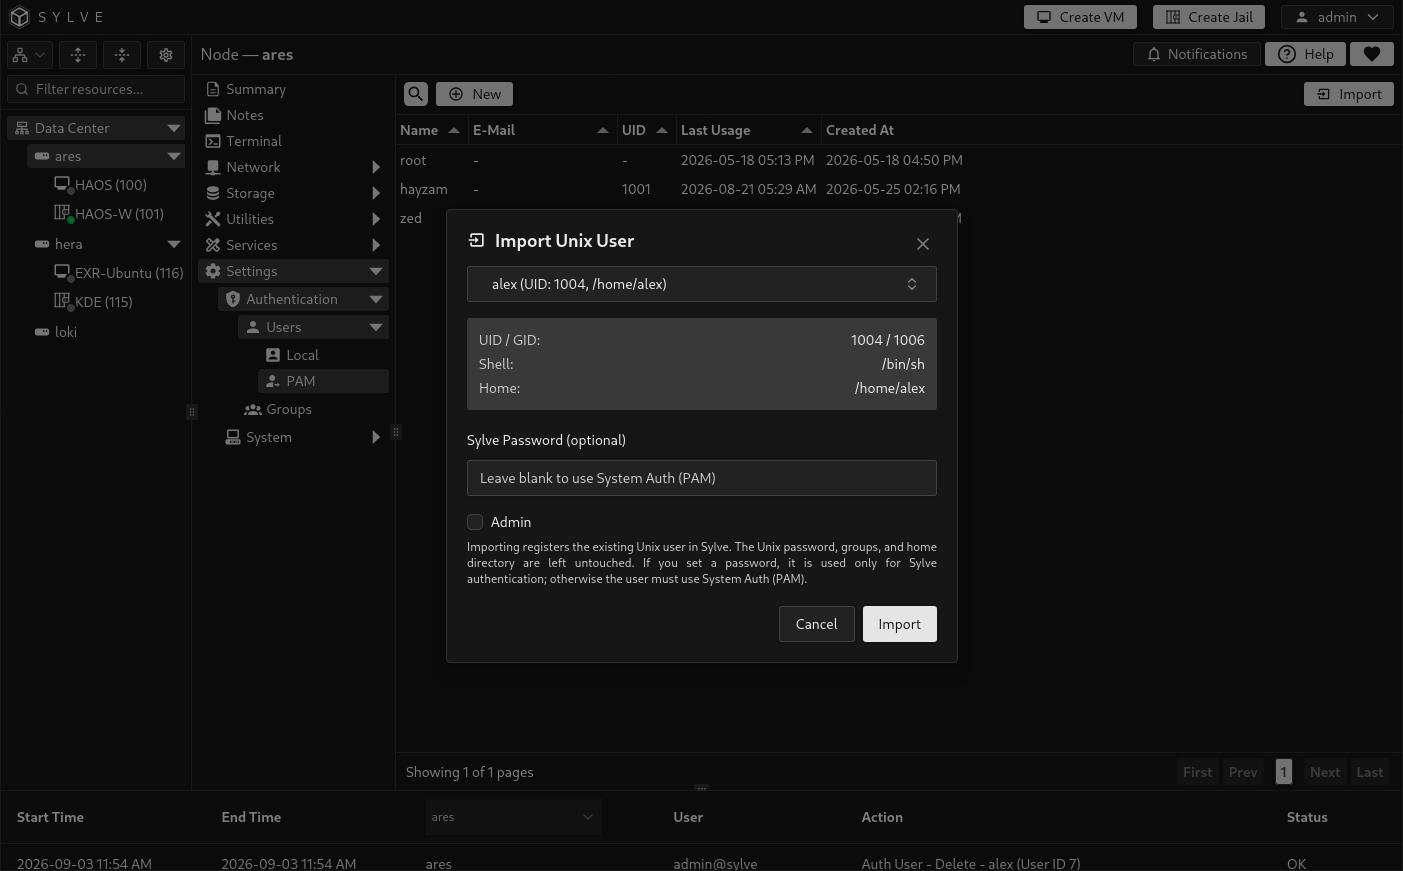
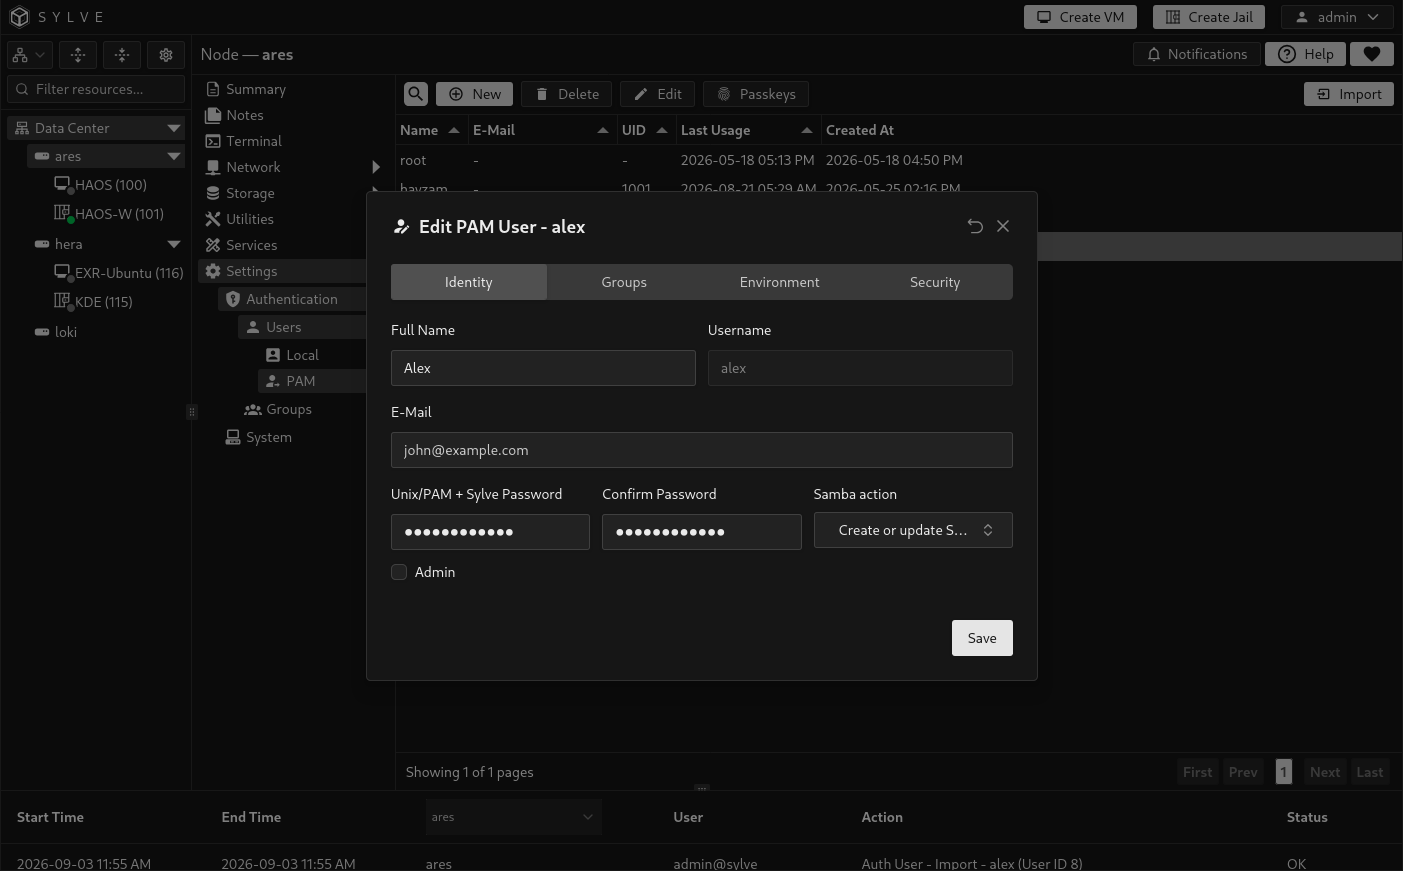
After importing, select alex in the PAM Users table and choose Edit. On the Identity tab:
- Enter and confirm the password that the person should use for this SMB share.
- Set Samba action to Create or update Samba user.
- Save the user.
This creates the missing Samba credential without replacing the existing Unix account, groups, or home directory. The password entered while editing also updates the managed Unix/PAM and Sylve password for this account.
For several people, create or import each PAM user with a Samba credential, add them to a managed group, and grant the group access to the share. See Groups for that workflow.
Create the filesystem
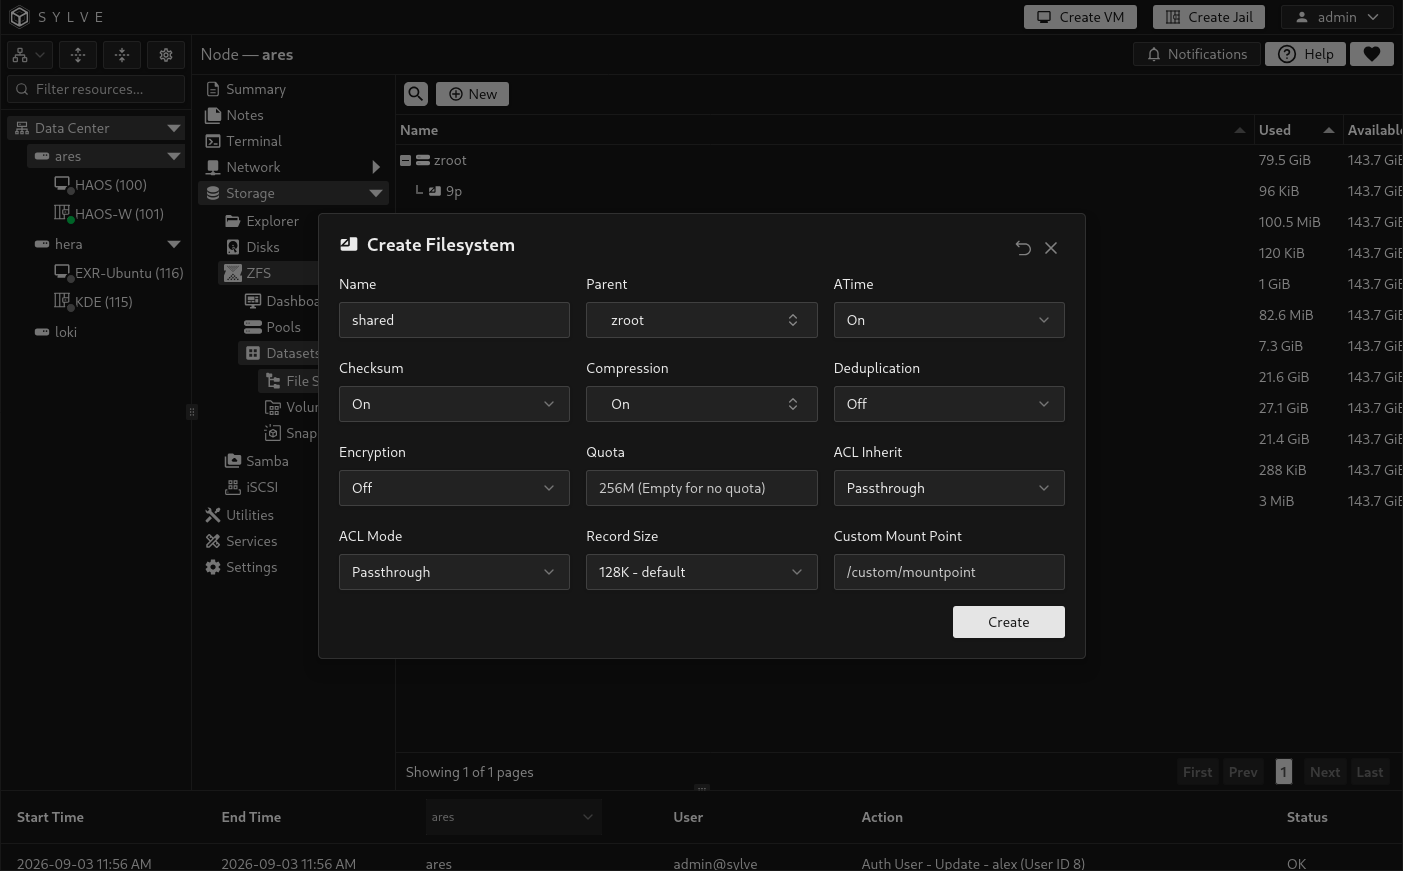
Section titled “Create the filesystem”Open Storage → ZFS → Datasets → File Systems and select New. Configure the filesystem:
- Enter
sharedas Name. - Select
zroot, or your chosen pool or parent filesystem, as Parent. - Keep Compression enabled.
- Leave Deduplication off.
- Leave Custom Mount Point empty so ZFS chooses the normal mount point.
- Keep the remaining defaults and select Create.
The result in this example is zroot/shared. Use a dedicated filesystem rather than the pool root. A dedicated filesystem can have its own quota, snapshots, encryption policy, and permissions.
If you enable encryption, store the passphrase safely. The filesystem must be unlocked and mounted before Samba can publish it. See Filesystems for every property.
Create the authenticated share
Section titled “Create the authenticated share”Open Storage → Samba → Shares, select New, and complete each tab.
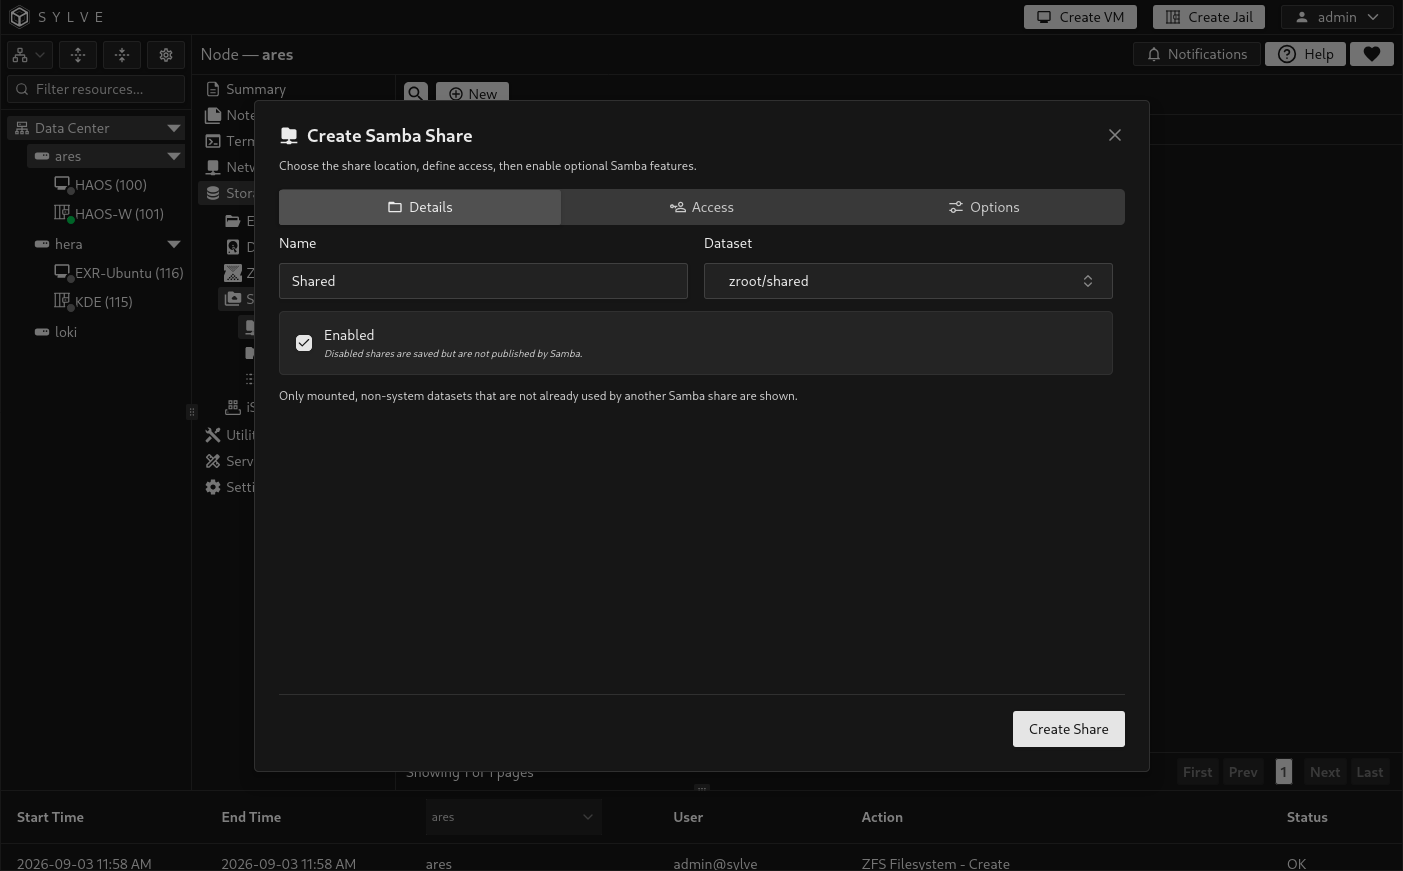
Details
Section titled “Details”- Enter
Sharedas Name. - Select
zroot/sharedas Dataset. - Keep Enabled selected.
The share name is what clients see. A mounted filesystem can be assigned to only one Samba share.
Access
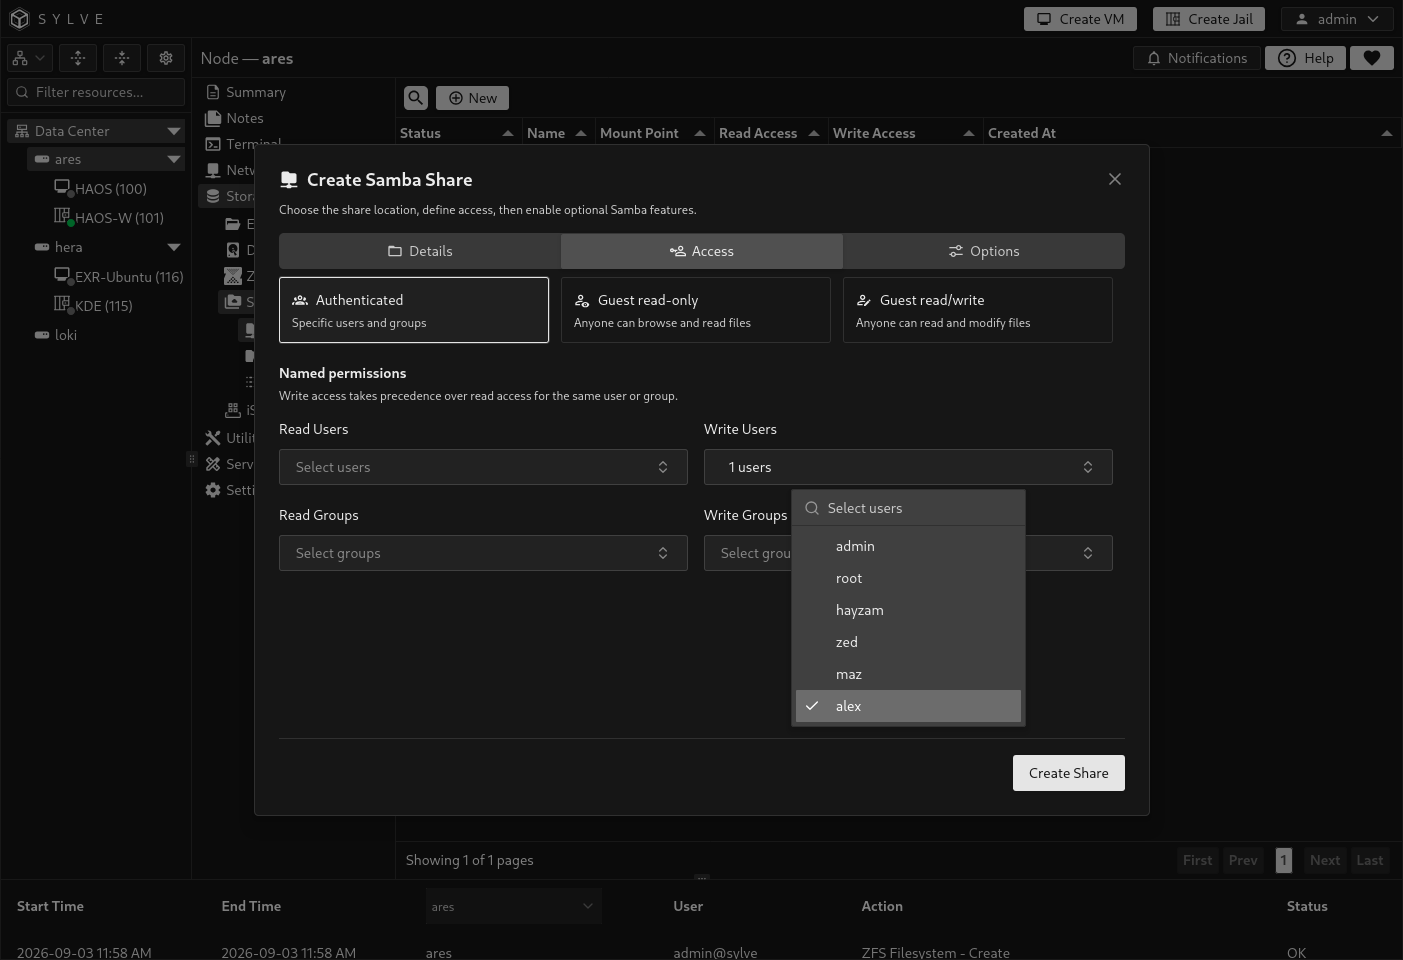
Section titled “Access”- Select Authenticated.
- Add
alexto Write Users. - Leave Read Users, Read Groups, and Write Groups empty.
Authenticated access requires at least one user or group. Adding alex to Write Users permits reading and writing. If a principal appears in both read and write selections, write access takes precedence.
Options
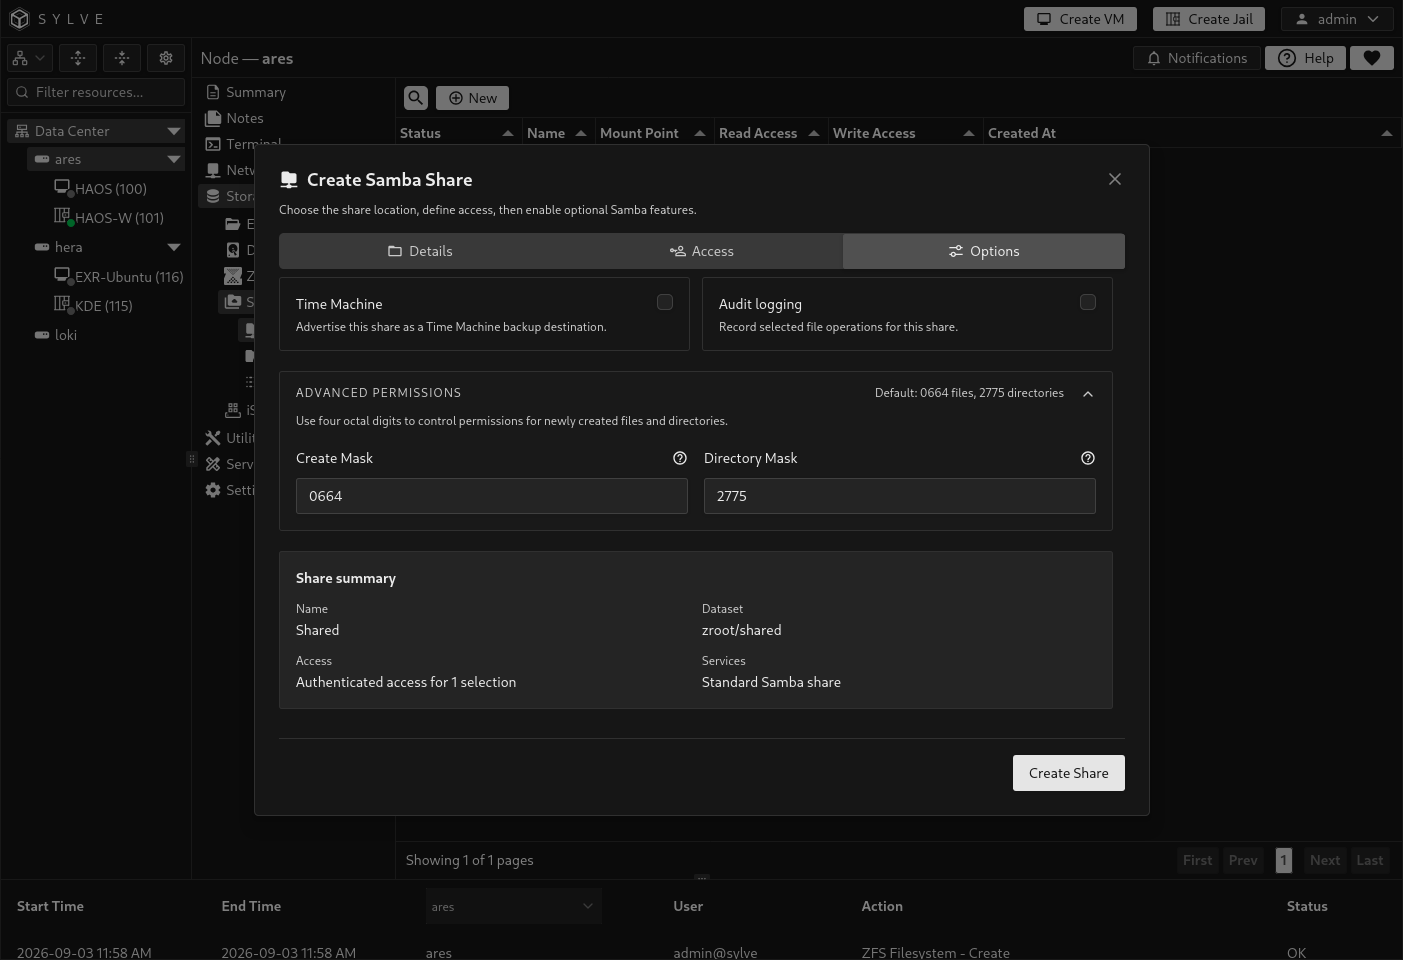
Section titled “Options”For a normal private file share, leave Time Machine and Audit logging disabled. Keep Create Mask at 0664 and Directory Mask at 2775, then select Create Share.
Sylve applies the required NFSv4 ACL properties and access entries to the selected filesystem, validates the generated Samba configuration, and reloads Samba. Do not manually change the Sylve-managed share section in smb4.conf.
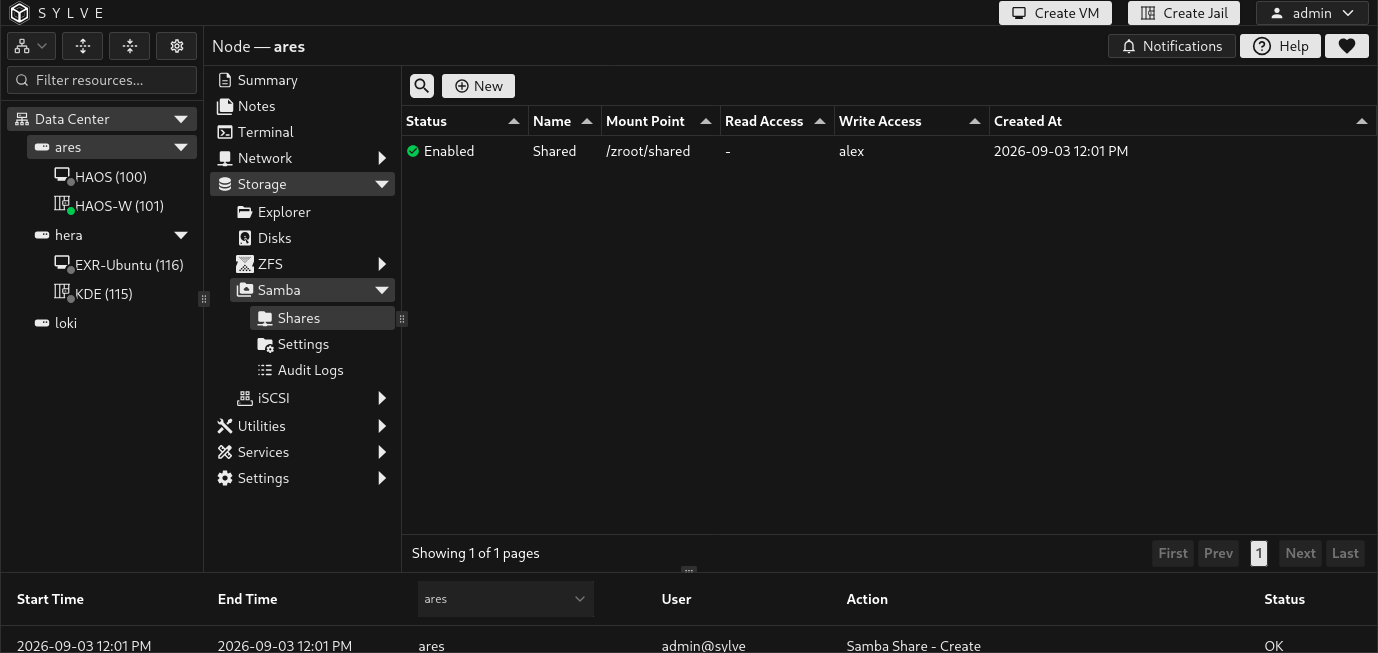
Confirm that the Shares table shows Shared as enabled, with alex under write access and the expected mount point.
Connect from GNOME
Section titled “Connect from GNOME”These steps use the Files application included with GNOME:
- Open Files.
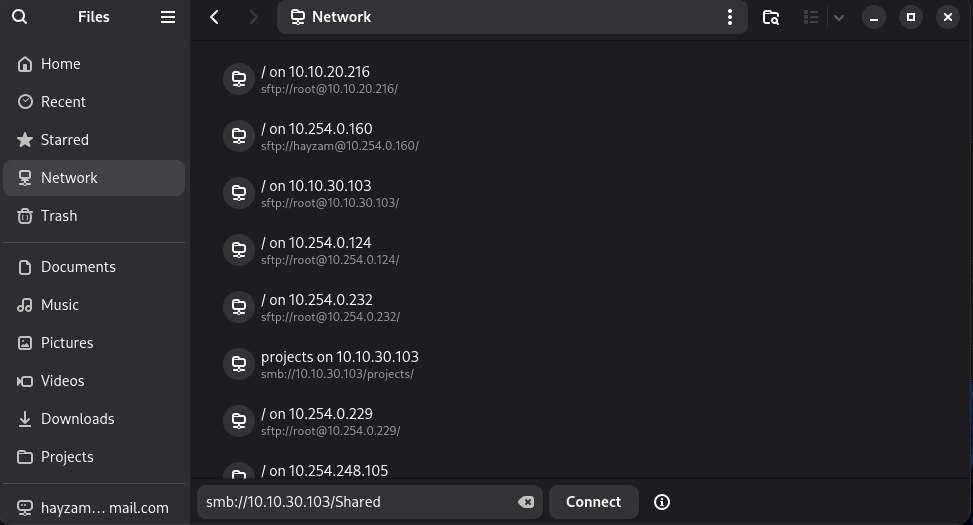
- Select Other Locations in the sidebar.
- In Connect to Server, enter
smb://10.10.30.103/Sharedusing your node’s address and share name. - Select Connect.
- Choose Registered User, enter
alexand the Samba password, then connect.
If the dialog asks for a domain, use the Samba workgroup shown under Storage → Samba → Settings. The default is commonly WORKGROUP.
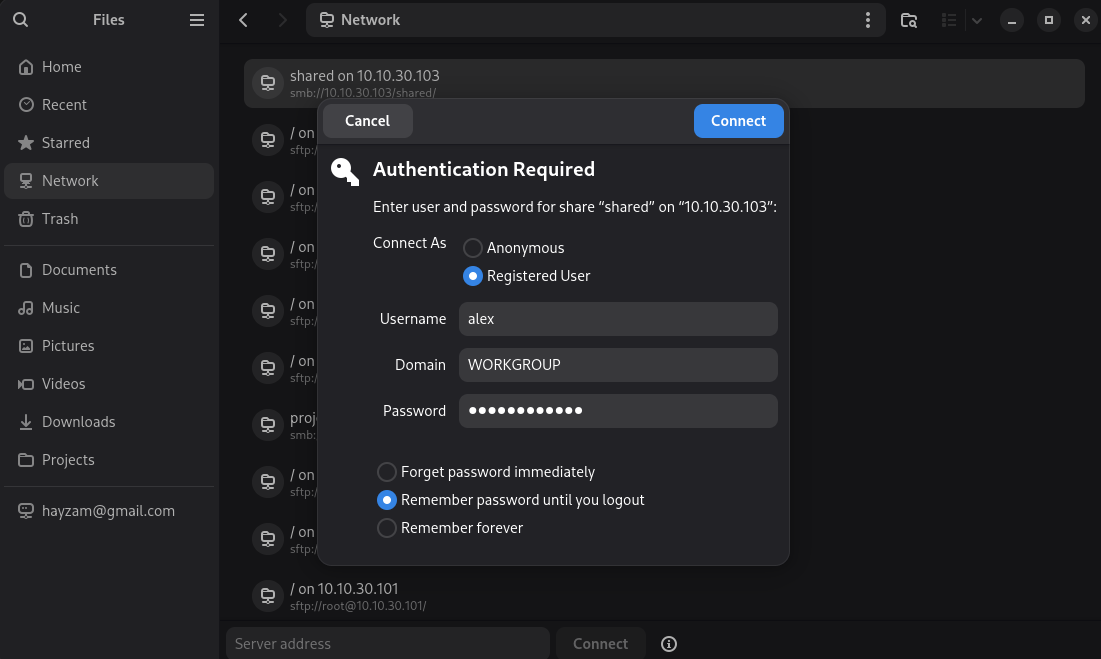
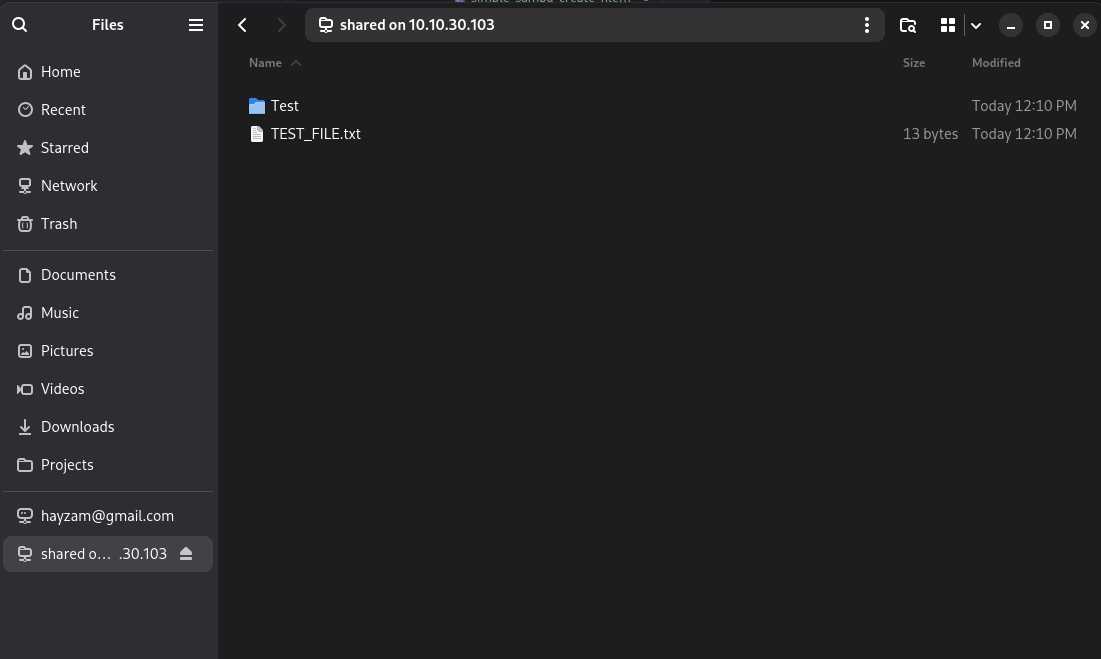
The share appears in the Files sidebar after it mounts. Create a small test folder or file to confirm that alex has write access.
Connect from macOS
Section titled “Connect from macOS”- Open Finder.
- Choose Go → Connect to Server, or press
Command-K. - Enter
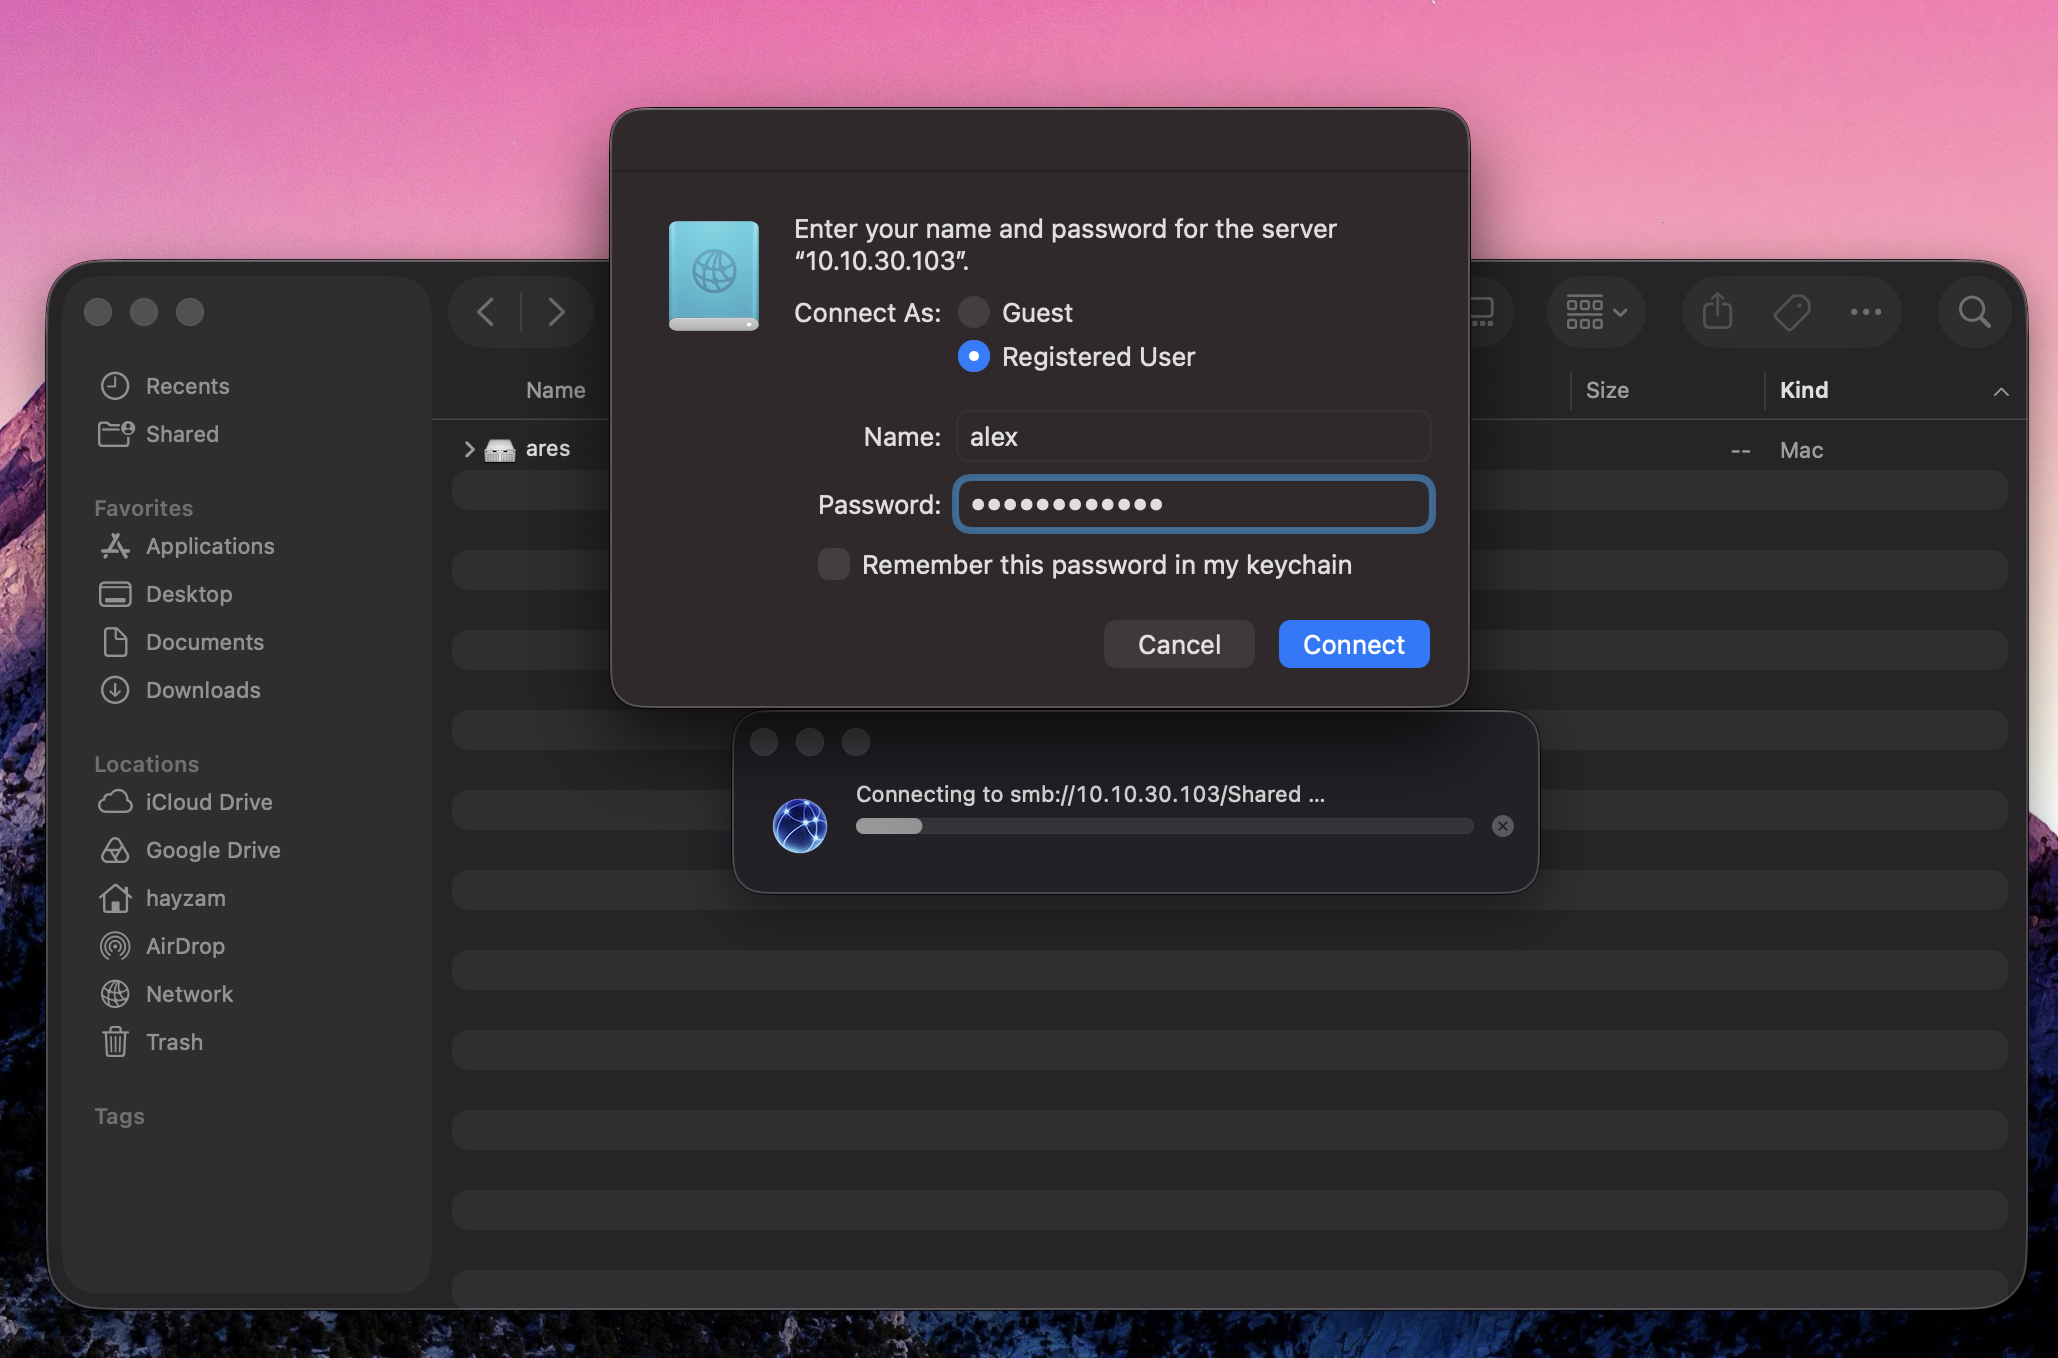
smb://alex@10.10.30.103/Sharedusing your Samba username, node address, and share name. - Select Connect.
- Choose Registered User if prompted, confirm that the name is
alex, enter the Samba password, then select Connect.
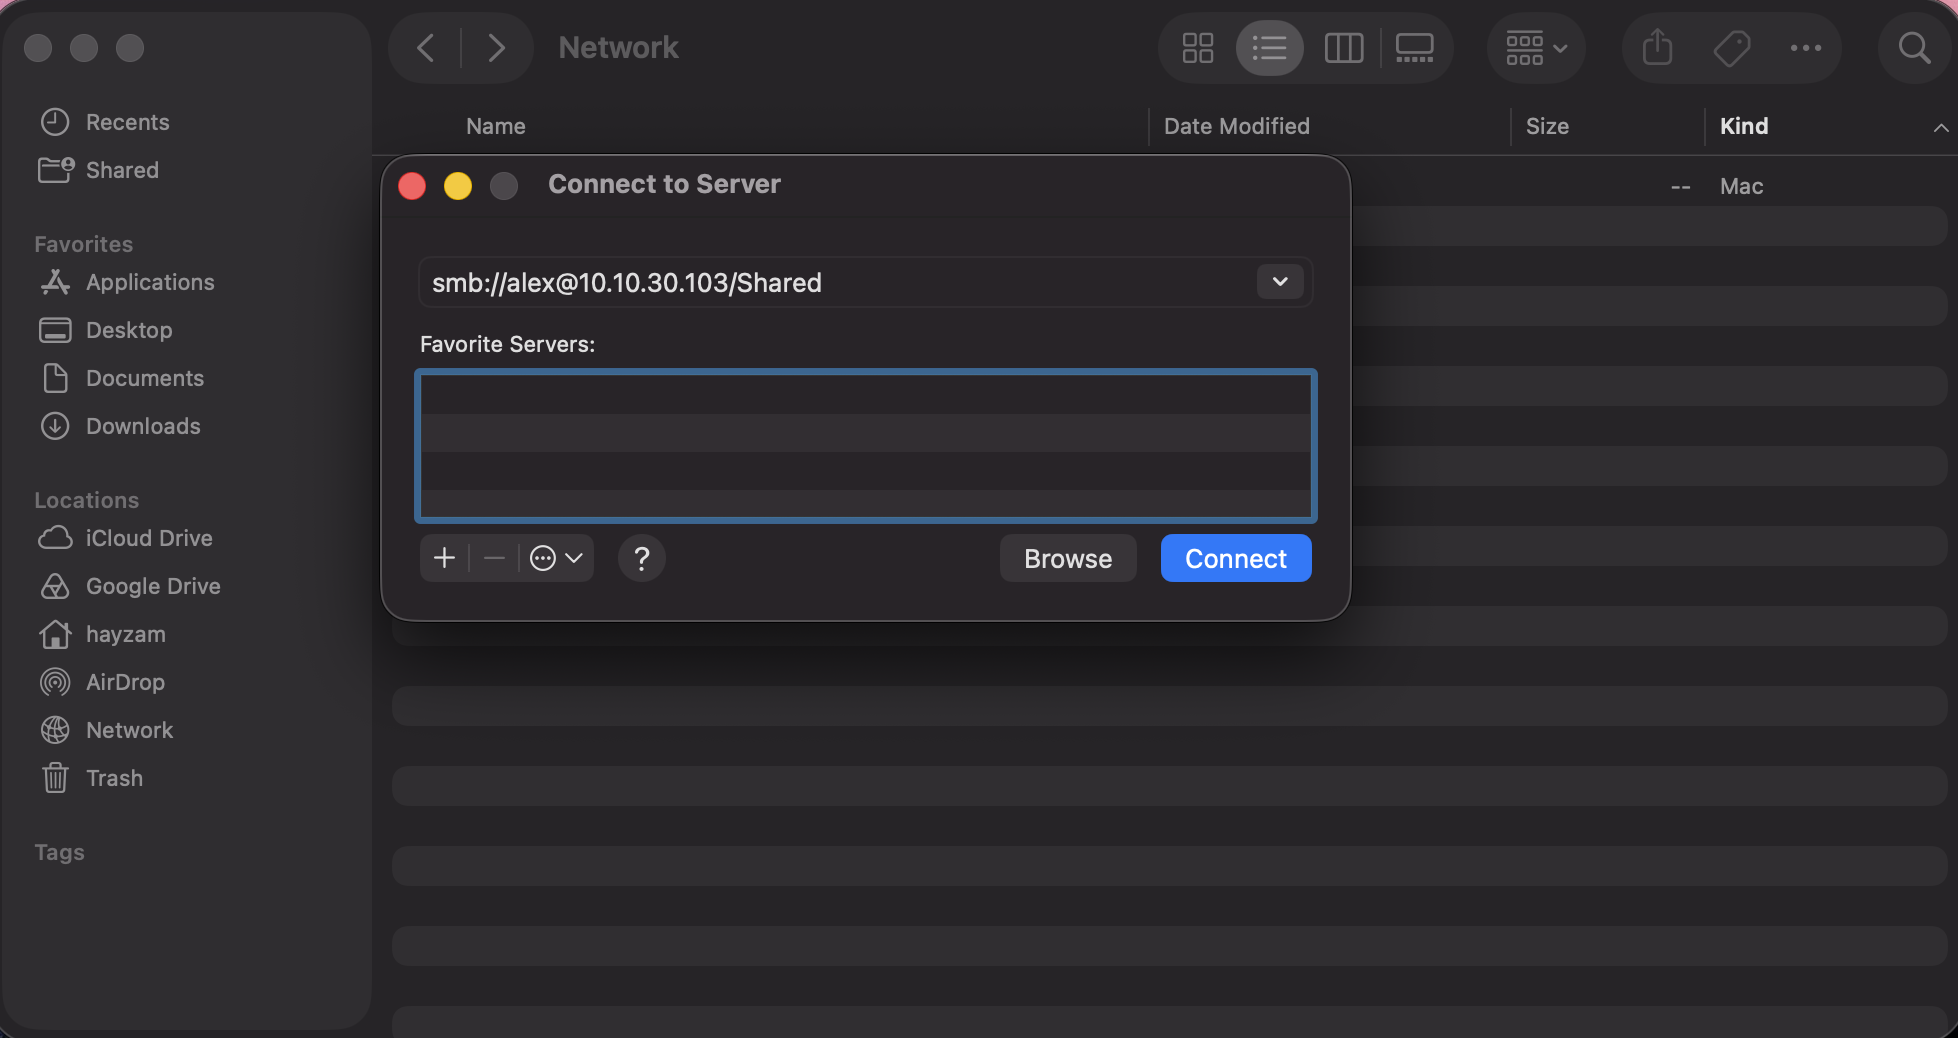
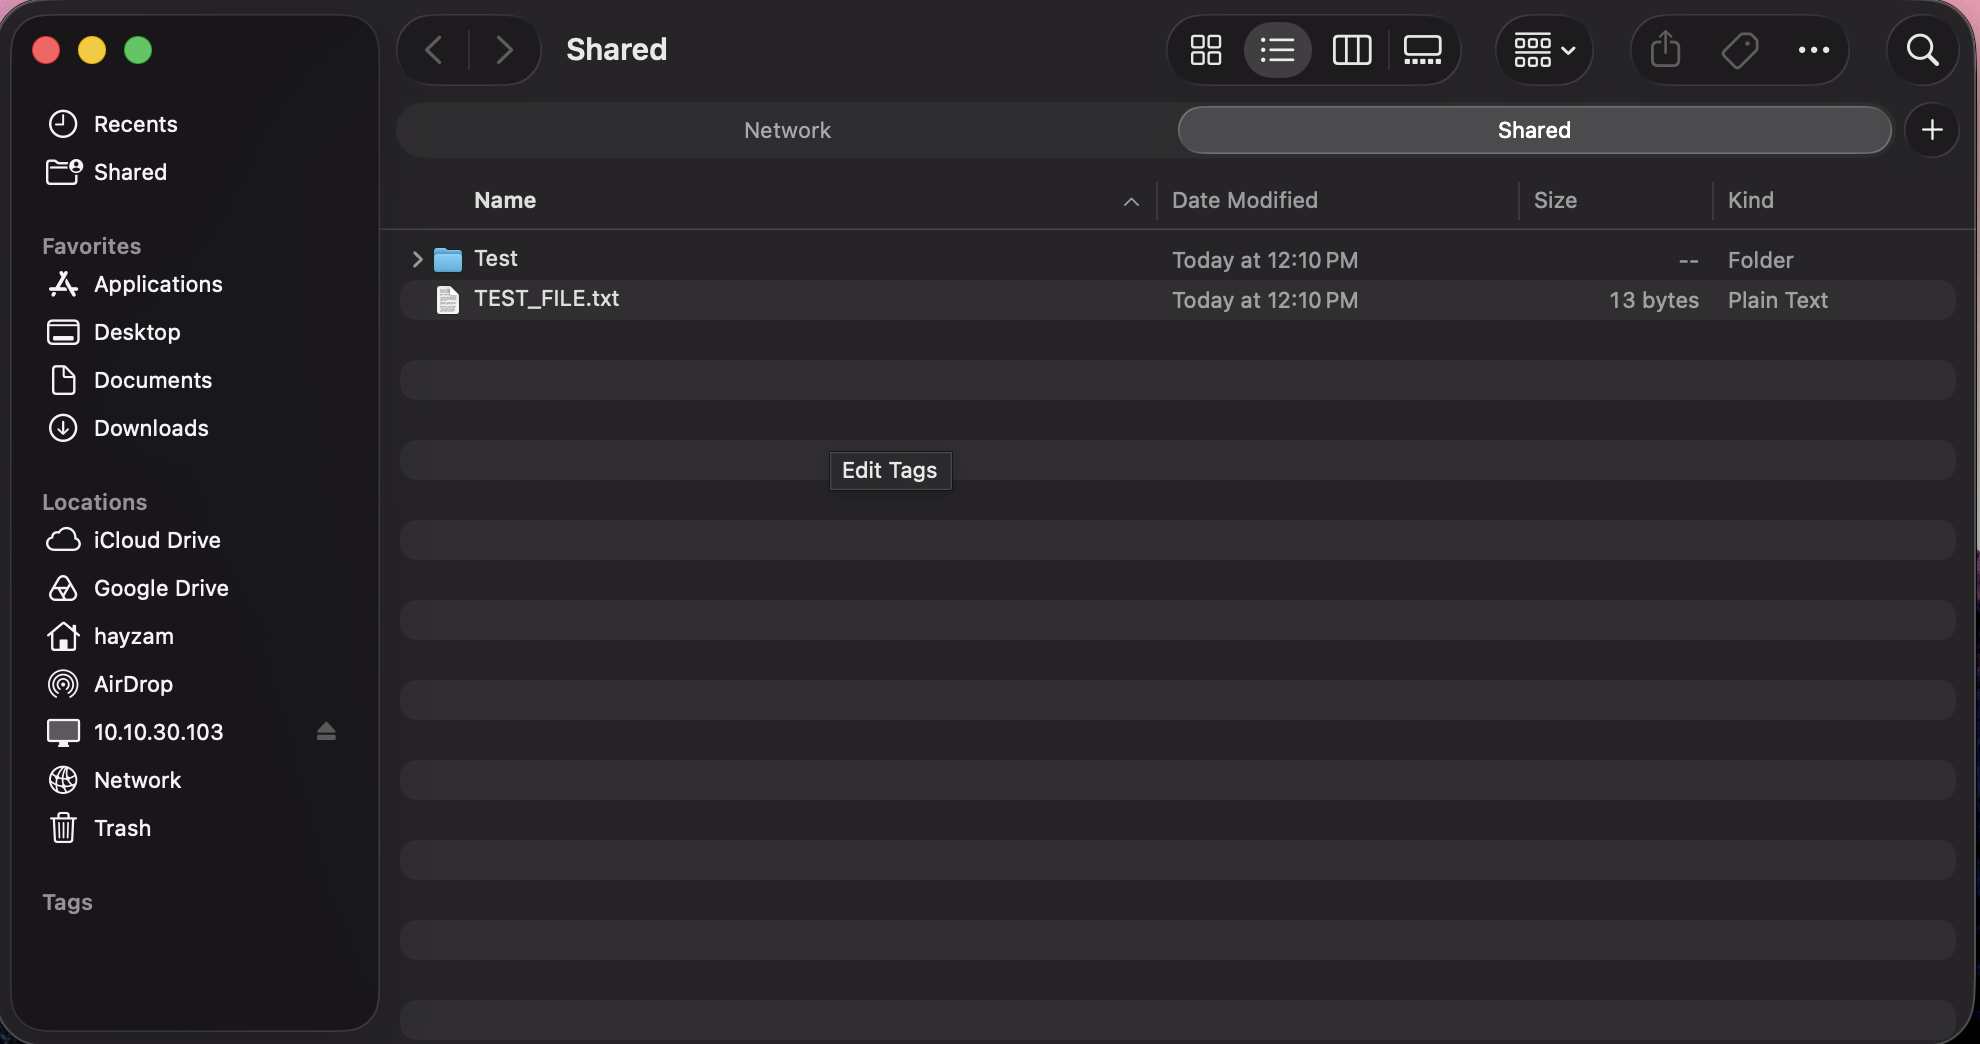
The mounted share appears under Locations in Finder. Create a small test folder or file to verify write access, then eject the share when finished.
Troubleshooting
Section titled “Troubleshooting”The Samba section is missing
Section titled “The Samba section is missing”Open Settings → System → Services and confirm that Samba Server is enabled, then restart the node. If enabling it fails, install a Samba 4XX package and retry.
The username and password are rejected
Section titled “The username and password are rejected”Confirm that the person is a PAM user, not only a Local user. Edit the PAM user, enter a password, select Create or update Samba user, and save. Use that most recently submitted password from the client.
The share is visible but access is denied
Section titled “The share is visible but access is denied”Edit the share and confirm that Authenticated is selected and the user is listed under Read Users or Write Users, either directly or through an assigned group. A Samba credential authenticates the user, but it does not grant access to every share.
The filesystem does not appear in the Dataset list
Section titled “The filesystem does not appear in the Dataset list”The dataset must be a mounted ZFS filesystem. Sylve excludes pool roots, boot-environment datasets, pool/sylve/... datasets, unmounted filesystems, and filesystems already assigned to another Samba share.
The client cannot find the server
Section titled “The client cannot find the server”Connect directly with smb://<node-ip>/Shared. Confirm that the client can reach the node and TCP port 445. Automatic discovery also requires Advertise Samba (mDNS) in Samba Settings and the node-wide mDNS Discovery service.
On macOS, include the Samba username in the address, such as smb://alex@10.10.30.103/Shared. A parse_dfs_path_strict message containing only the server address can appear when Finder probes the server without a complete share path. It does not require disabling DFS when the username-qualified share address connects successfully.
For advanced access modes, Time Machine, audit logging, and permission masks, see Samba Shares.