Pools
The Pools page lists the ZFS pools that Sylve manages. Select a pool or an expandable device row to reveal the actions that apply to it. Sylve can create pools from an unused raw disk or from unused partitions. It also creates its managed dataset layout after a pool is created.
Add an existing pool to Sylve
Section titled “Add an existing pool to Sylve”Sylve manages a pool only when you selected it during node initialization, created it from this page, or explicitly added it afterward. An existing ZFS pool is not automatically adopted merely because it is imported on the node.
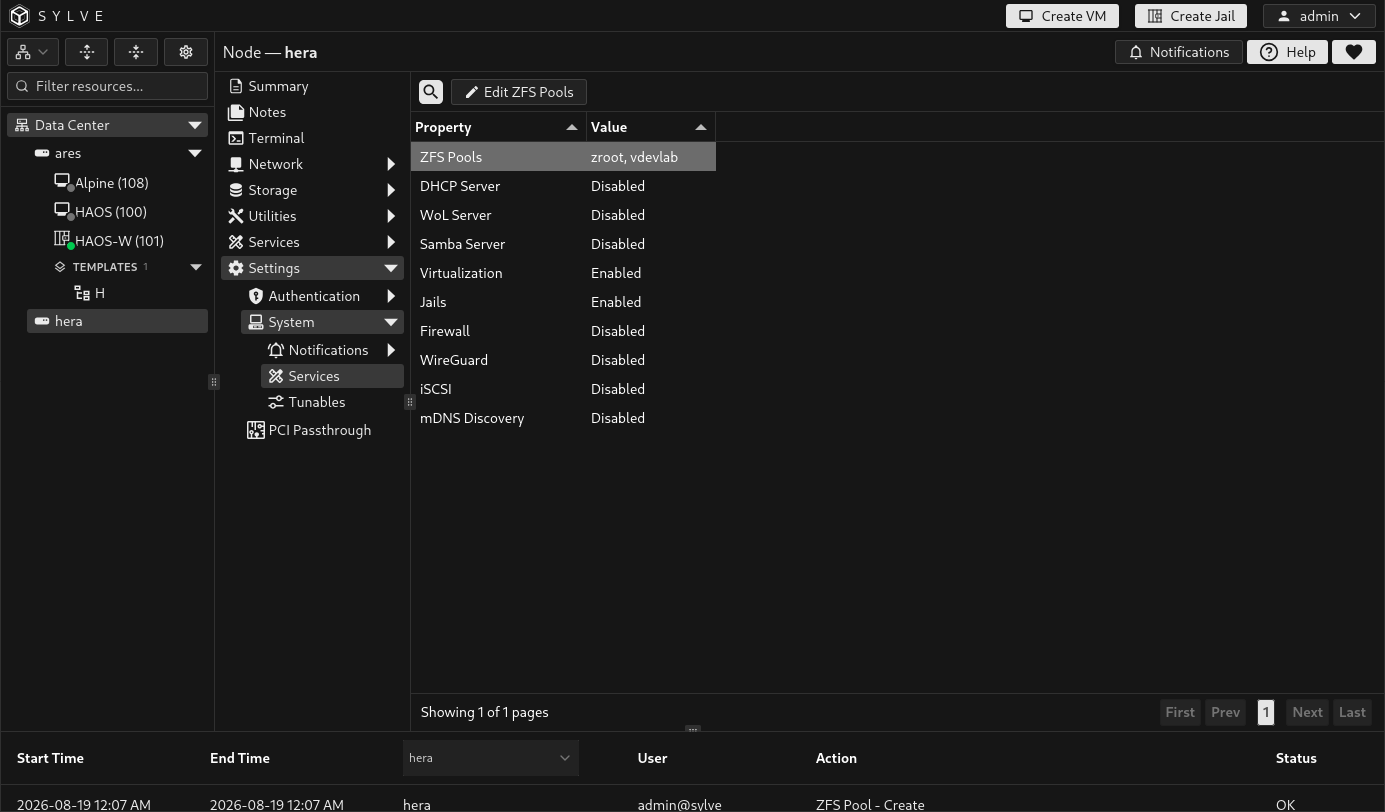
To add an existing pool, go to Settings → System → Services, edit ZFS Pools, then select the imported pool that Sylve should manage and save the change. This is a deliberate authorization step: only add pools that you intend Sylve to use for its managed datasets, workloads, and storage features.
Before you create a pool
Section titled “Before you create a pool”Sylve offers only disks and partitions that are eligible for use:
| Source | Eligible when | Not shown when |
|---|---|---|
| Raw disk | The disk is unused and does not have a GPT partition table. | It is already in use, already partitioned, or assigned to a pool. |
| Partition | The parent disk is partitioned, the disk has no EFI partition, and the partition is not already used by a pool. | The parent disk contains an EFI partition or the partition is already assigned. |
A VDEV is a group of devices that ZFS treats as one storage unit. A pool must have at least one Data VDEV. The layout of the Data VDEVs determines the pool’s capacity and failure tolerance. Adding a cache, log, special, or dedup VDEV does not make an unprotected Data VDEV redundant.
Create a simple raw-disk pool
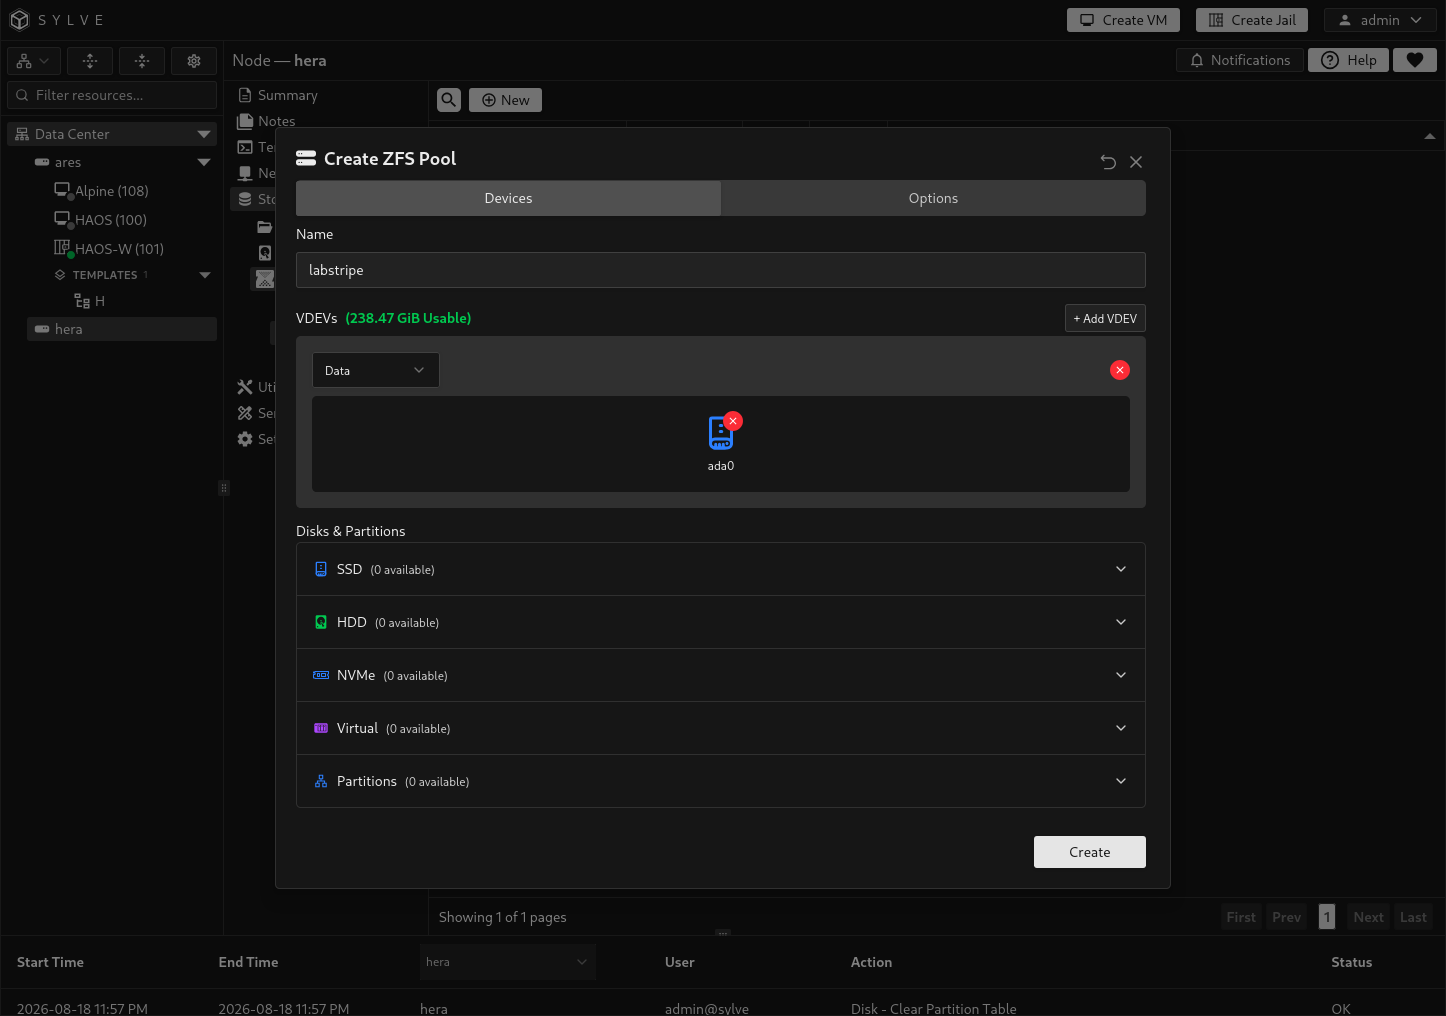
Section titled “Create a simple raw-disk pool”This first example uses the one free raw disk on the demo node to create a stripe pool. A one-device stripe is useful for a disposable test pool, but it has no redundancy. If the disk fails, the pool is lost.
- Go to Storage → ZFS → Pools and select New.
- Enter an alphanumeric pool name between 1 and 24 characters, such as
labstripe. - Leave the initial VDEV as Data and Stripe.
- Drag the available raw disk into the VDEV, or use the arrow on the disk card to add it to the last VDEV.
- Confirm the usable capacity, then select Create.
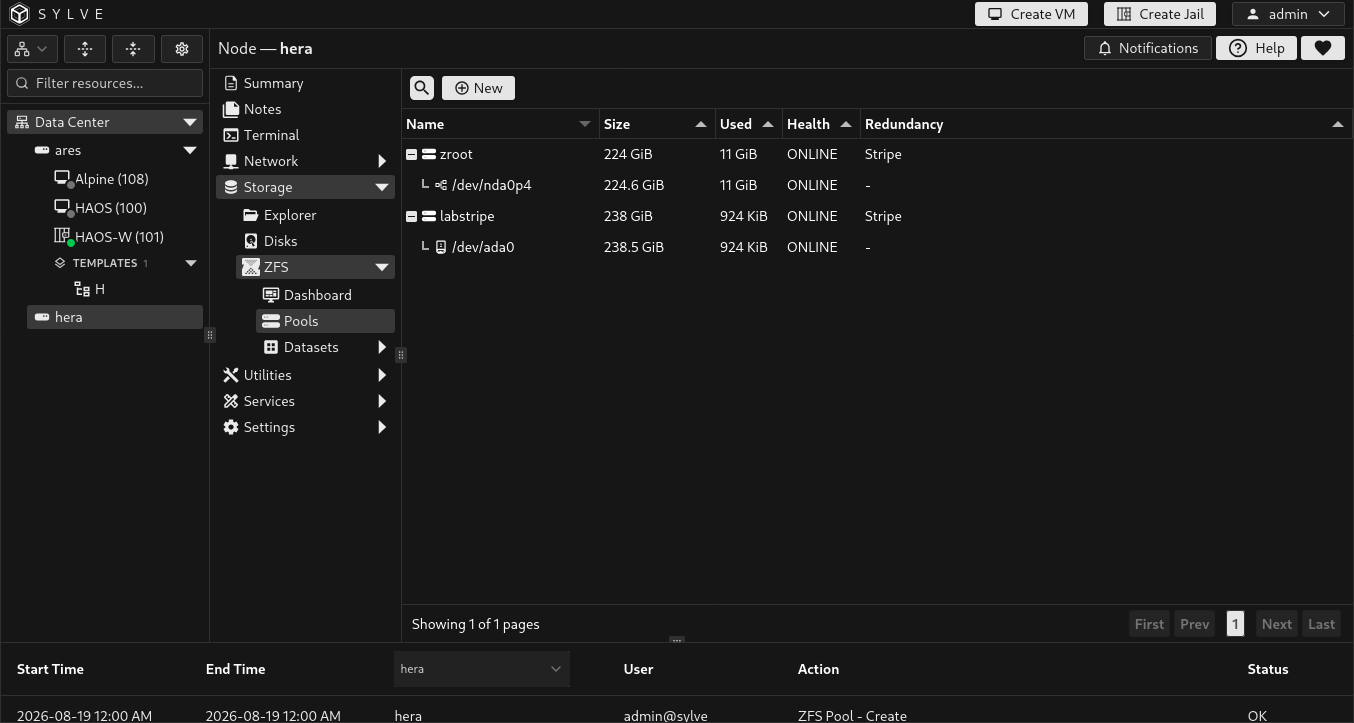
After creation, the pool appears in the table with its capacity, allocation, health, and redundancy. Expand the pool row to inspect its Data VDEV and device.
VDEV types and redundancy
Section titled “VDEV types and redundancy”The Devices tab lets you add VDEVs and select their type. The available redundancy choices depend on the type and the number of devices in that VDEV.
| VDEV type | Purpose | Redundancy choices in Sylve | Important consideration |
|---|---|---|---|
| Data | Stores ordinary pool data. At least one is required. | Stripe, Mirror, RAIDZ, RAIDZ2, RAIDZ3. | This is the pool’s primary capacity and protection layout. All Data VDEVs should use the same RAID type unless you deliberately enable Force Create. |
| Log (ZIL) | Serves synchronous write intent log workloads. | Stripe or Mirror. | A separate log VDEV is workload-specific. Use a mirror for fault tolerance. |
| Cache (L2ARC) | Provides a secondary read cache. | Stripe only. | It does not add redundancy or increase usable pool capacity. |
| Special | Holds special allocation classes, including metadata when configured by ZFS. | Stripe, Mirror, RAIDZ, RAIDZ2, RAIDZ3. | Loss of a special VDEV can make the pool unusable. Use a redundant layout in production. |
| Dedup | Holds deduplication table data when ZFS deduplication is used. | Stripe, Mirror, RAIDZ, RAIDZ2, RAIDZ3. | This is an advanced and memory-sensitive feature. Use redundant, suitable devices before enabling deduplication. |
| Spare | Stands by for replacement of a failed device. | Added separately, not as a VDEV. | A spare must be at least as large as the largest device in the pool. |
Sylve enables a layout only when it has enough devices: Stripe needs 1, Mirror needs 2, RAIDZ needs 3, RAIDZ2 needs 4, and RAIDZ3 needs 5. Capacity is limited by the smallest device in a mirror or RAIDZ group, so use equal-sized devices within each VDEV.
Complex partition layout for the demo
Section titled “Complex partition layout for the demo”After documenting the raw-disk example, you can reuse that demo disk for a topology walkthrough. First delete the disposable labstripe pool, then create eight equal partitions on the disk using the process in Disks. Do not use a partitioning scheme like this on a production system.
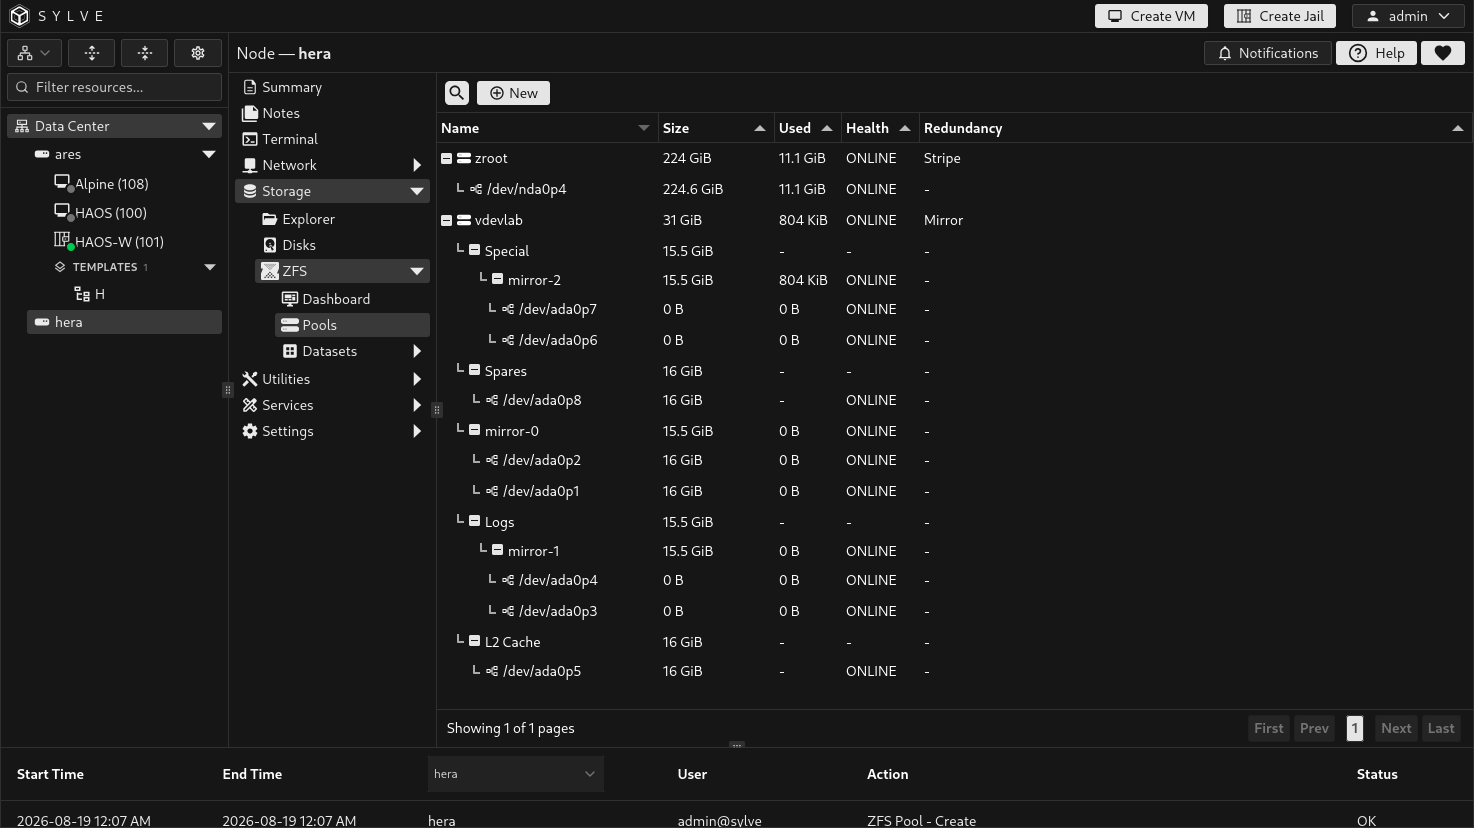
Arrange the eight partitions in the Create dialog as follows:
| Partitions | VDEV type | Layout | What it demonstrates |
|---|---|---|---|
p1, p2 |
Data | Mirror | A protected-looking primary Data VDEV. |
p3, p4 |
Log (ZIL) | Mirror | A mirrored separate log VDEV. |
p5 |
Cache (L2ARC) | Stripe | A cache VDEV, which only supports Stripe in the UI. |
p6, p7 |
Special | Mirror | A redundant special VDEV layout. |
p8 |
Spare | N/A | A hot spare assigned from the Spares drop zone. |
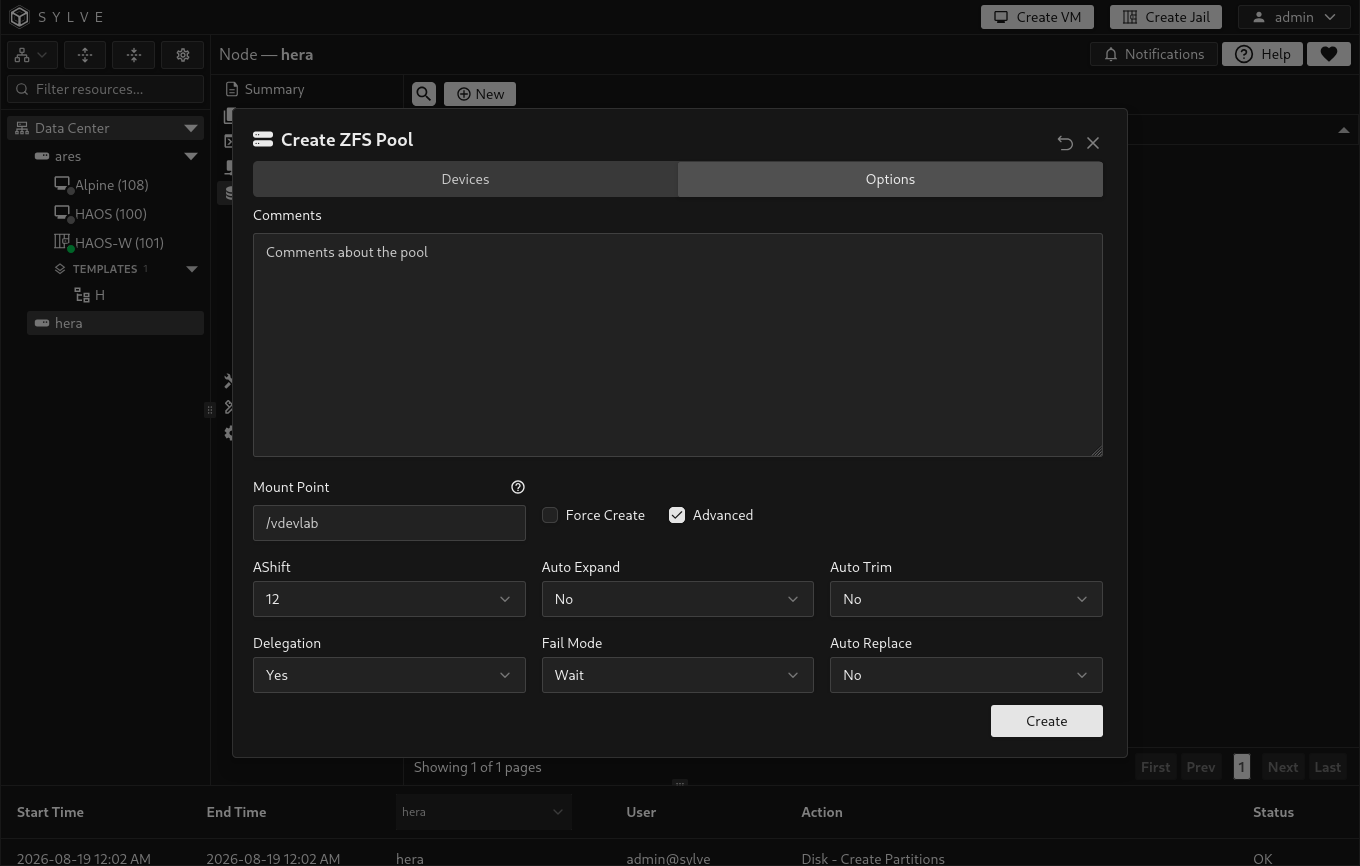
Name the pool something clearly disposable, such as vdevlab. In the Devices tab, choose + Add VDEV for each VDEV, change the type before adding partitions, then drag each partition to its intended VDEV. The Spares area appears once the layout contains a non-stripe VDEV.
This layout intentionally does not include a Dedup VDEV. A useful Dedup VDEV needs its own redundant devices and is not safe to simulate with the remaining partitions on the same physical disk. Treat the Dedup VDEV type as a specialist production feature, not a way to improve ordinary pool performance.
Pool options
Section titled “Pool options”The Options tab applies creation-time properties and an optional mount point.
| Option | Meaning | Practical guidance |
|---|---|---|
| Comments | A descriptive ZFS pool comment. | Record the pool’s purpose or workload. |
| Mount Point | Where the pool root is mounted. Leaving it blank uses the ZFS default /<pool>. |
Use an absolute path such as /mnt/tank only when your layout requires it. Custom mount points are heavily discouraged. |
| Force Create | Allows a creation request that mixes Data VDEV RAID types. | Leave it off unless you intentionally understand the capacity and fault-domain consequences. |
| AShift | The pool’s sector-size exponent. Sylve offers 9 through 16 and defaults to 12. | Select the right value before creation. It is not a routine post-creation tuning option. |
| Auto Expand | Lets ZFS expand eligible devices when their capacity grows. | Enable only when that behavior matches your storage plan. |
| Auto Trim | Controls automatic discard or trim behavior. | Enable it only for storage that supports trim appropriately. |
| Delegation | Controls ZFS delegated administration. | Keep the default unless you have a defined delegation model. |
| Fail Mode | Controls how ZFS responds when it cannot complete I/O: wait, continue, or panic. |
wait is the default. Change it only with a clear recovery policy. |
Inspecting the pool tree and status
Section titled “Inspecting the pool tree and status”The pool table shows each pool’s name, size, used space, health, and primary redundancy. Expand a row to see the Data VDEVs and their devices. Separate L2 Cache, Logs, Spares, Special, and Dedup branches appear after the Data VDEVs when the pool contains them.
Select a pool and choose Status for the detailed ZFS status. It includes the pool state, status and action text supplied by ZFS, scan state, error summary, and the device tree. Use it to investigate degraded devices, checksum errors, a scrub, or a resilver.
Scrubbing, replacement, and detaching
Section titled “Scrubbing, replacement, and detaching”Select a pool and choose Scrub to begin an integrity scan. The Scrub button is disabled while a scrub is already in progress. Editing is also disabled while a scrub or a replacement is in progress, helping prevent conflicting pool changes.
Select an eligible device row to reveal Replace Device or Detach Device. Replacement starts a ZFS replacement operation. Detaching removes the selected device from the pool when ZFS permits it. Neither operation is a substitute for verifying the pool’s redundancy and current health first.
Editing and deleting a pool
Section titled “Editing and deleting a pool”Select a pool and choose Edit to change its comment, Auto Expand, Auto Trim, Delegation, Fail Mode, and eligible spares. Spare management is available for pools with a mirror or RAIDZ layout. Sylve validates that any selected spare is large enough for the pool.
To remove a disposable pool, select it and choose Delete. Sylve refuses deletion when a dataset in the pool is still used by a Sylve-managed workload. Delete or move those dependencies first.