

Getting Started
System Requirements
Section titled “System Requirements”As of the latest release, Sylve requires FreeBSD 15.0-RELEASE or later. You will also need to have a ZFS pool available for Sylve to use. Other filesystems such as UFS are not currently supported.
If you want to get going right away, run pkg install sylve on a FreeBSD >= 15 machine and open https://<host>:8181 in your browser. For more details, continue reading.
Software Dependencies
Section titled “Software Dependencies”Sylve is designed to run using only base FreeBSD dependencies if you prefer. However, we recommend installing the following packages:
-
libvirt,bhyve-firmware,swtpm,qemu-tools: Required for managing and running Bhyve virtual machines. The virtualization subsystem cannot be used without these dependencies. -
samba4XX: Enables SMB shares for guests and Jails. Basic sharing functionality and an audit log are supported out of the box when this dependency is installed. -
dnsmasq: Provides DHCP and DNS services. If installed, Sylve can directly manage DHCP ranges and leases.
Hardware Requirements
Section titled “Hardware Requirements”We run several Sylve instances in production with the specifications listed below (Jails only), and they are more than sufficient for most use cases. If you plan to run Bhyve virtual machines, we recommend at least 2 vCPUs and 4 GB of RAM.
- CPU: 1 vCPU (2+ recommended for better performance)
- RAM: 512 MB (1 GB+ recommended)
- Storage: 10 GB (ZFS pool with at least 20 GB recommended)
- Network: 50 Mbps (100 Mbps+ recommended)
As mentioned in the Introduction, Sylve is extremely lightweight. As part of this guide (and as a practical example), we will set up Sylve on a CX23 machine on Hetzner Cloud. This instance includes 2 vCPUs, 4 GB of RAM, a single IPv4 address, and an IPv6 /64 subnet, which is more than enough to run Sylve and explore its features.
On most of these providers, you will also probably need to mount a FreeBSD ISO and manually install it as they don’t provide FreeBSD images by default.
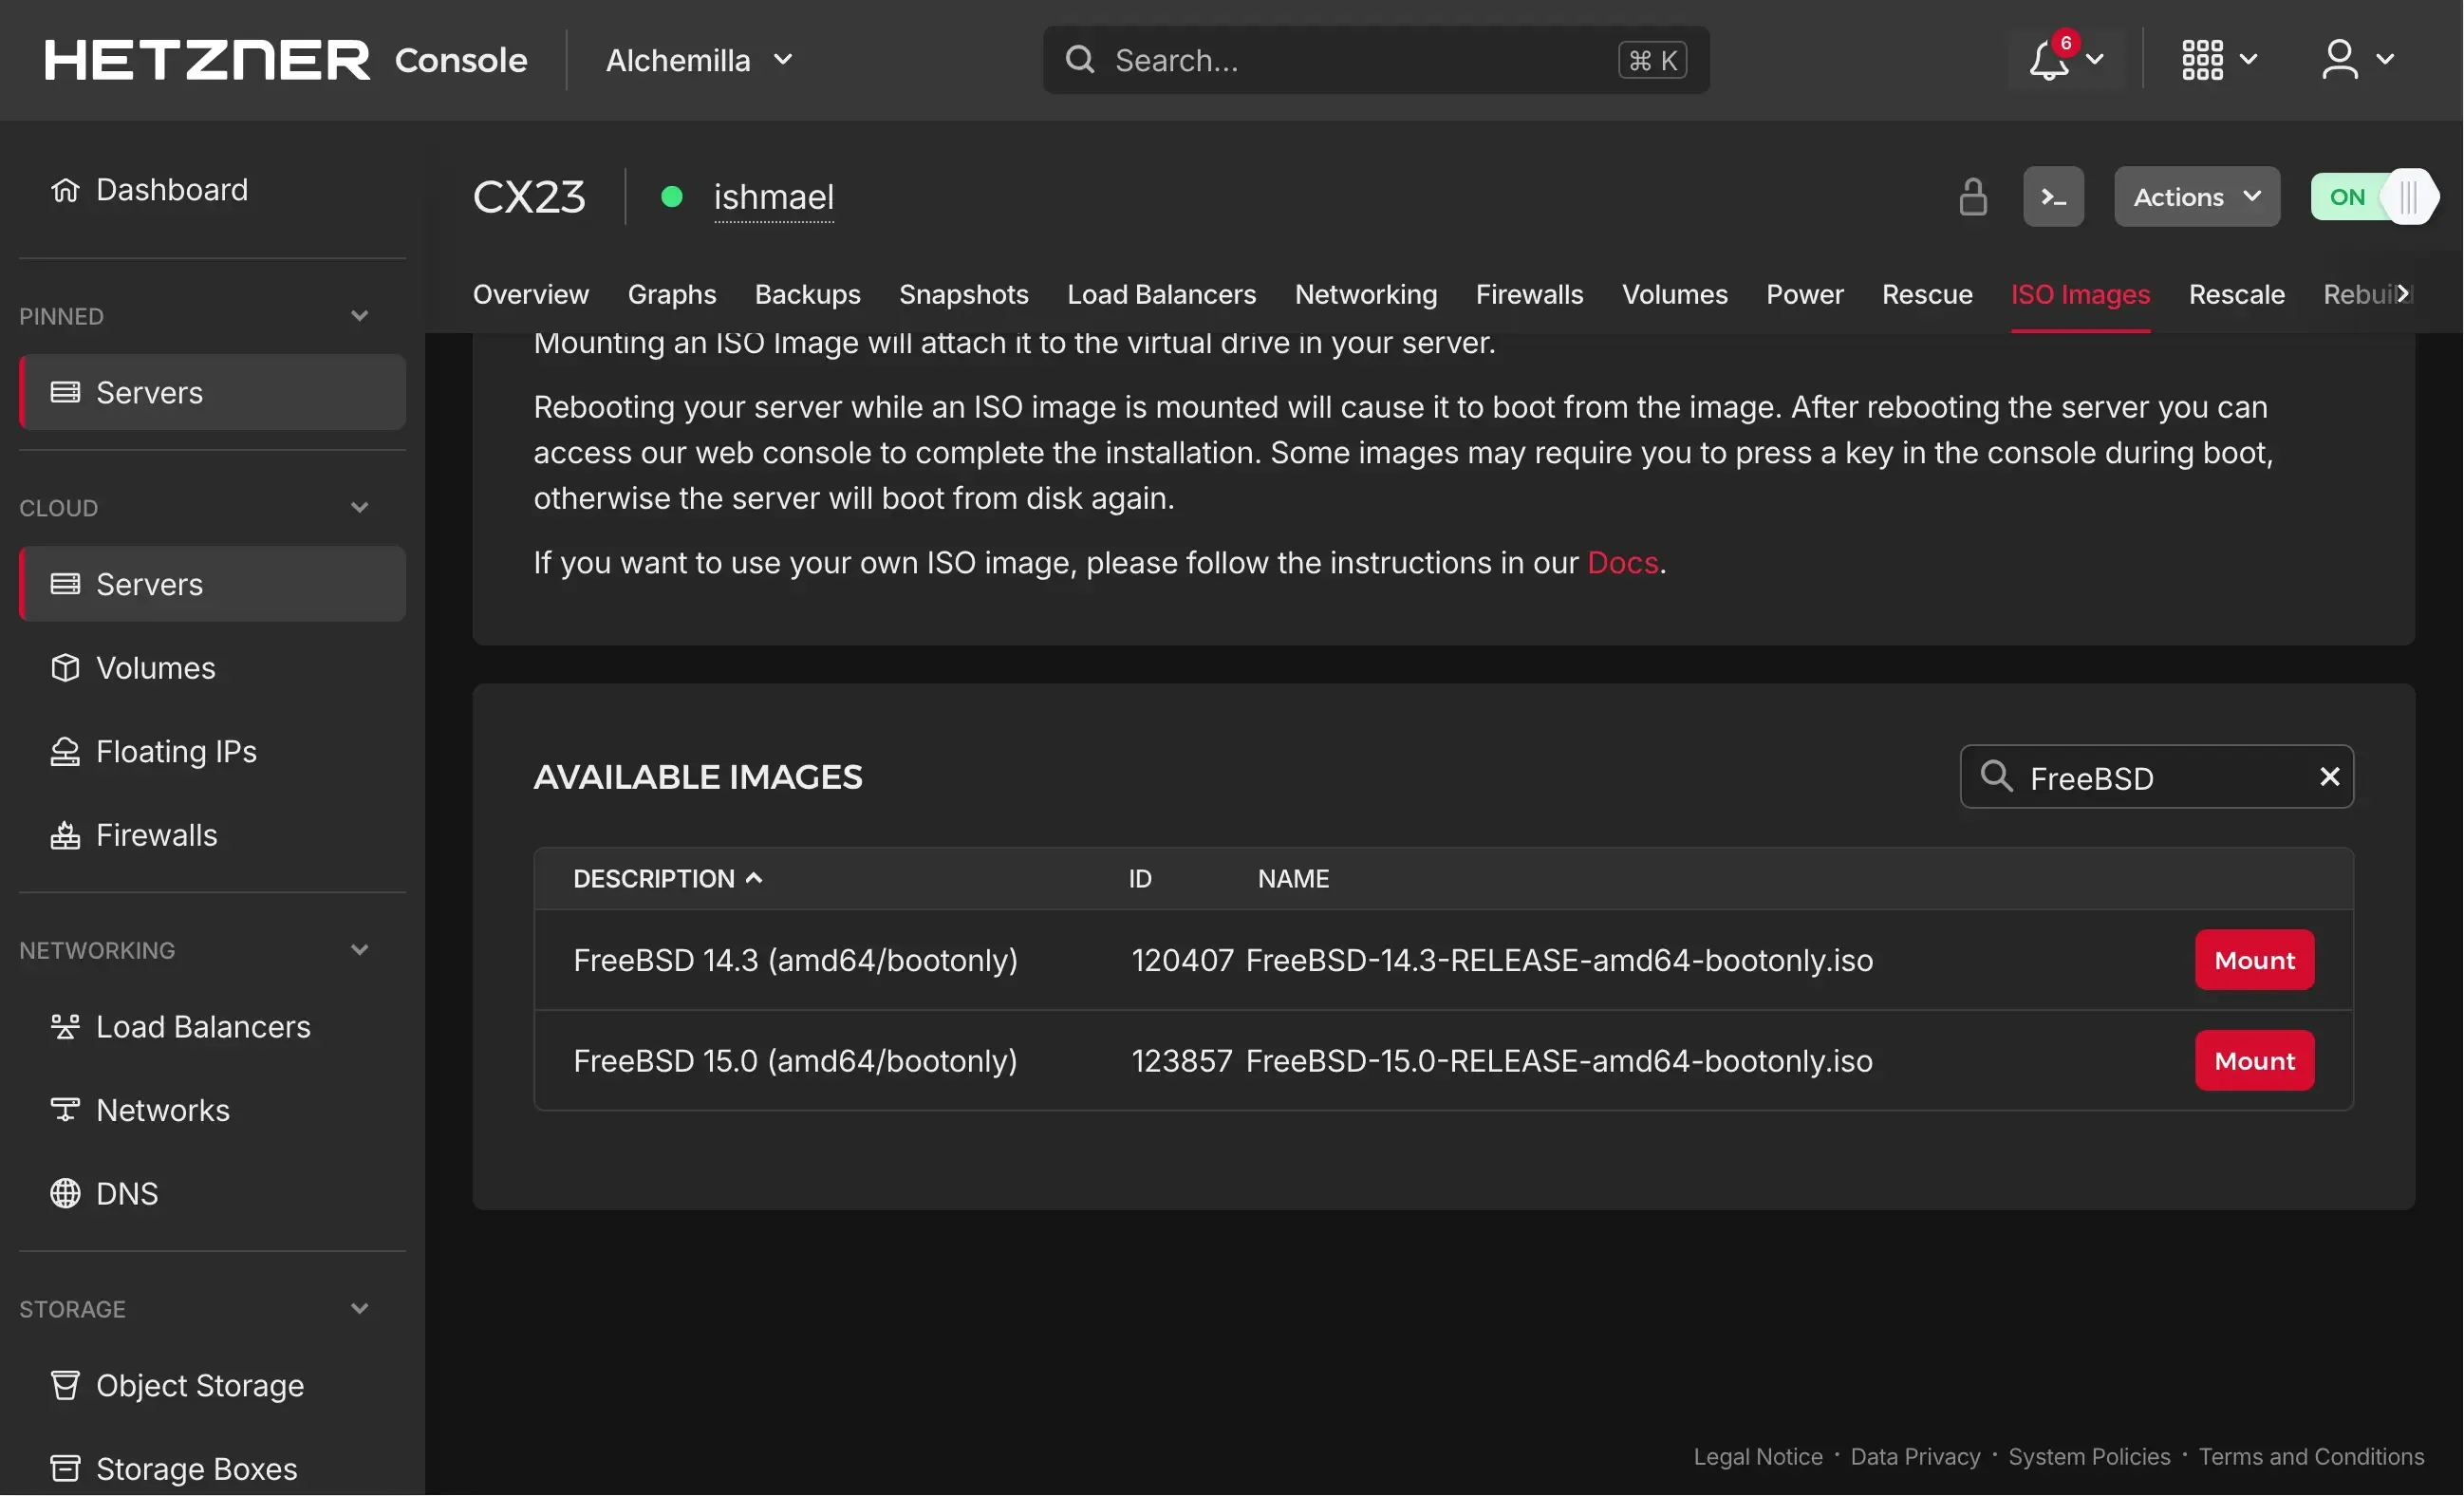
You can mount that drive, and install as you usually would. If you’re new to FreeBSD, this section of it is an excellent resource to get you up and running.
Installing Sylve
Section titled “Installing Sylve”Regardlesss of what method we use, we will still need to install our dependencies, so let’s start with that:
pkg install -y libvirt bhyve-firmware swtpm qemu-tools samba423 dnsmasqIf you’re building from source, you will also need to have git, go and node installed.
pkg install -y git go node npmInstalling from GitHub Releases
Section titled “Installing from GitHub Releases”You can visit the releases page and download the latest release for your architecture. Once downloaded, you can extract the archive and move the sylve binary to a location in your PATH, such as /usr/local/bin. The below commands will do this for you:
fetch https://github.com/AlchemillaHQ/Sylve/releases/download/tip/sylve-amd64 -o sylvechmod +x sylvemv sylve /usr/local/sbin/Should get you the absolute latest release, but if you want to get a specific version, just replace tip with the version tag you want to install, when it is available.
Building from Source
Section titled “Building from Source”Building Sylve is no more difficult than building any other Go application. You can clone the repository, navigate to the project directory, and run the build command:
git clone https://github.com/AlchemillaHQ/Sylve.gitcd SylvemakeThat should build both the backend and frontend, and place the sylve binary in the bin/ directory. You can then move it to a location in your PATH:
mv bin/sylve /usr/local/sbin/Setting up Sylve
Section titled “Setting up Sylve”We will setup an rc script for running Sylve but prior to that we need to do 2 things:
- Create a
config.jsonfile:
{ "environment": "production", "proxyToVite": false, "dataPath": "/var/db/sylve", "auth": { "enablePAM": false }, "admin": { "email": "admin@sylve.local", "password": "replace-this-with-something-strong" }, "logLevel": 3, "port": 8181, "httpPort": 8182, "raft": { "reset": false }, "btt": { "rpc": { "enabled": false, "host": "127.0.0.1", "port": 6890 }, "dht": { "enabled": true, "port": 7246 } }}Most of the above config is self-explanatory, we will discuss the ones that aren’t:
-
auth: Controls authentication in Sylve. By default, PAM is enabled, allowing login with system user accounts. To use only local database authentication, setenablePAMtofalse. In that case, only the admin user from theadminsection can log in initially. Additional users can be created later via the web UI. -
password: During initial setup, you can enter the password here. After you have initialized Sylve for the first time, this can later be set to an empty value (“”). Sylve will ignore it, yet keep the existing password, which was stored as a hash in the database. -
proxyToVite: This is a development setting that allows the backend to proxy requests to the Vite development server. It should be set tofalsein production. -
tlsConfig: This is where you specify the paths to your TLS certificate and key files. If you want to use HTTPS (which is highly recommended), you need to provide valid paths here. You can use Let’s Encrypt or any other certificate authority to obtain your certificates. This is also important if you’re going to setup Passkey based authentication.
"tlsConfig":{ "certFile":"/usr/local/etc/letsencrypt/live/sylve.example.com/fullchain.pem", "keyFile":"/usr/local/etc/letsencrypt/live/sylve.example.net/privkey.pem"},logLevel: This controls the verbosity of the logs. The levels are as follows:0: Debug1: Info2: Warning3: Error4: Fatal5: Panic
We recommend setting it to 3 for production to only log errors, but you can adjust this based on your needs. Setting it to 0 will log everything, which can be useful for debugging but may generate a lot of logs in a busy environment.
-
raft.reset: If something goes catestrophically wrong with your cluster, you can set this totrueto reset the Raft state. This will essentially start the cluster from scratch, on this node. Use with caution, and only if you know what you’re doing. -
btt.dht: This enables the Bittorrent DHT, which is used for peer discovery in the BTT network. It is recommended to keep this enabled unless you have a specific reason to disable it, downloading ISOs over magnets is one of the best features of Sylve and DHT makes it a whole lot better.
Now once you have the above config filled out, you need to place it in /usr/local/etc/sylve/config.json:
mkdir -p /usr/local/etc/sylvemv config.json /usr/local/etc/sylve/Once that is done we can also make a data directory for Sylve to store its data in:
mkdir -p /var/db/sylveNow that we have both the config and data directories setup, we can create an rc script to run Sylve as a service. Create a file named sylve in /usr/local/etc/rc.d/ with the following content:
#!/bin/sh## PROVIDE: sylve# REQUIRE: DAEMON NETWORKING# KEYWORD: shutdown## Add the following lines to /etc/rc.conf.local or /etc/rc.conf to enable sylve:## sylve_enable (bool):      Set to "NO" by default.#                           Set it to "YES" to enable sylve.# sylve_user (user):        Set to "root" by default.#                           User to run sylve as.# sylve_group (group):      Set to "wheel" by default.#                           Group to run sylve as.# sylve_args (str):         Set to "-config %%ETCDIR%%/config.json" by default.#                           Extra flags passed to sylve.
. /etc/rc.subr
name=sylvercvar=sylve_enable
load_rc_config $name
: ${sylve_enable:="NO"}: ${sylve_user:="root"}: ${sylve_group:="wheel"}: ${sylve_args:="-config /usr/local/etc/sylve/config.json"}
export PATH="${PATH}:/usr/local/bin:/usr/local/sbin"
pidfile="/var/run/${name}.pid"daemon_pidfile="/var/run/${name}-daemon.pid"procname="/usr/local/sbin/sylve"command="/usr/sbin/daemon"command_args="-f -c -R 5 -r -T ${name} -p ${pidfile} -P ${daemon_pidfile} ${procname} ${sylve_args}"
start_precmd=sylve_startprecmdstop_postcmd=sylve_stoppostcmd
sylve_startprecmd(){        if [ ! -e ${daemon_pidfile} ]; then                install -o ${sylve_user} -g ${sylve_group} /dev/null ${daemon_pidfile};        fi        if [ ! -e ${pidfile} ]; then                install -o ${sylve_user} -g ${sylve_group} /dev/null ${pidfile};        fi}

sylve_stoppostcmd(){        if [ -f "${daemon_pidfile}" ]; then                pids=$( pgrep -F ${daemon_pidfile} 2>&1 )                _err=$?                [ ${_err} -eq 0 ] && kill -9 ${pids}        fi}
run_rc_command "$1"
Make the script executable:
chmod +x /usr/local/etc/rc.d/sylveOnce that is done you can enable the service by adding the following lines to your /etc/rc.conf:
sylve_enable="YES"You can also just invoke sysrc sylve_enable=YES to do this for you. Now you can start the service using the following command:
Instead of starting like the command given below, at this stage it’s good to reboot your machine to see if everything is in order with the system and that Sylve starts up correctly on boot. If you want to start it without rebooting, you can use the following command:
service sylve startNow you should have Sylve up and running, you can access the web UI by navigating to https://<your-server-ip>:8181 in your browser and login with the credentials you setup in the config.json file.
Default Network Ports
Section titled “Default Network Ports”Sylve uses these ports by default:
-
8181/tcp: Main API and web UI (HTTPS). Change inconfig.jsonwithport. -
8182/tcp: Main API and web UI over HTTP only. This is insecure and can break features like passkeys and serial/VNC console, so use it only when needed (for example, behind a reverse proxy on a trusted network). Change inconfig.jsonwithhttpPort. -
8180/tcp: RAFT communication between cluster nodes. This port is fixed in Sylve and is not configurable. -
8183/tcp: Cluster SSH channel used for intra-cluster operations. This port is fixed in Sylve and is not configurable. -
8184/tcp: Intra-cluster HTTPS API used for node-to-node control plane traffic (including cluster join flows). This port is fixed in Sylve and is not configurable. -
7246/udp: BTT DHT peer discovery. Used only whenbtt.dht.enabledistrue. Change inconfig.jsonwithbtt.dht.port.