

Jellyfin in a Jail
Introduction
Section titled “Introduction”Jellyfin is a free and open-source media server that allows you to organize and stream your media collection. Running it in a FreeBSD jail is a breeze and Sylve makes it even easier. In this guide, we will walk you through the steps to set up Jellyfin in a FreeBSD jail using Sylve, with support for Intel GPU transcoding.
Prerequisites
Section titled “Prerequisites”Before we begin, make sure you have the following:
- FreeBSD system with Sylve installed (see Getting Started).
- Network access to download packages.
- A machine with an intel iGPU, in this case we’re using an Intel(R) Xeon(R) E-2176G CPU @ 3.70GHz, that we got from Hetzner. you can google your CPU model to check if it has an iGPU. You can use the command sysctl hw.model to check your CPU model. Also make sure you have the drivers installed on the host system and that the iGPU is working properly.
Downloading a Jail Base
Section titled “Downloading a Jail Base”Now you can skip this step entirely if you already have downloaded a jail base using the downloader in sylve, but if you haven’t, you can do so by navigating to Utilities > Downloader in your node’s context menu and filling in the following details:
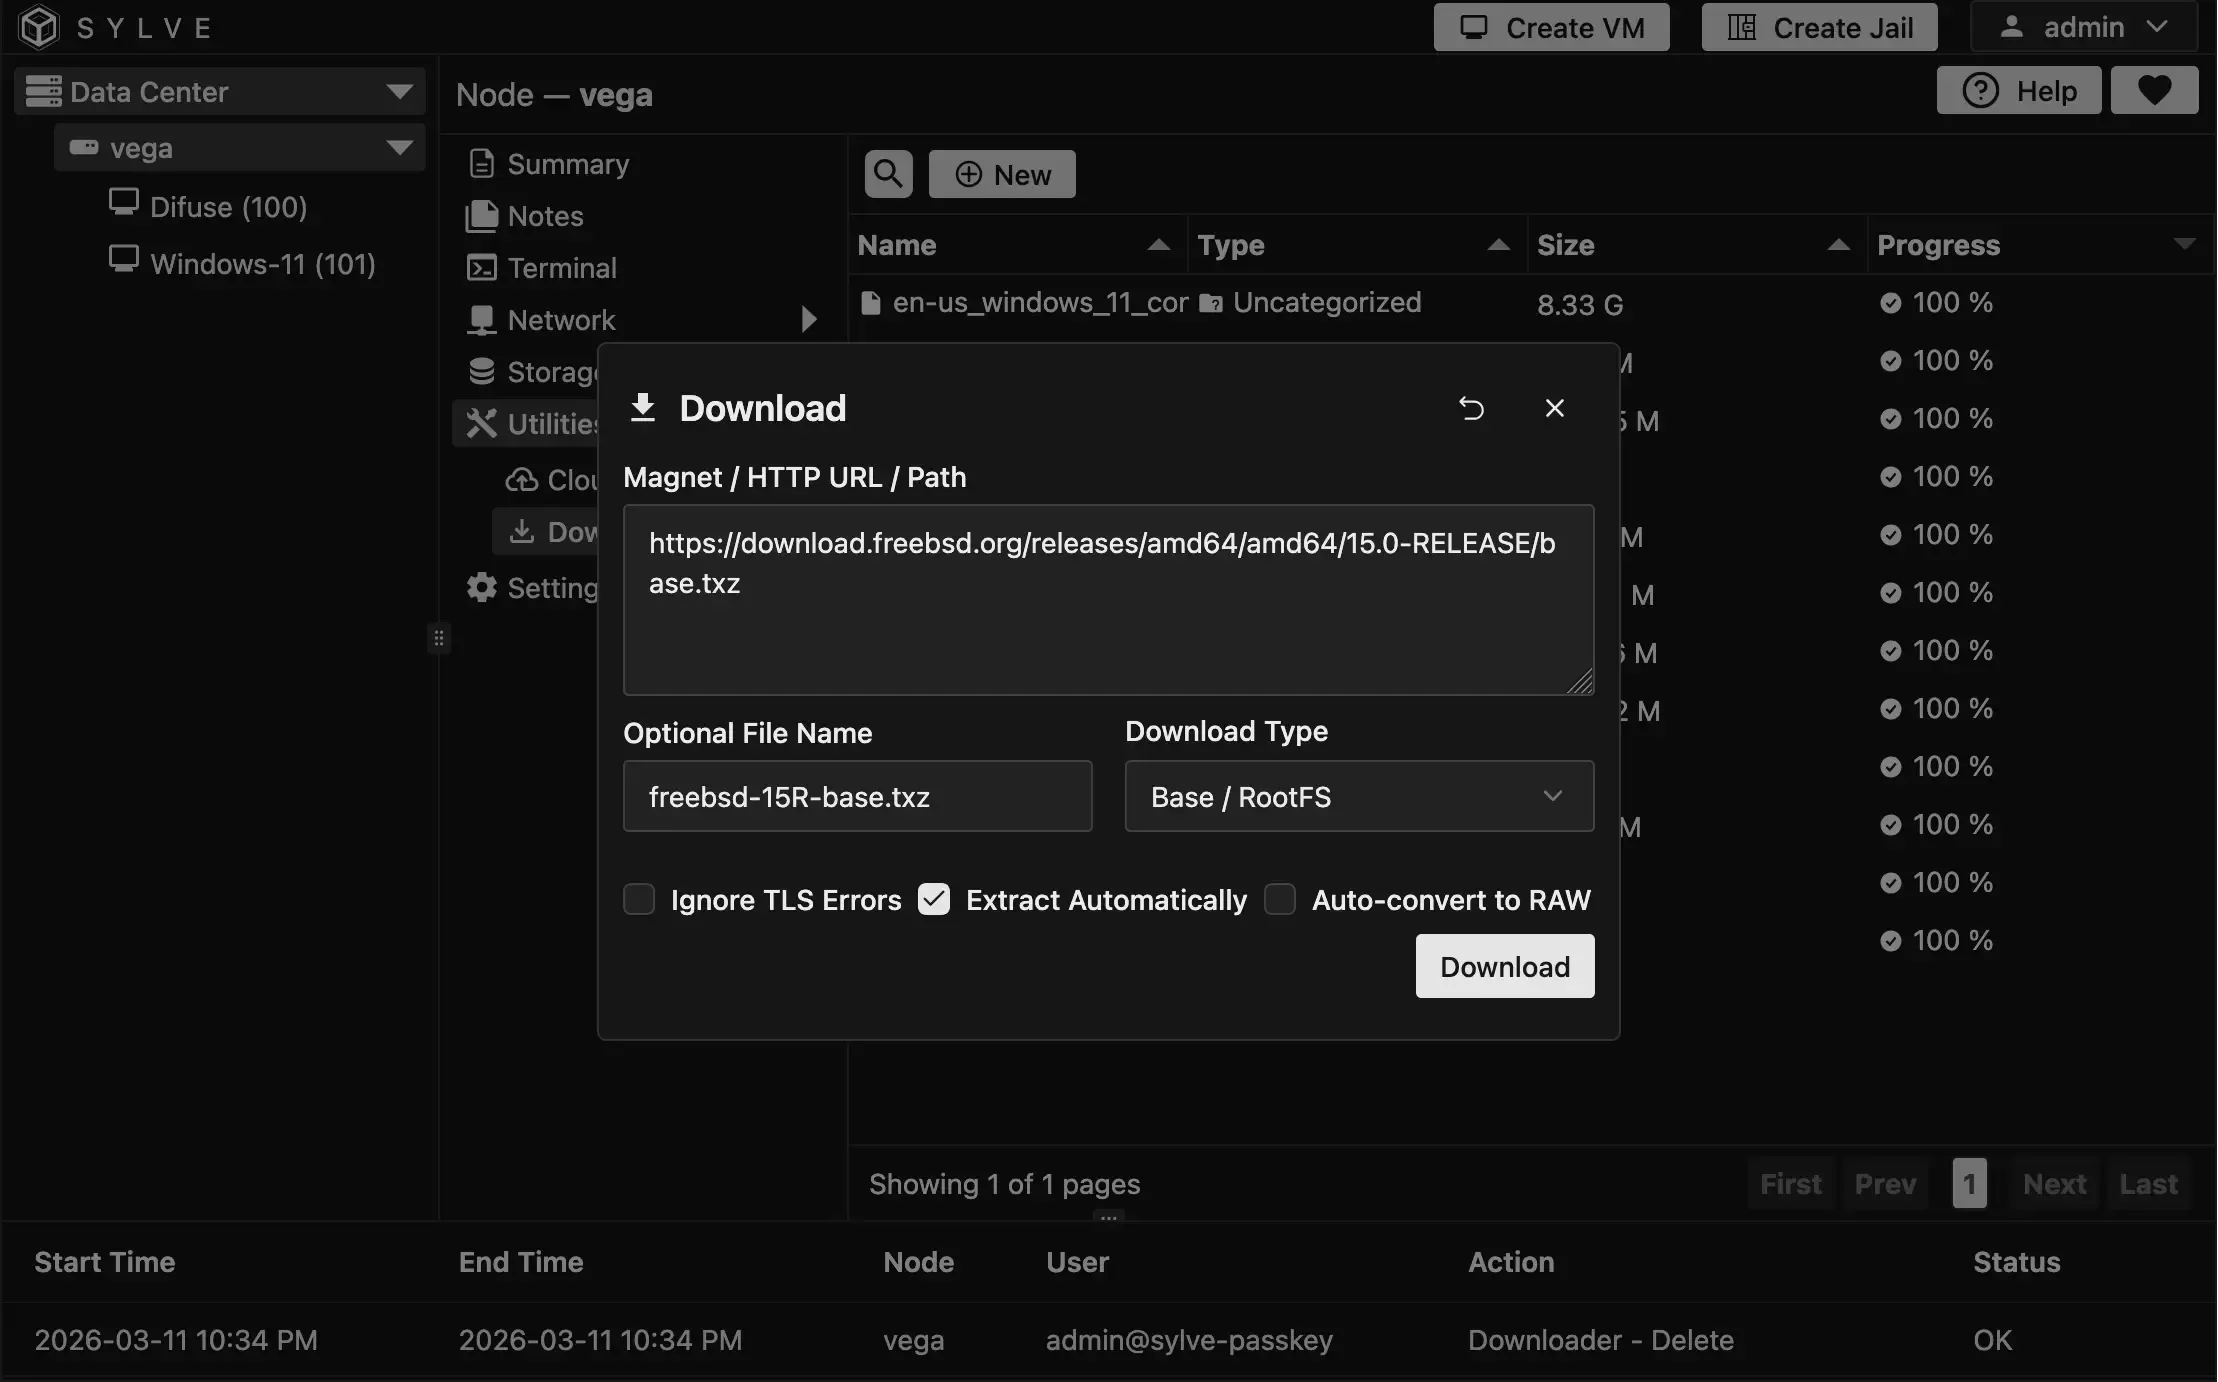
| Field | Value |
|---|---|
| HTTP URL | https://download.freebsd.org/releases/amd64/amd64/15.0-RELEASE/base.txz |
| Optional File Name | freebsd-15R-base.txz |
| Download Type | Base / RootFS |
| Extract Automatically | Enable this option so the jail base is extracted after downloading. |
Creating the Jail
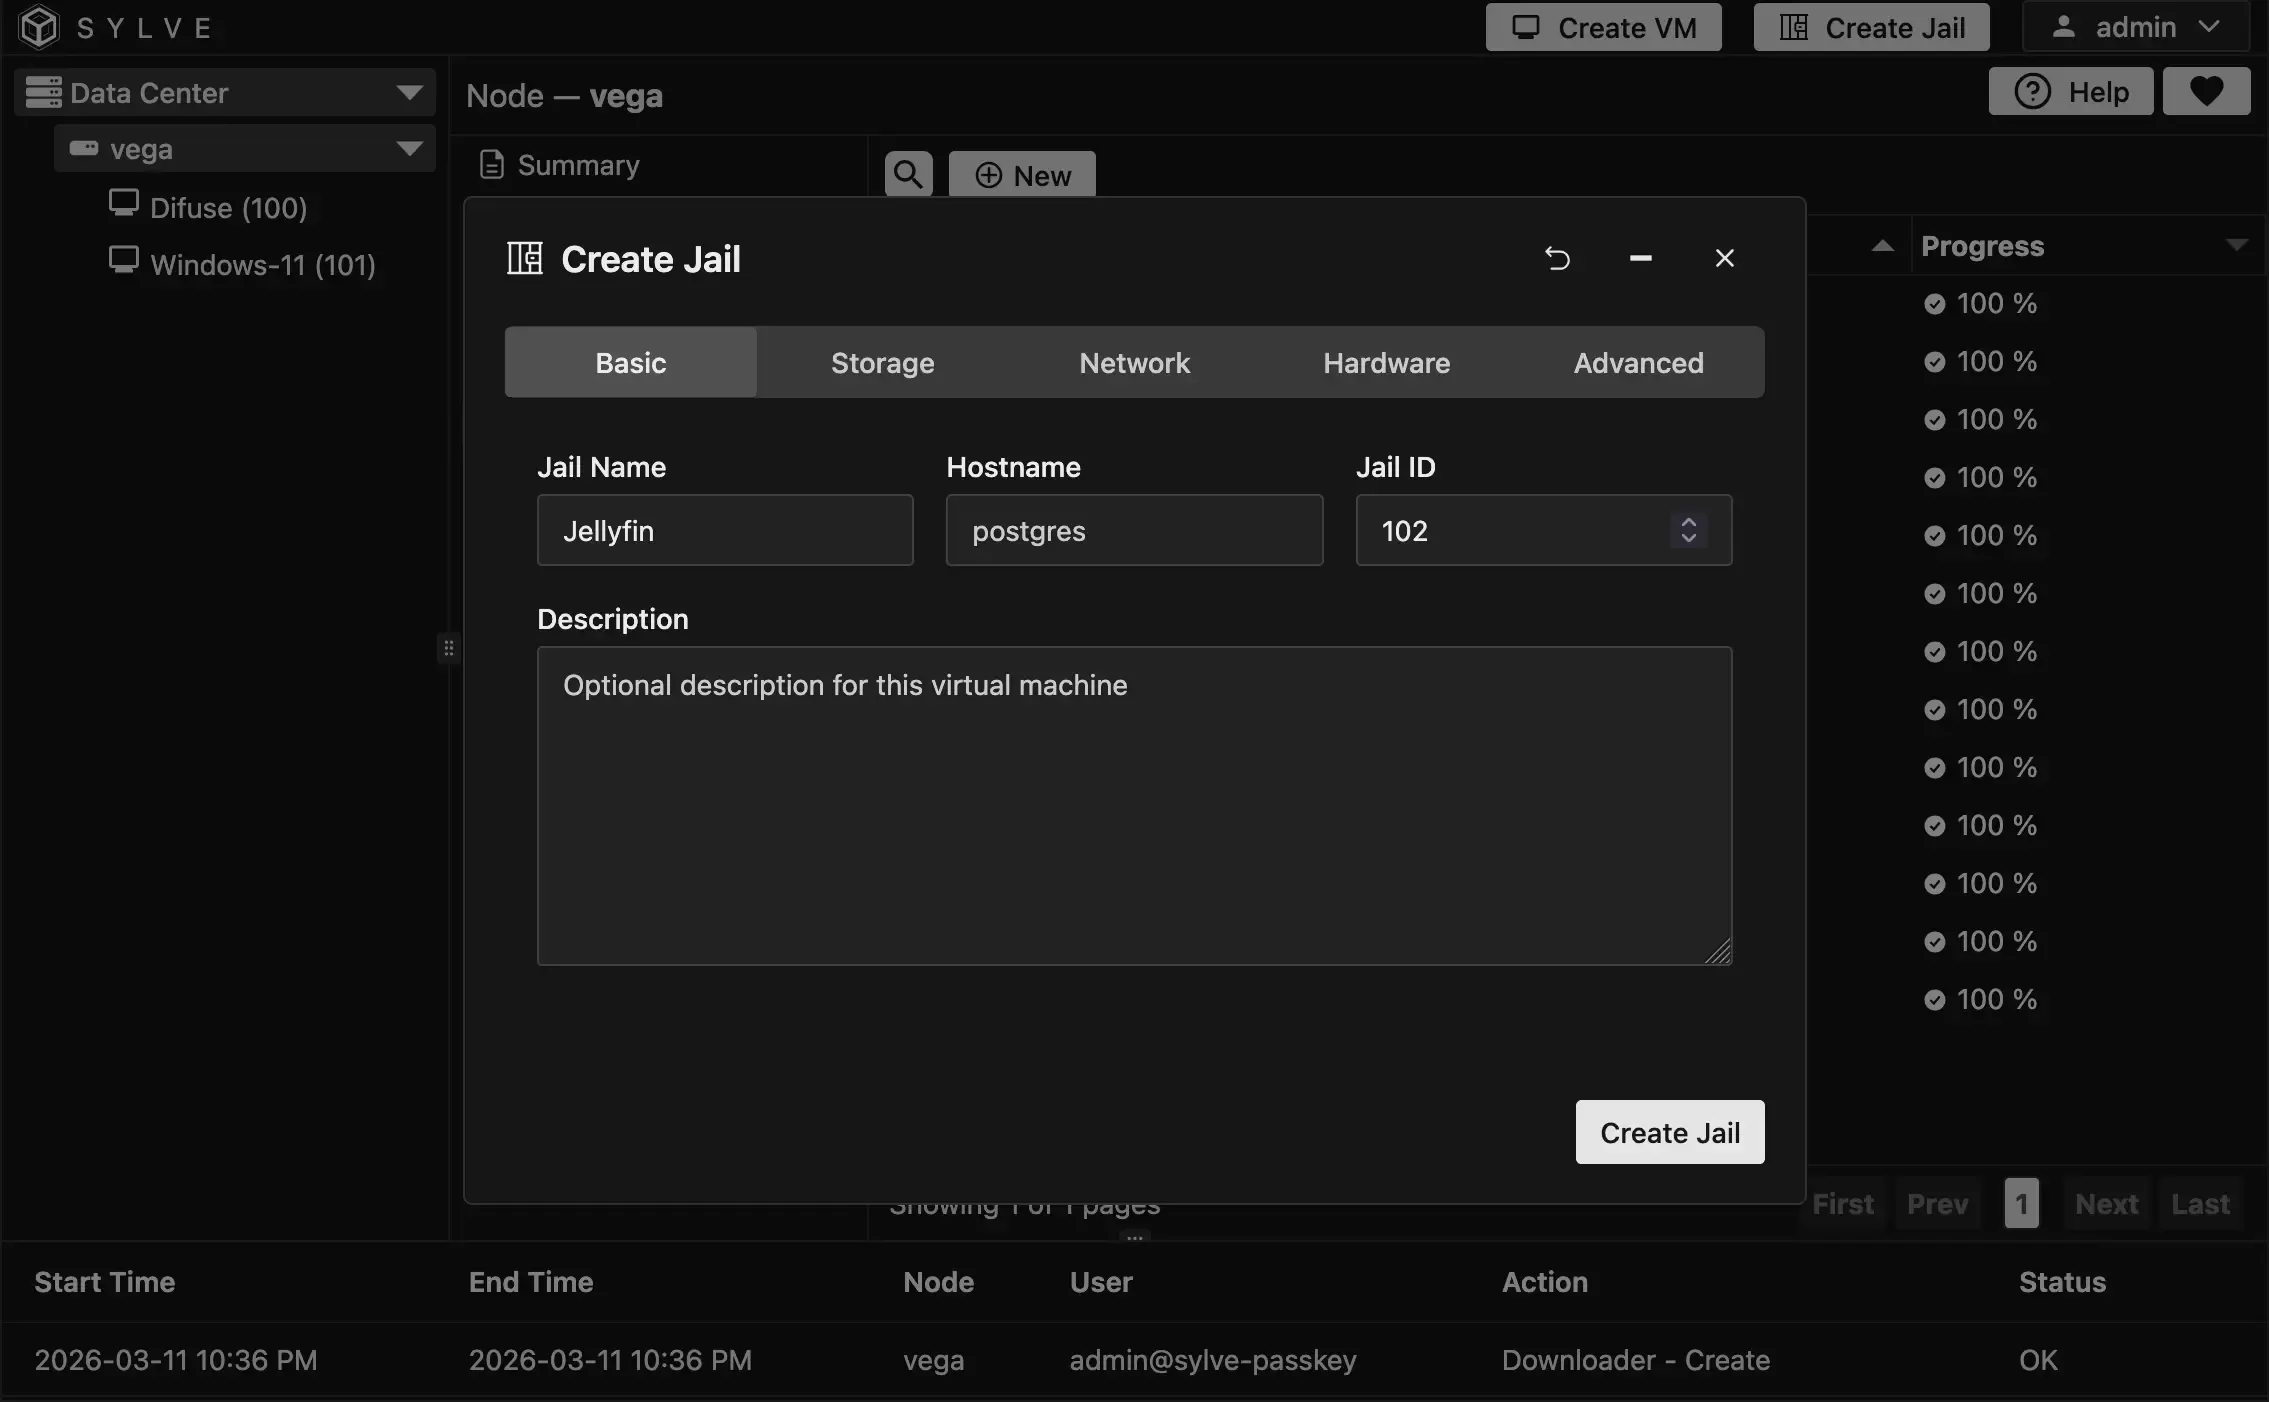
Section titled “Creating the Jail”- Click on Create Jail on the top right and let’s fill out some basic details:
- In the next
Storagestep, we pickzrootas our pool (you can pick any) and the FreeBSD 15 Release base we just downloaded as our base:
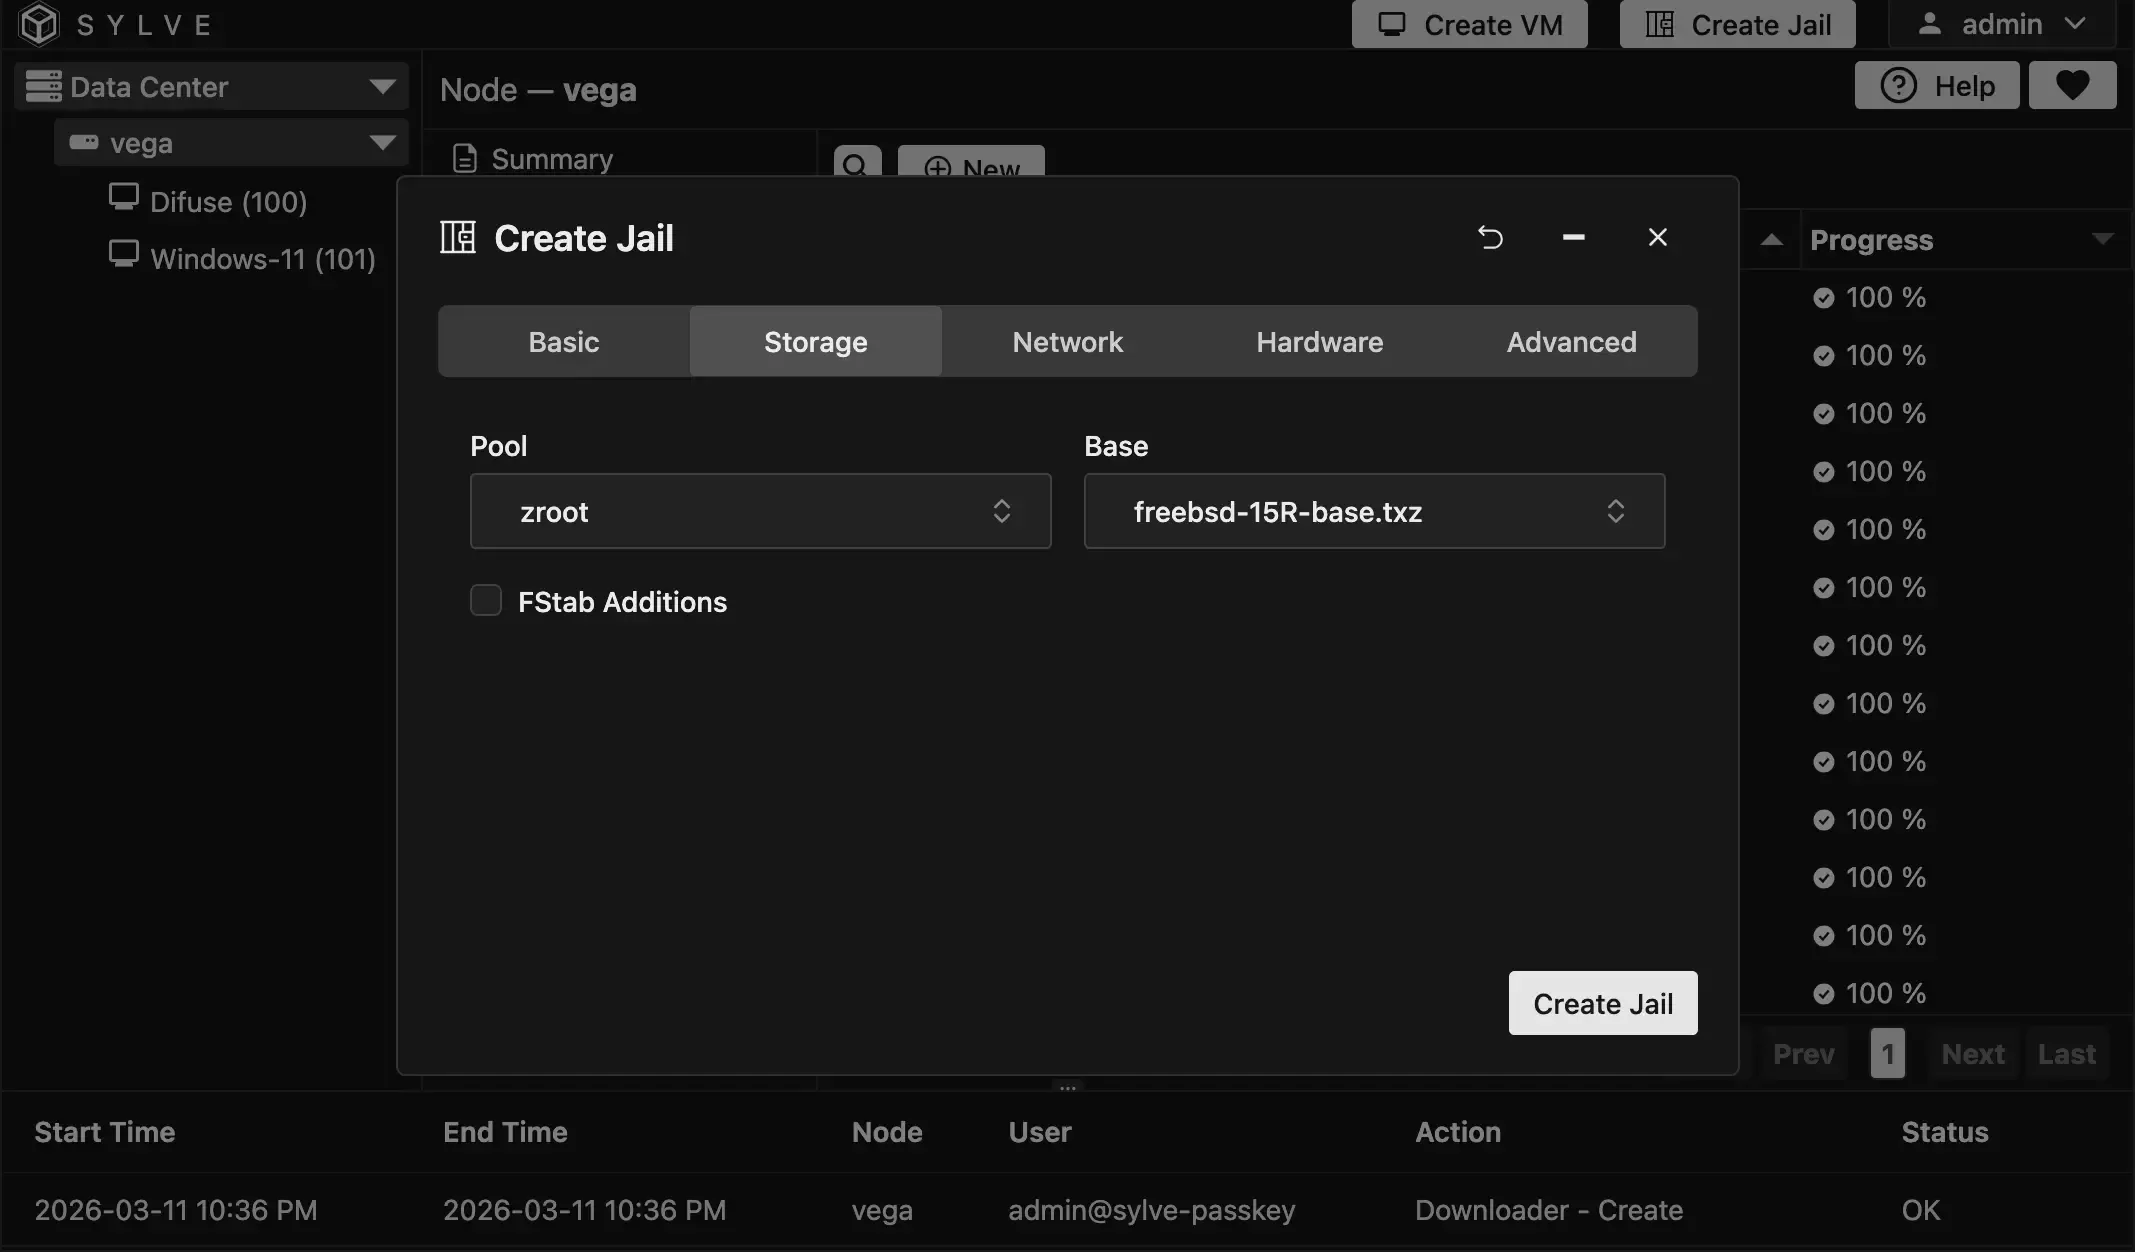
We don’t need FSTab additions for this jail so we can keep it unchecked.
- In the
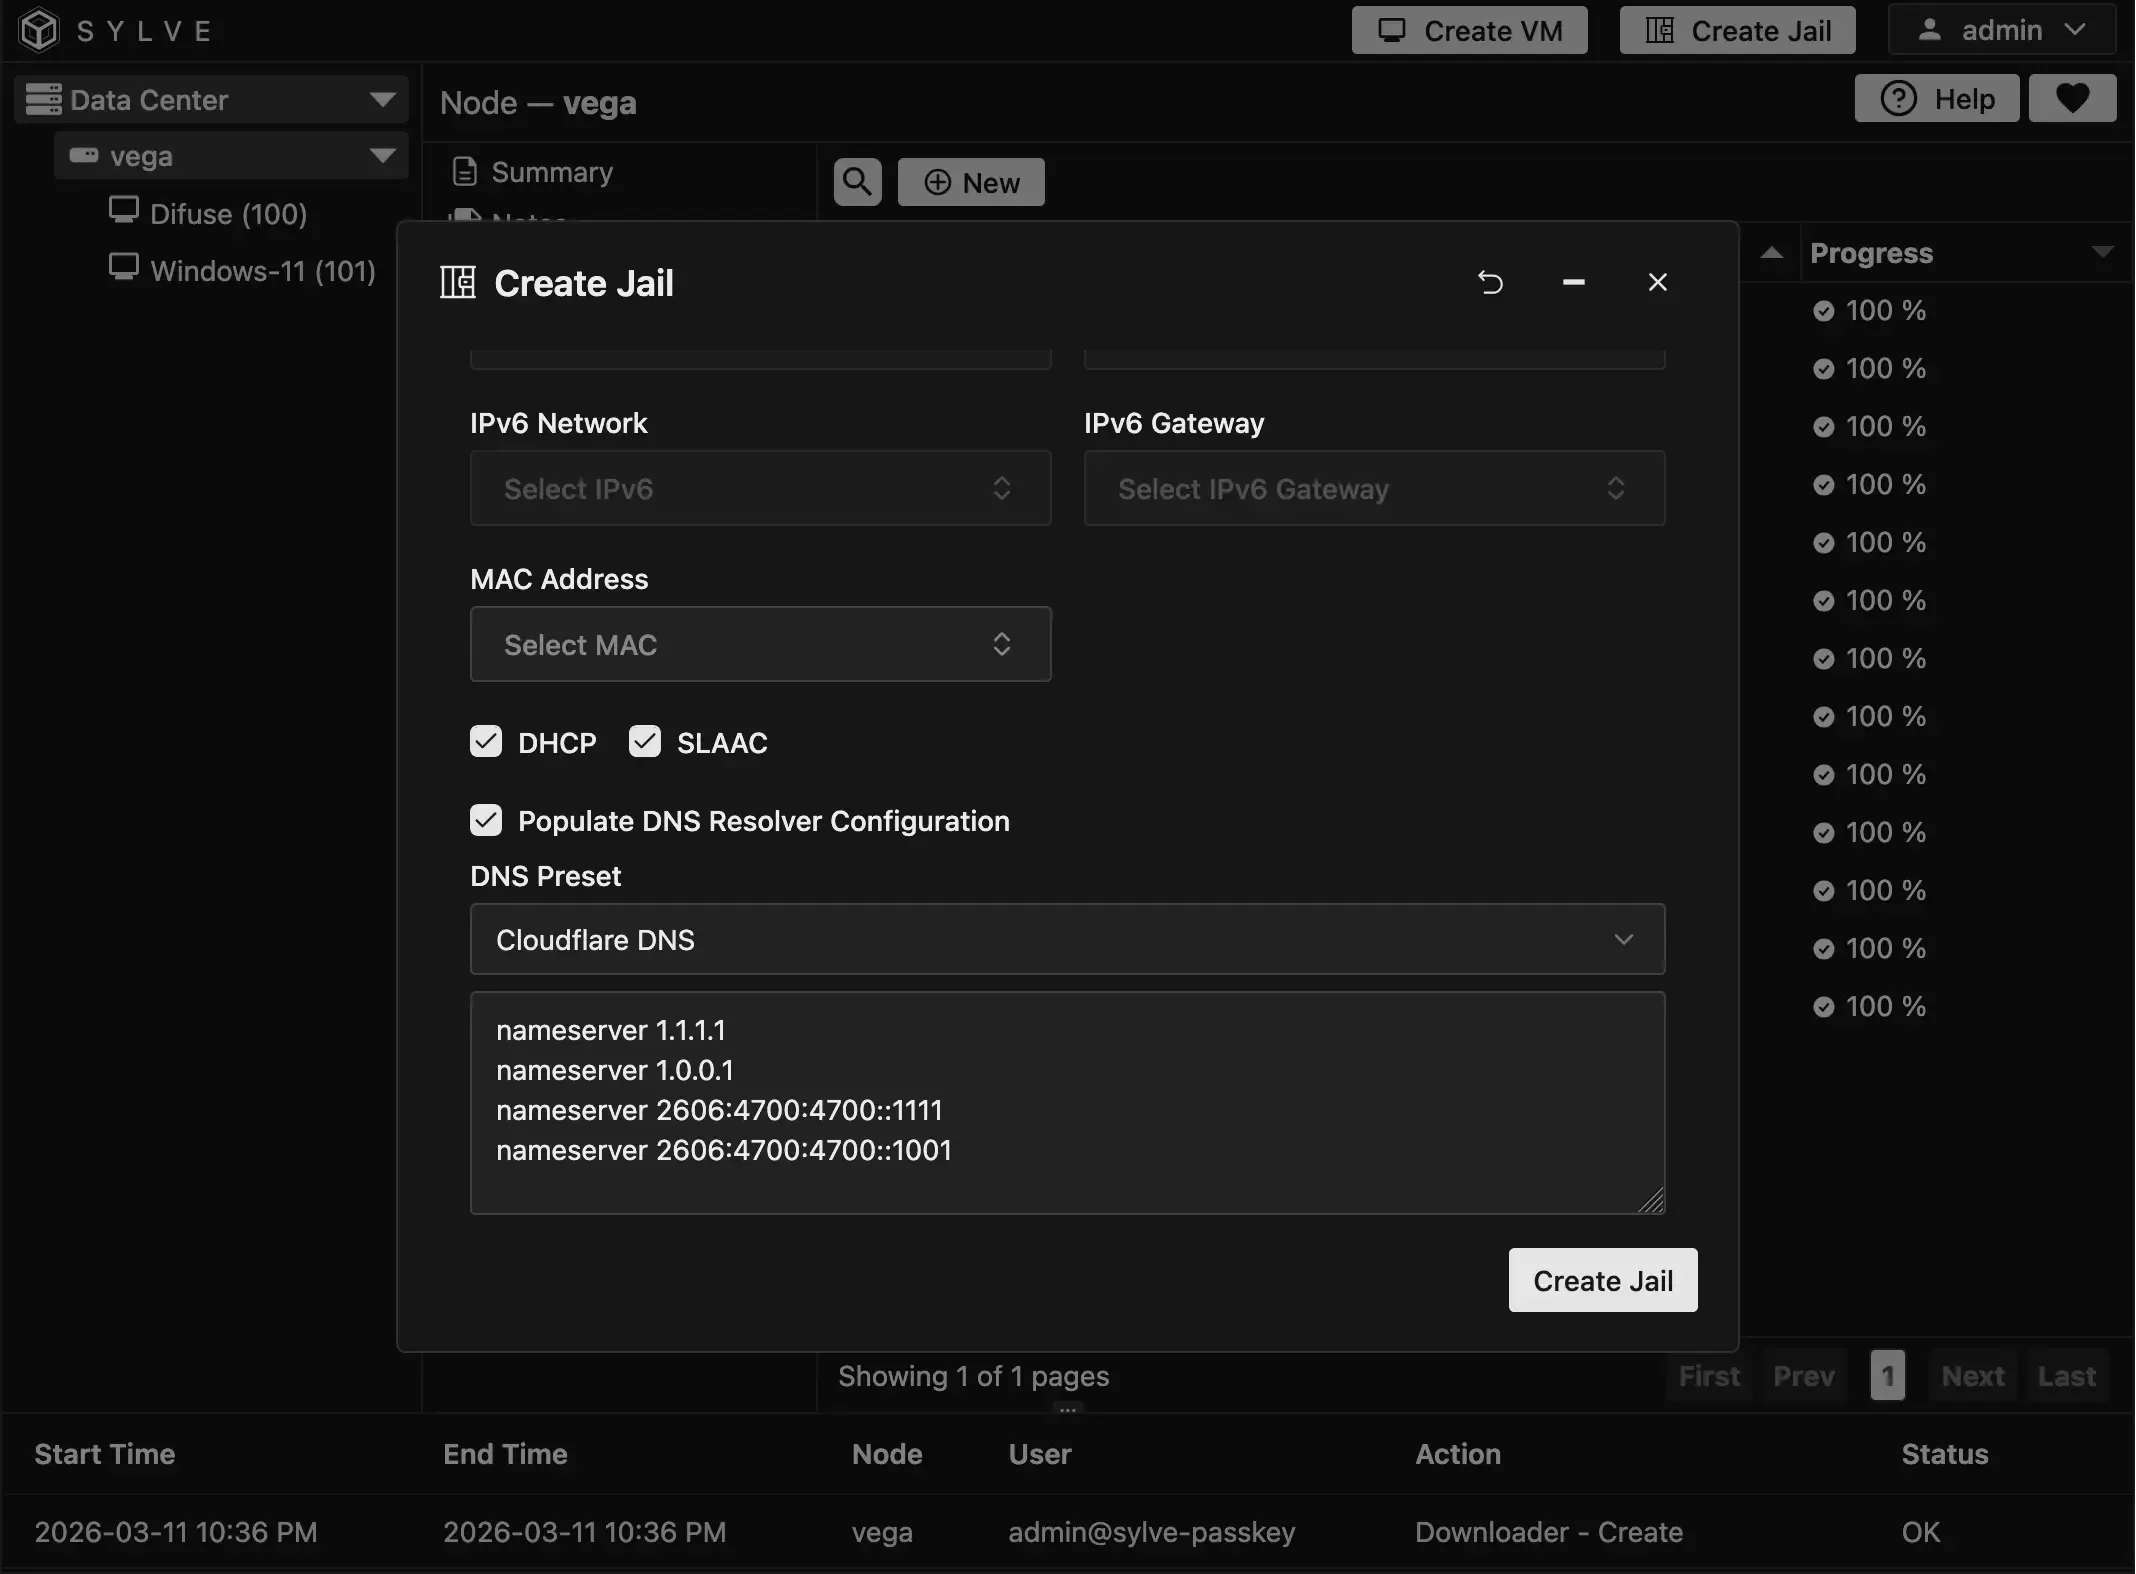
Networkstep, we highly recommend you use a a Standard or Manual switch, but for simplicity’s sake you could just use theInheritoption which will use the host’s network. If you choose to use a Standard or Manual switch, make sure to assign an IP address to the jail (or use DHCP/SLAAC). In our case, we’re going to use ourLANstandard switch:
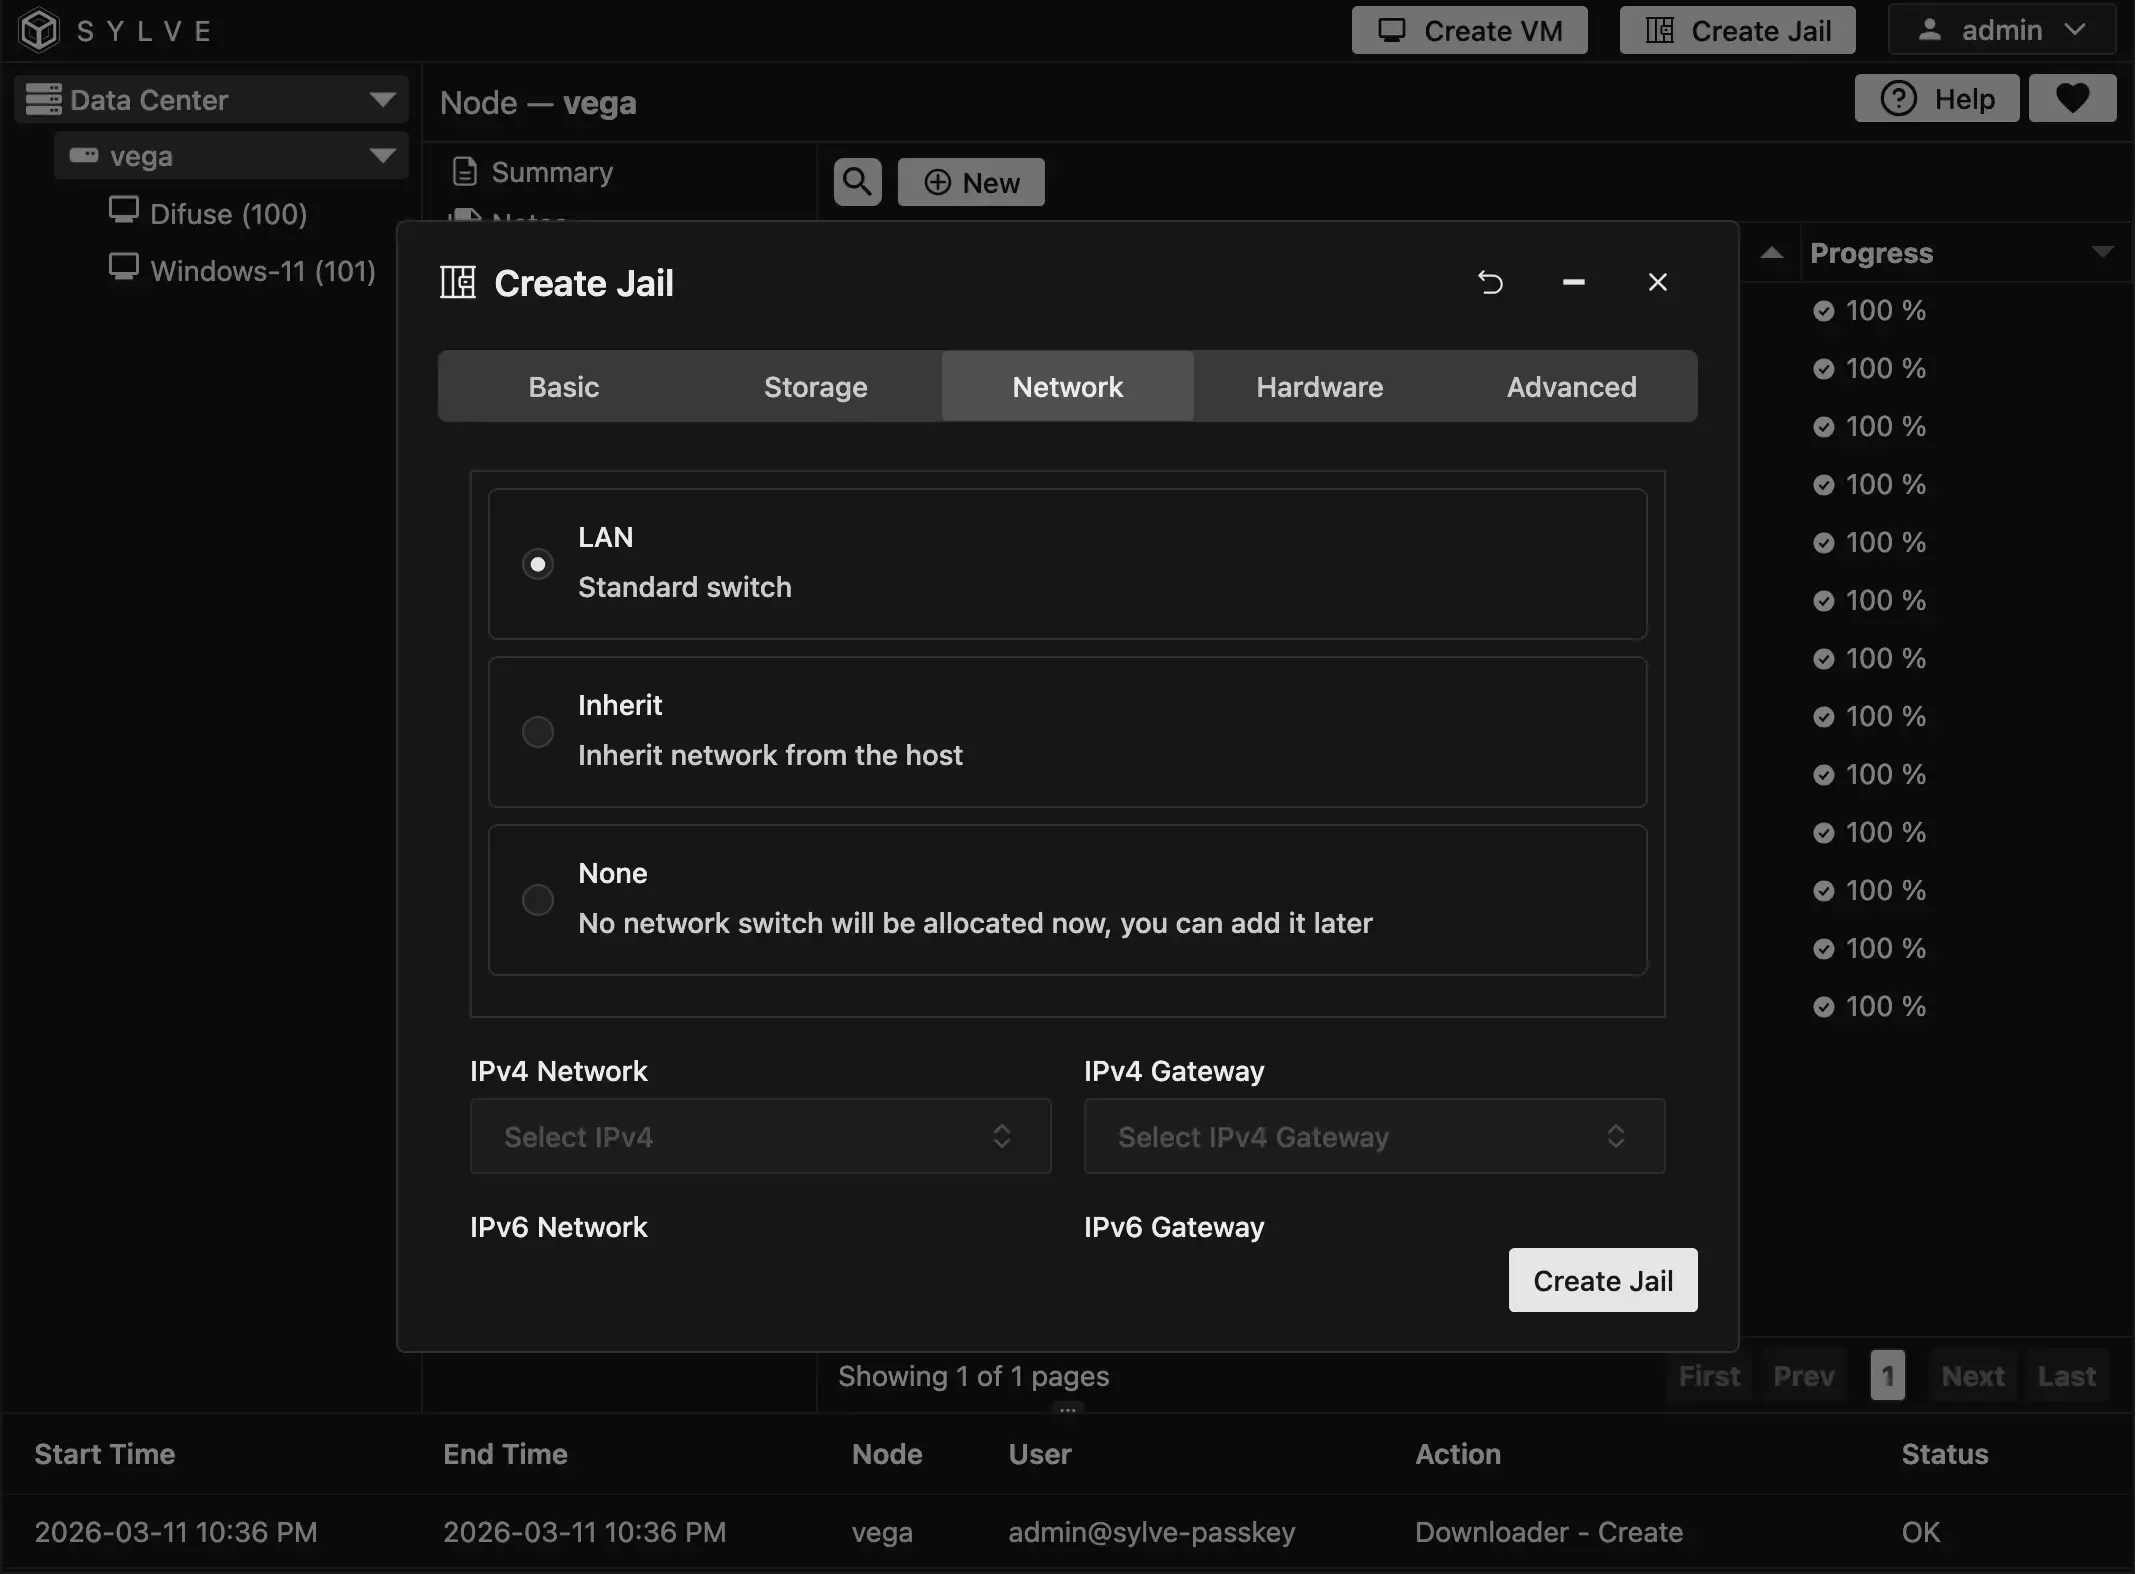
We also used the Populate DNS Resolver Configuration option which will let us specify custom DNS servers for the jail, but you can skip this if your upstream gateway (or switch) provides DNS addresses in the DHCP offer.
- In the Hardware step, things get a bit more interesting. Sylve uses
rctlto cap the jail’s CPU and RAM usage if resource limits are enabled. However, for a media server like Jellyfin it’s usually best to leave these limits disabled so the jail can use the resources it needs.
We also need a custom devfs ruleset to allow the jail to access the iGPU for hardware transcoding. You can click on the Custom Devfs Ruleset checkbox and fillout the form as follows:
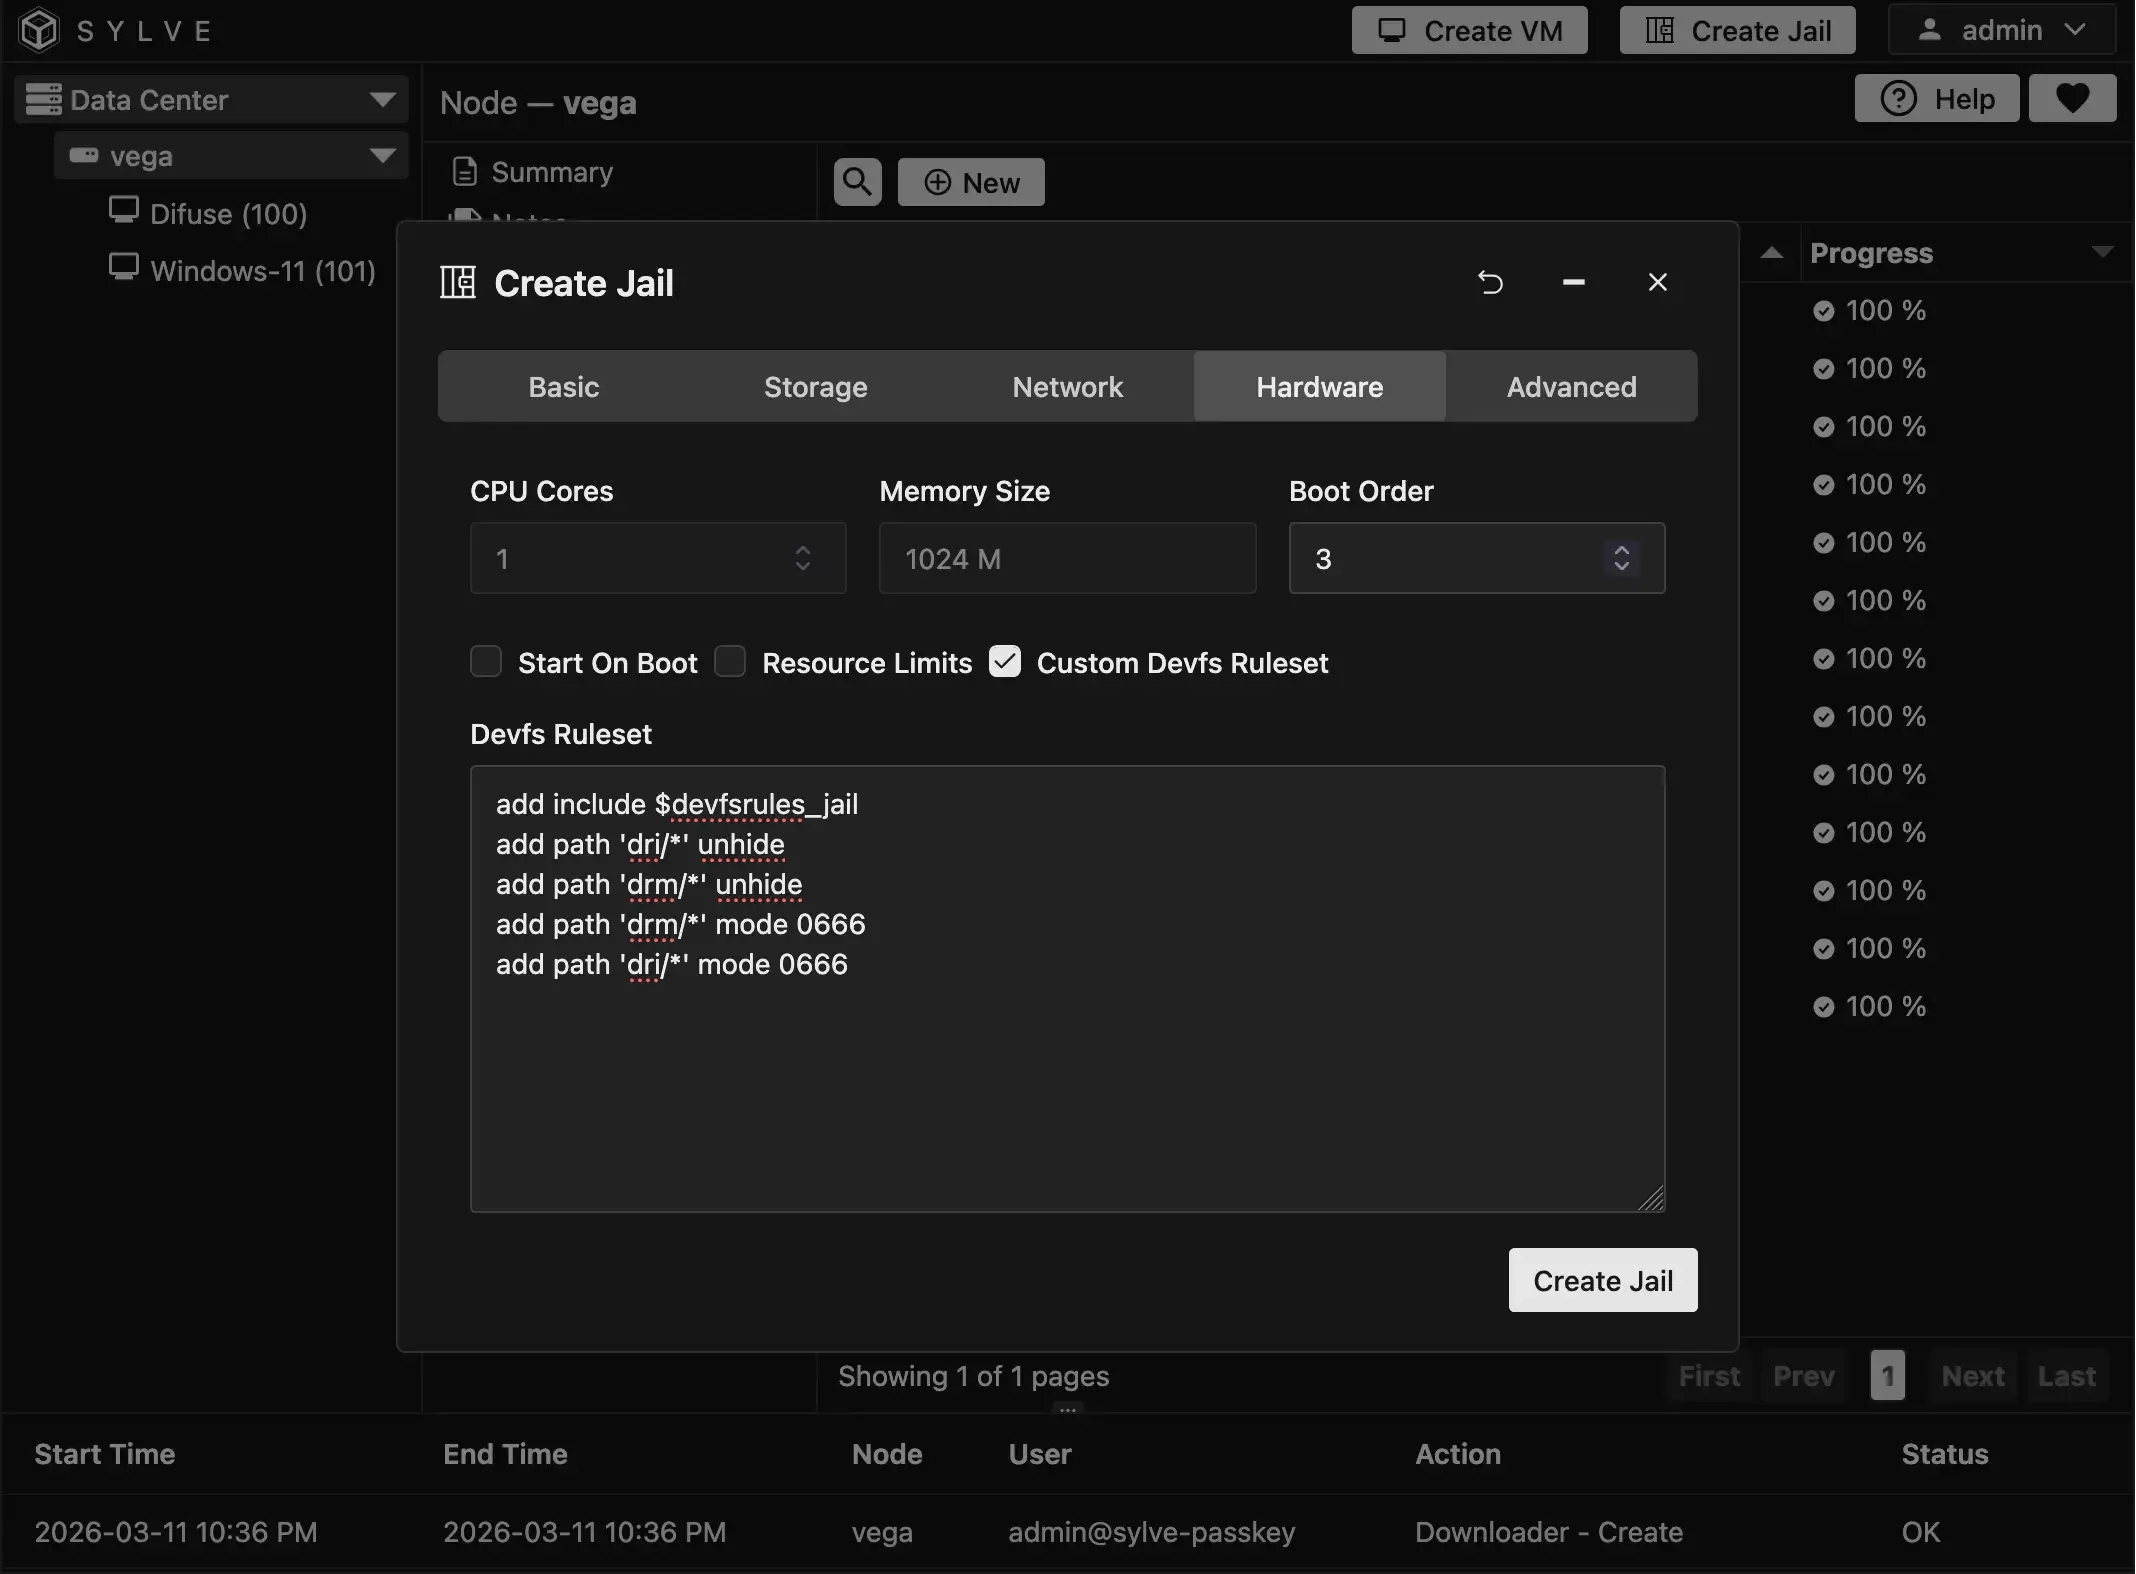
Here’s the configuration we used for the custom devfs ruleset so you can copy and paste it:
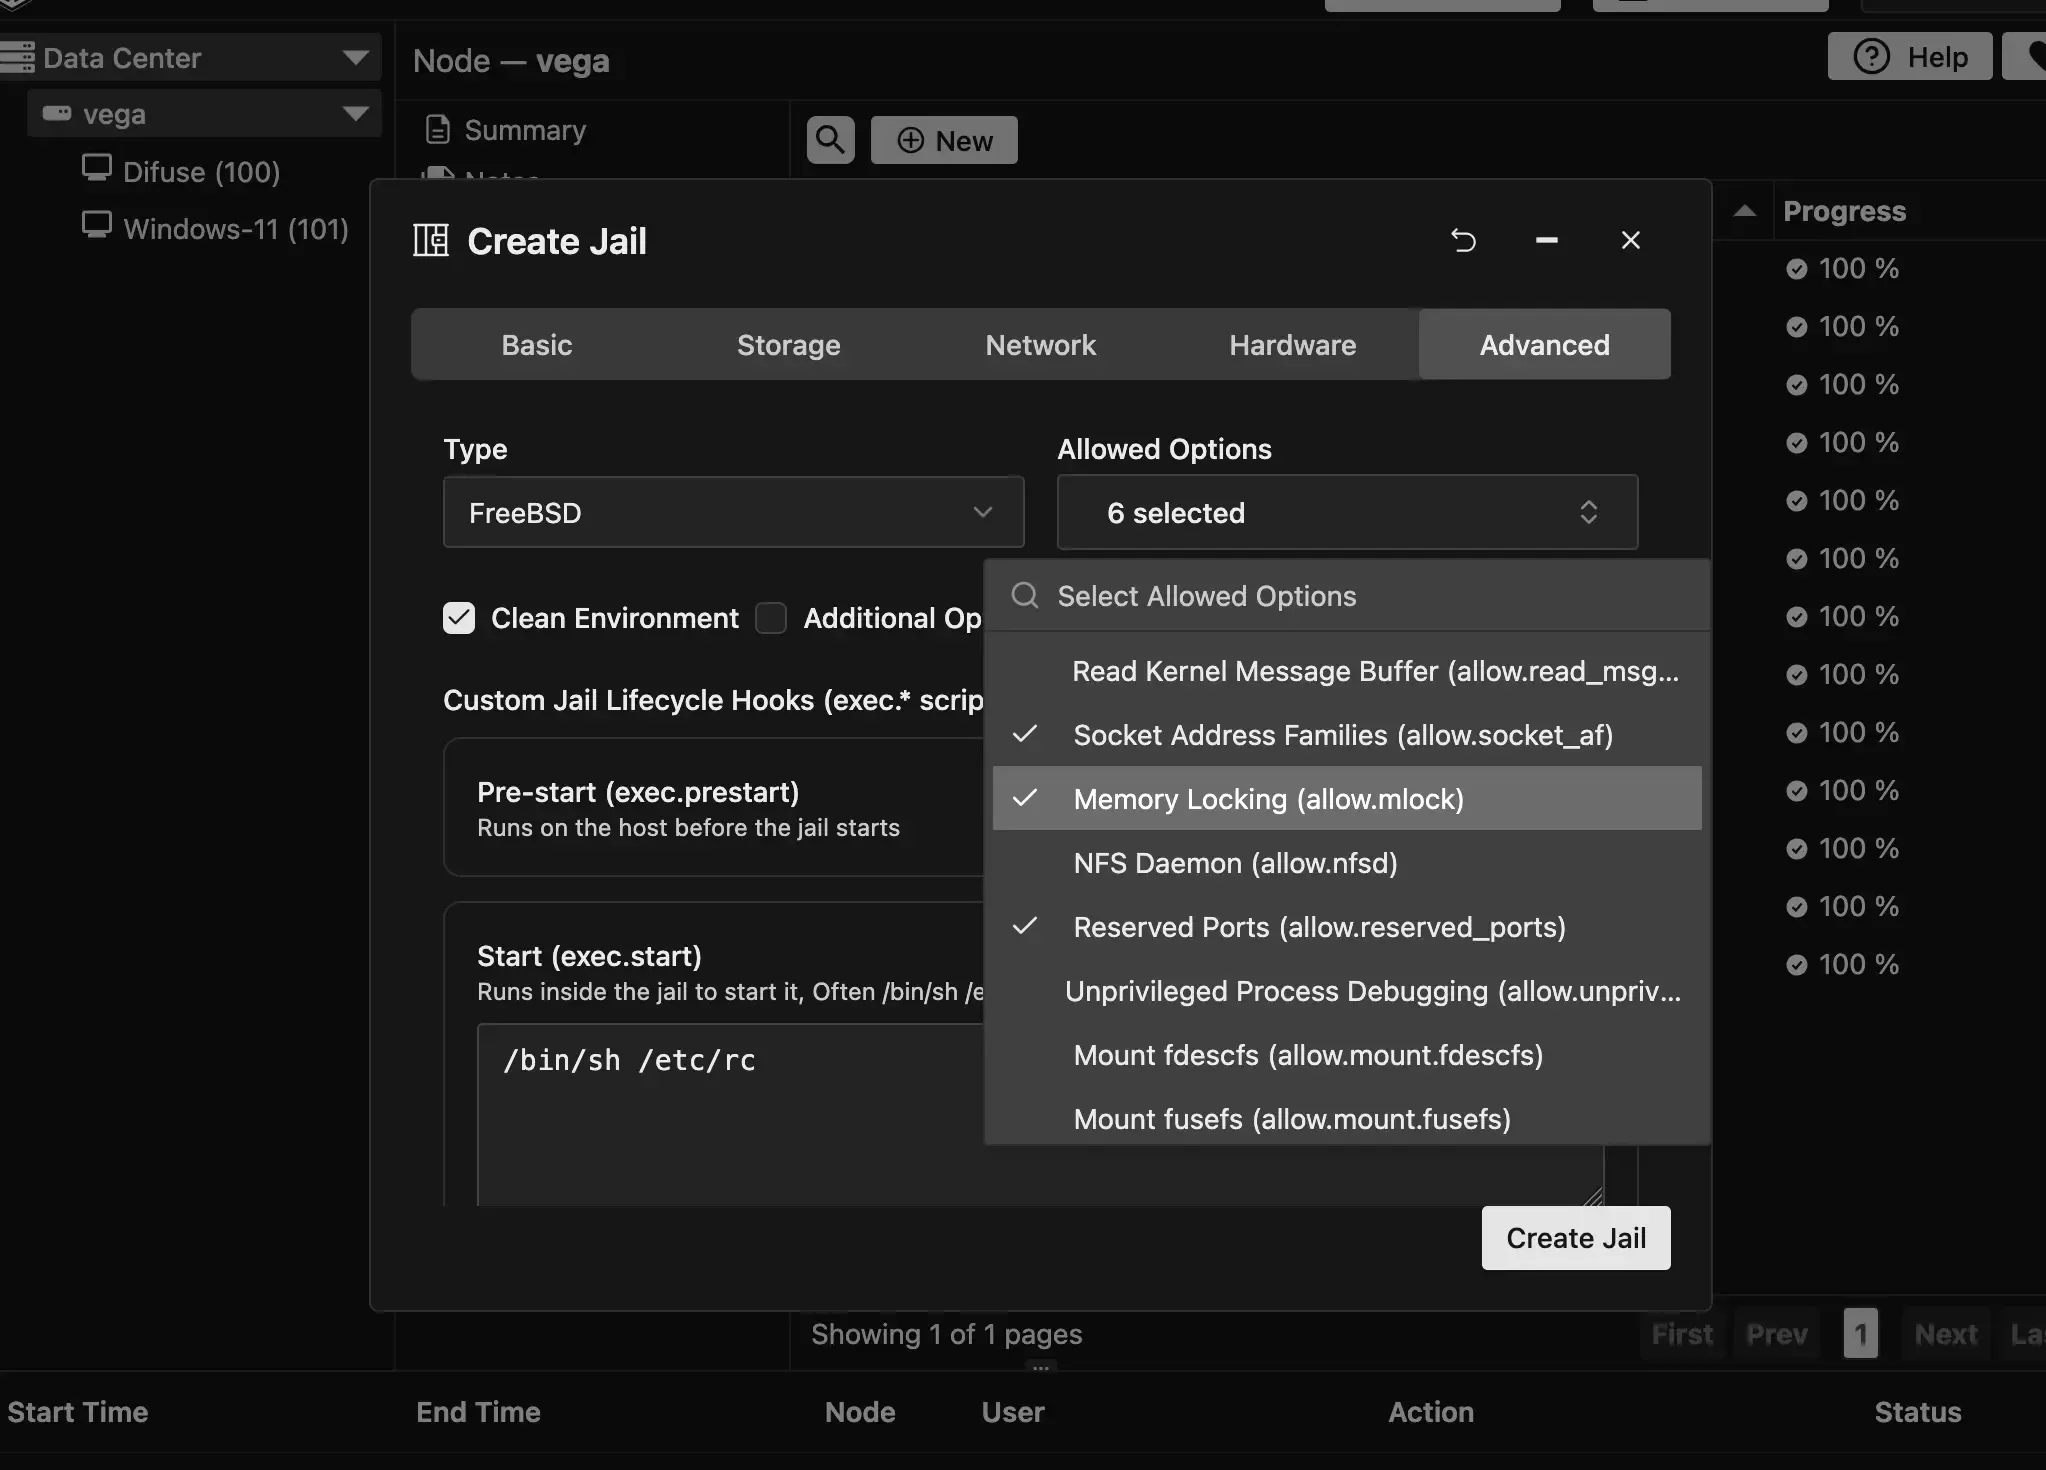
add include $devfsrules_jailadd path 'dri/*' unhideadd path 'drm/*' unhideadd path 'drm/*' mode 0666add path 'dri/*' mode 0666- Now in the last step
Advancedyou can keep most of the defaults but make sure to enableMemory Locking (allow.mlock)under the allowed options:
Now once that’s all done you should be good to go and you can click on Create Jail to setup your jail! If everything went well you should see your new jail in the sidebar list and once you navigate to it you should see something like this:
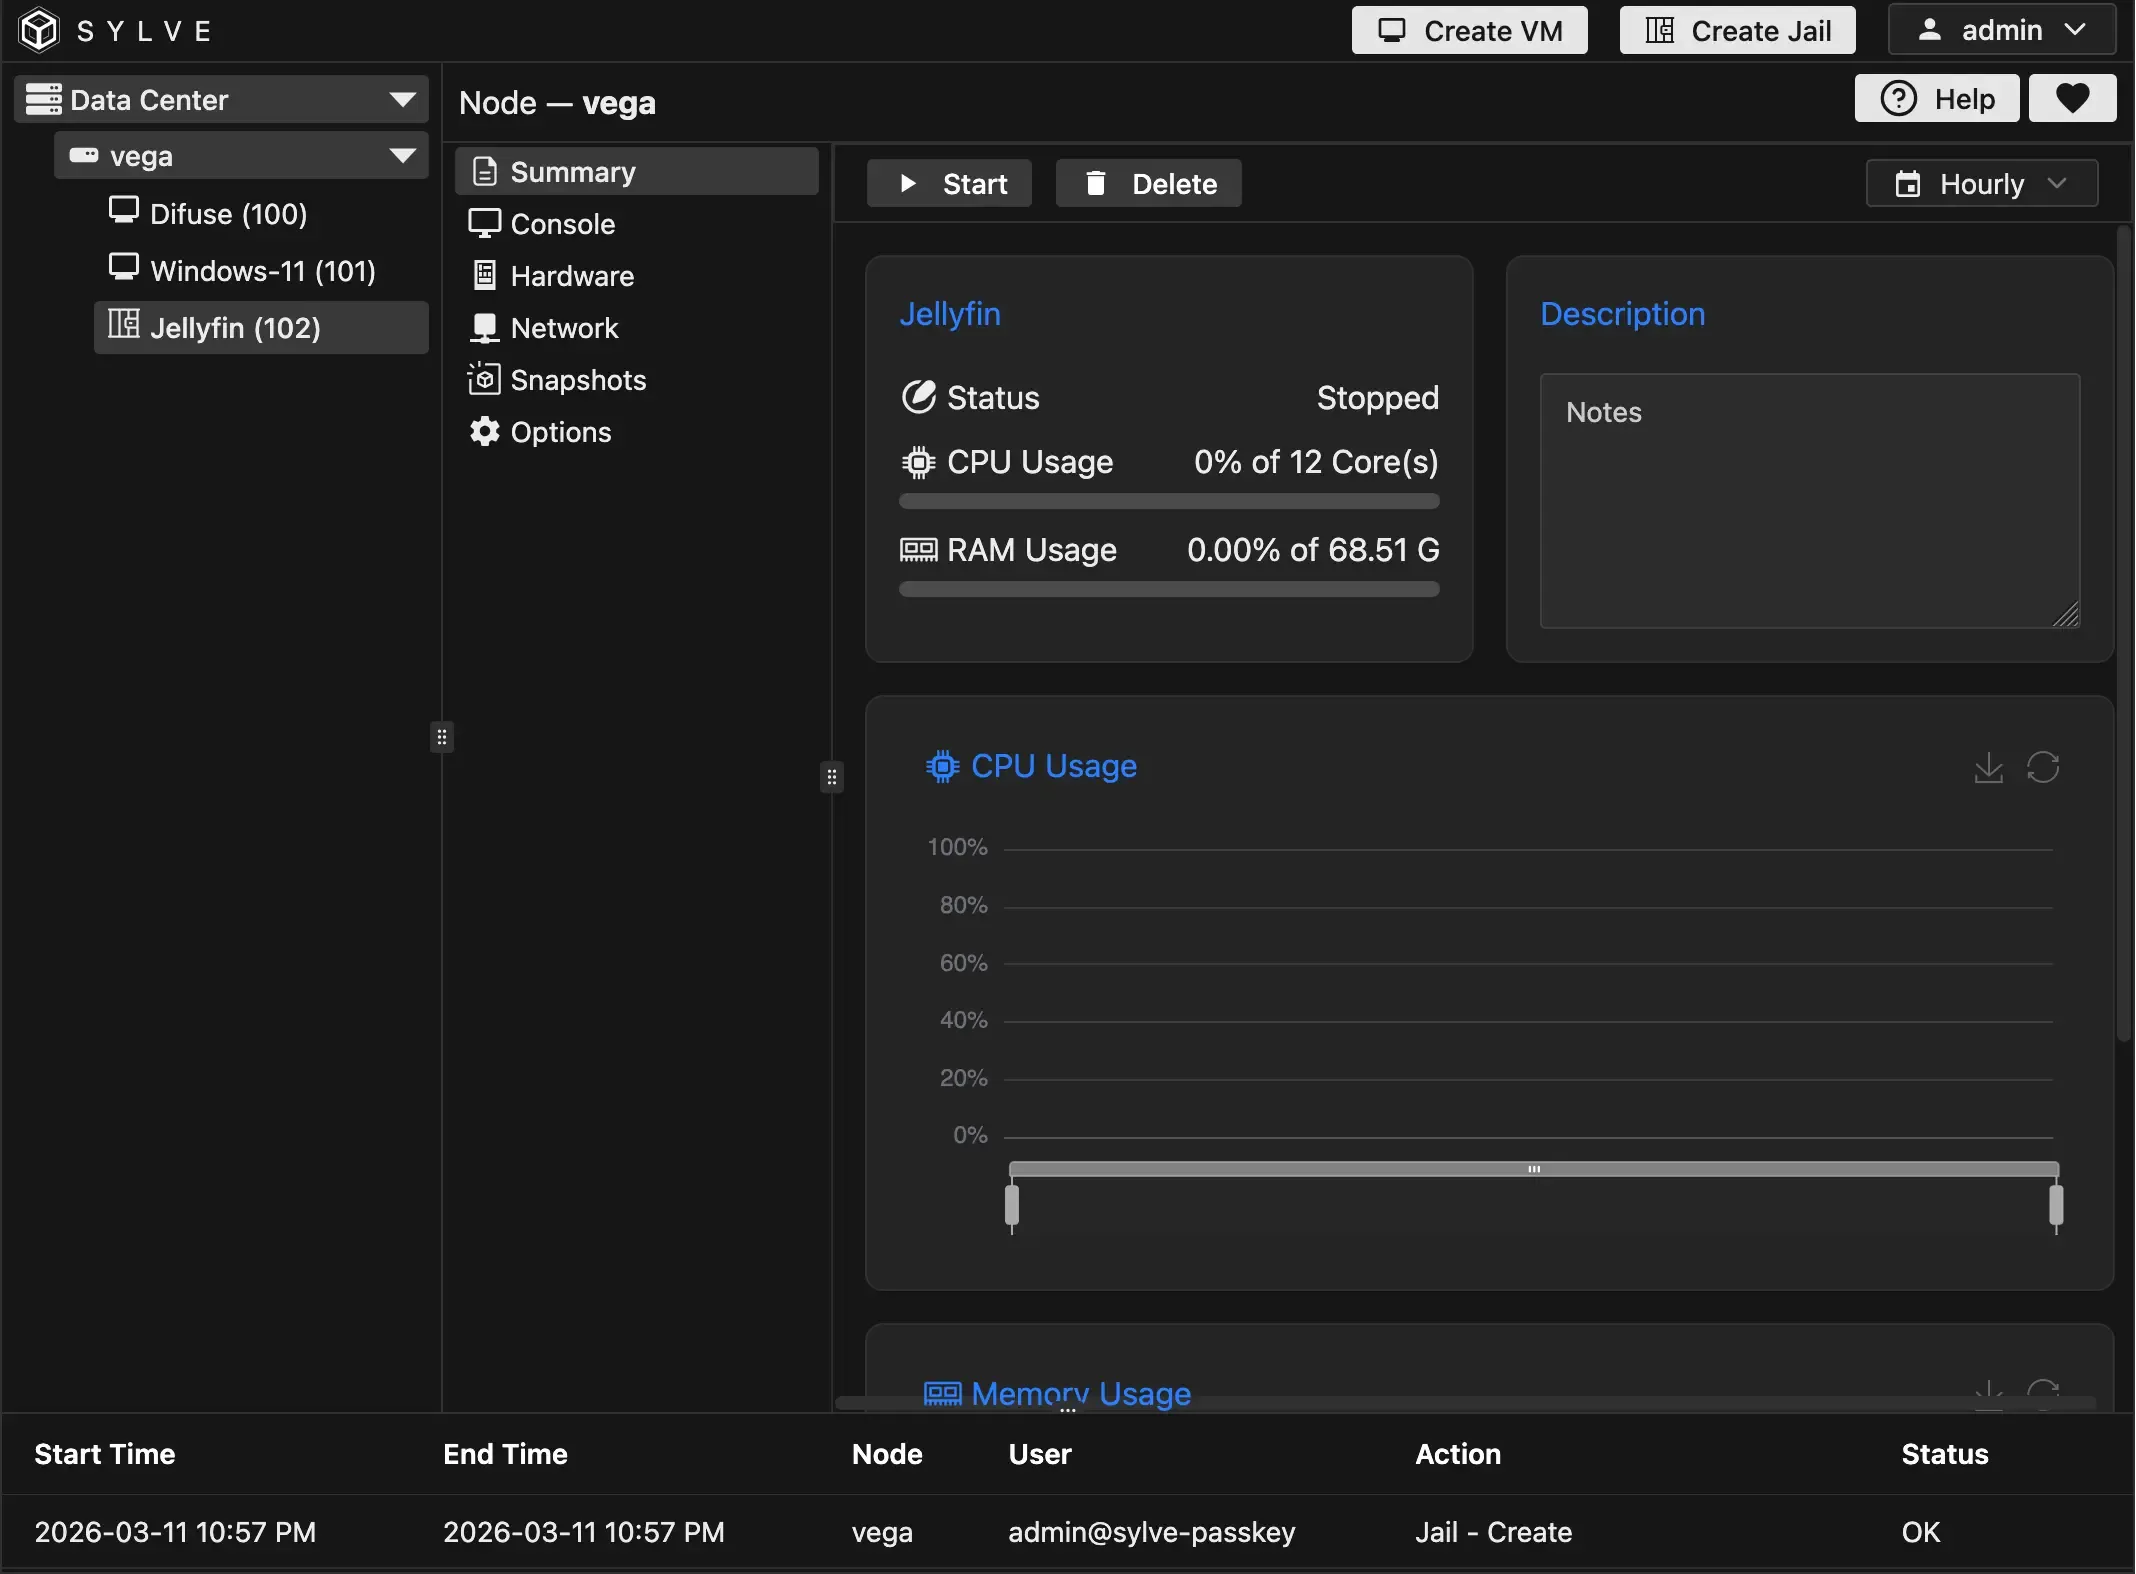
You can start the jail and then access it’s console so we can start installing and configuring Jellyfin!
Setting up Jellyfin
Section titled “Setting up Jellyfin”The first thing you can do when you’re inside your jail console is to update the package repository catalog and then install Jellyfin:
pkg updatepkg install jellyfin libva libva-utils libva-intel-media-driver gmmlibThe install may take a few minutes depending on your network speed since it has to download the jellyfin package and all of its dependencies (it’s a dotNET app!). libva, libva-utils, etc. are needed for hardware transcoding support, you can test if the iGPU is working properly by running vainfo after installing those packages, if you see a list of supported codecs then you’re good to go!
Once it’s done you can run the following command to enable the jellyfin service so it starts on boot:
service jellyfin enableNow that’s about it! You can access the web interface by navigating to http://<jail-ip>:8096 in your web browser and you should see the Jellyfin setup page where you can create your admin account and start adding media libraries.
For the media I like to keep it a part of the jail rootfs, so I just created a jellyfin folder inside /media/:
mkdir -p /media/jellyfin/moviesmkdir -p /media/jellyfin/tvmkdir -p /media/jellyfin/musicAnd then I added that folder as a media library in the Jellyfin web interface. You can also use external storage if you want, just make sure to mount it inside the jail and give the jail access to it.
For purposes of demonstration I populated the movies directory with sintel which is a free movie provided by the Blender Foundation, you can use it for testing transcoding and streaming performance.
Setting up Hardware Transcoding
Section titled “Setting up Hardware Transcoding”On jellifin’s web interface, navigate to Dashboard > Playback > Transcoding and make sure to select VAAPI as the hardware acceleration method. You can also adjust the transcoding settings here if you want, but the defaults should be fine for most use cases.
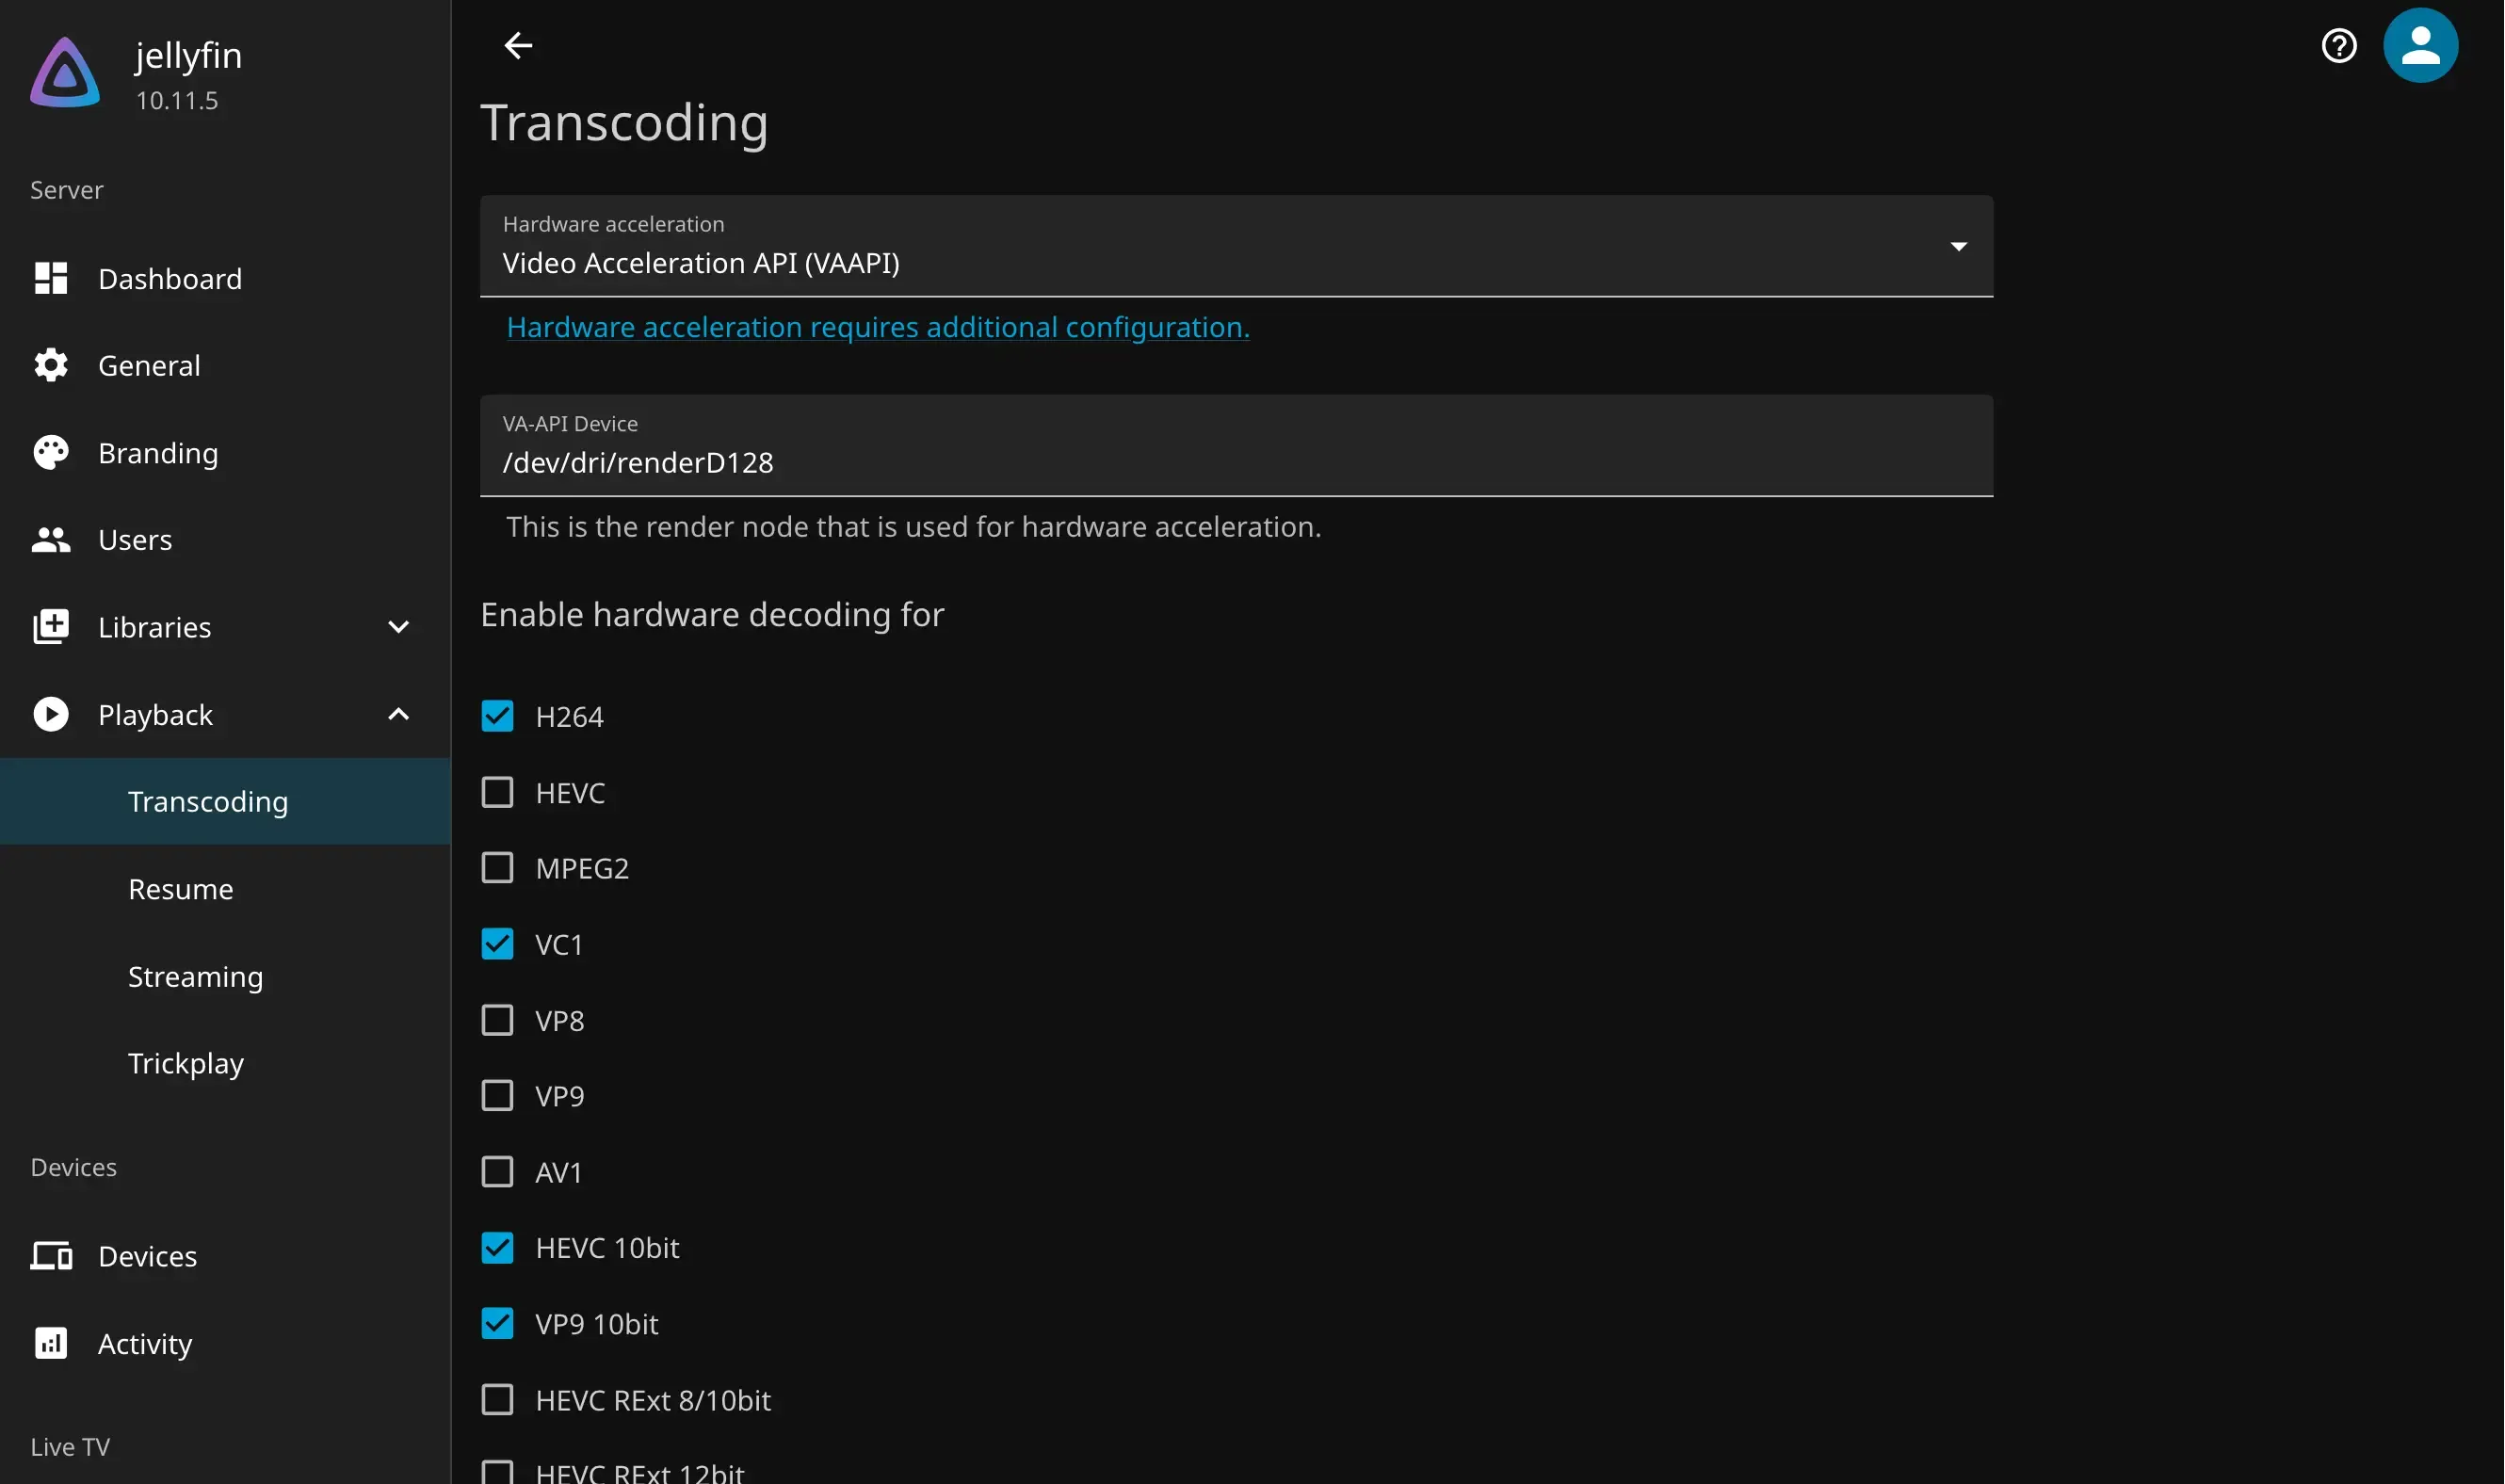
That should be pretty much it! You can now enjoy your media server with hardware-accelerated transcoding.
Sharing data storage with other jails
Section titled “Sharing data storage with other jails”After configuring Jellyfin, maybe you also want to integrate it with other software stack, like *arr, to have a fully fledged media library. Thanks to Sylve’s integration with ZFS, doing it is quite simple!
The following steps assume your other services are configured in different jails.
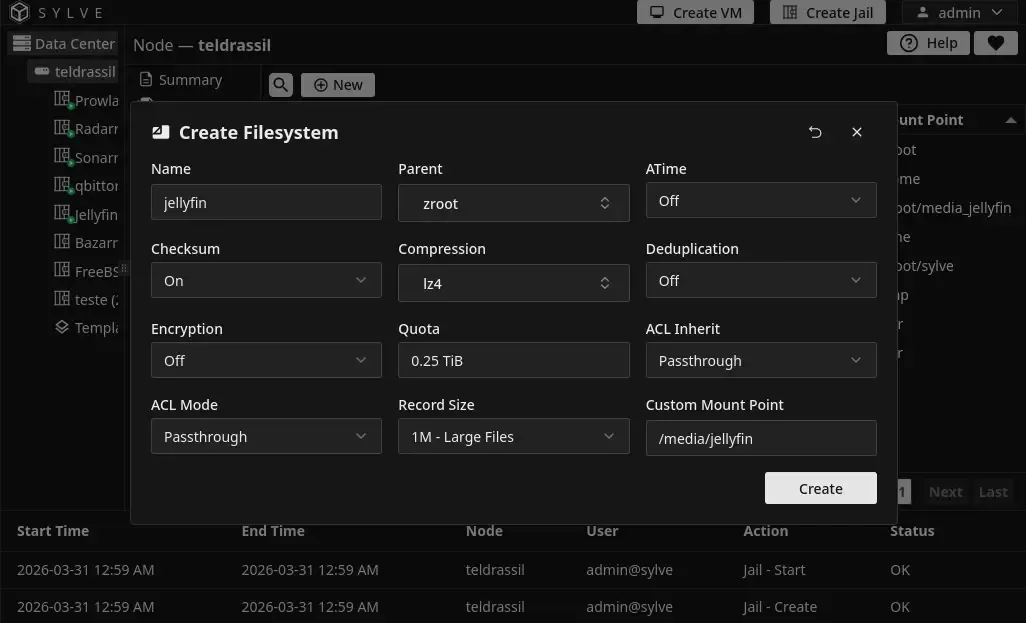
To begin, we should create a new ZFS dataset. A ZFS dataset acts as a separate filesystem, similar to BTRFS volumes. You can specify different options to a dataset, e.g., you can enable compression, configure record sizes, disable access time modification and you can even create complex access control lists to restrict access to your files.
Let’s get started with creating our ZFS dataset where we will store the media files used by our services and where Jellyfin can access this media.
- Go to your node and select
Storage > ZFS > Datasets > File Systems. Click New to create a new dataset.
- Now we need to mount the filesystem to our jails. You can add the dataset to a new jail directly through the UI, but I advise against it because you need to create the mount point before the jail is created, otherwise it won’t turn on.
In my case, I want to mount the new filesystem in /media/jellyfin, so this directory was already created on the jail itself.
Select an existing jail on your node (e.g. the newly created jail), go to Options > FSTab Entries and click Edit FSTab Entries.
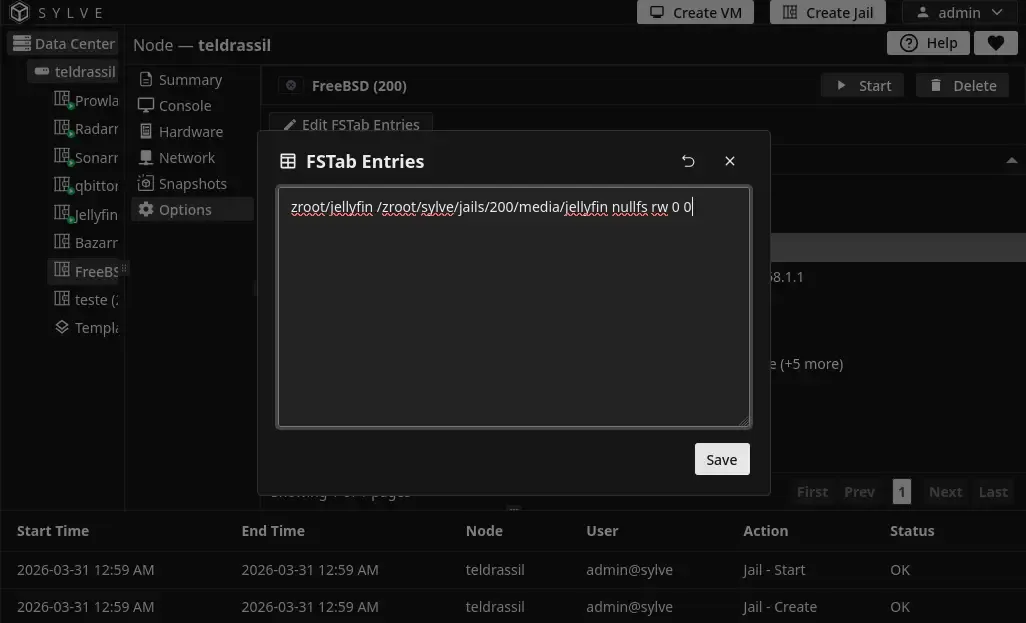
You can check the snippet for the fstab entry below. Make sure to replace <jail-id> with the ID of your jail.
# <device> <dir> <type> <options> <dump> <fsck>zroot/jellyfin /zroot/sylve/jails/<jail-id>/media/jellyfin nullfs rw 0 0- We have created the shared directory, now we need to setup the permissions for it, so that our different services can read and write to it.
One thing to keep in mind is that the user ID for the user account of your services might not be the same depending on your setup. That is, two different services may not share the same UID. Thankfully with ZFS ACLs, we can simply allow read-write access to overcome this issue.
Open a shell in your node and type the following command to add read, write and execute permissions for the Jellyfin user in our newly created filesystem. Jellyfin typically uses UID 868 in FreeBSD:
setfacl -m u:868:rwx:fd:allow /zroot/jellyfinAnd that’s it! If you have more jails you want to share the directory with, just repeat these simple steps, and make sure to add permissions for the new UIDs.