

Simple Jail
This guide is written for people starting from absolute zero and walks through the entire process from installation onward. If you have already completed some of the setup, use the page outline on the right to jump directly to the section relevant to you.
This guide requires Sylve 0.3.0 or newer. The built-in FreeBSD pkgbase bootstrap used below also requires a FreeBSD 15.0 or newer host. The screens and workflow described here may not be available in earlier Sylve releases.
Install Sylve
Section titled “Install Sylve”On the FreeBSD node, install Sylve from the package repository as root:
pkg install sylveAfter the installation completes, enable Sylve so it starts automatically when FreeBSD boots, then start it now:
service sylve enableservice sylve startOpen https://<your-node-ip>:8181 in a browser. A fresh package installation uses admin as both the username and password. Change these default credentials before exposing the node to an untrusted network. You can follow the account guidance in Getting Started or sign in, open Settings → Authentication → Users → Local, and edit the built-in administrator from the Local Users page.
Confirm the installed version
Section titled “Confirm the installed version”Sign in to the web interface and open the node’s Summary page. Find the Sylve version and confirm that it is 0.3.0 or newer.
You can also check the installed version from the command line:
sylve --versionConfirm that the command reports version 0.3.0 or newer before continuing.
Initialize Sylve for jails
Section titled “Initialize Sylve for jails”Sylve must have its Jails service enabled before it can create or manage jails. How you enable it depends on whether the node has already been initialized.
During first-time initialization
Section titled “During first-time initialization”After your first sign-in, Sylve opens the initialization dialog automatically. Select a ZFS pool that Sylve may use, enable Jails under Compute, and then select Initialize.
The initialization check verifies that FreeBSD resource accounting is enabled through kern.racct.enable and that jail filesystem visibility is restricted through security.jail.enforce_statfs. If resource accounting is not enabled, Sylve can add the required boot-time setting and require a reboot. Resolve any validation error shown by the dialog before continuing.
For a complete explanation of the first-time setup screen, see Initialization.
On an initialized node
Section titled “On an initialized node”If the node was initialized without jail support, open Settings → System → Services, select the Jails row, and select Enable. Confirm the change when prompted.
After the node returns, sign in again and confirm that Jails is shown as enabled under System Services.
Prepare the host networking
Section titled “Prepare the host networking”A jail has a virtual network cable, but that cable still needs a way to reach the physical network. A bridge provides that connection.
Think of a bridge as a small Ethernet switch living inside the FreeBSD host. The node’s physical interface, such as em0, plugs into one side. Virtual interfaces belonging to jails plug into the other side. The bridge passes network traffic between them, allowing the jails to communicate with the same network as the host.
In this guide, Sylve will create and manage that bridge as a Standard Switch. It will attach the node’s existing em0 interface as a physical port, then new jails can attach their virtual interfaces to the same switch.
What this demonstrates: a Standard Switch is a software Ethernet bridge inside the FreeBSD host. It forwards Ethernet frames like a physical switch, while the bridge interface itself can hold the host's IP address. Physical interfaces such as em0 and host-side epair ends such as epair0a occupy its ports. The matching epair0b end is moved into the jail's VNET network stack.
For every switch-backed VNET jail, Sylve creates an epair, which is a connected pair of virtual Ethernet interfaces. The a end stays on the host and joins the Standard Switch bridge. The matching b end moves into the jail’s private VNET network stack. Together, the two ends behave like the two ends of a virtual Ethernet cable.
Your interface may have a different name. Open Network → Interfaces and identify the physical interface that currently provides network access before continuing. Substitute that name wherever this guide uses em0.
Record the current host configuration
Section titled “Record the current host configuration”This guide assumes that em0 is already configured in /etc/rc.conf with either DHCP or a static address. A DHCP configuration commonly looks like this:
ifconfig_em0="DHCP"A static configuration commonly looks like this:
ifconfig_em0="inet 192.168.1.10/24"defaultrouter="192.168.1.1"Use the values already assigned to your node. Do not copy the example address unless it matches your network.
Before creating the switch, remove the physical port’s DHCP, static address, aliases, and IPv6 router-advertisement settings from /etc/rc.conf. For this guide, em0 should either be omitted or retained only as a layer-2 interface:
ifconfig_em0="up"For a static configuration, also remove the old defaultrouter entry after recording its value. The Standard Switch will own the host address and default route after creation. Editing rc.conf does not remove the address from the currently running interface, so do not restart networking between this step and creating the switch.
Create a Standard Switch
Section titled “Create a Standard Switch”Open Network → Switches → Standard, select New, and configure the switch:
- Enter
WANas the switch name. - Leave MTU and VLAN at their defaults unless your physical network requires different values.
- If
em0currently uses DHCP, enable DHCP. Enable Use DHCP Default Route because this is the node’s uplink. - If
em0has a static address, enter that same host address in CIDR notation under IPv4 Network, enter its next-hop router under IPv4 Gateway, and enable IPv4 Default Route. - Select
em0, or your equivalent physical interface, under Ports. - Under Bridge MAC source, select Use port MAC, then select
em0as the MAC source port. Confirm that an Effective MAC is shown. - Leave Private disabled so guests can communicate through the physical network.
- Leave Disable Bridge Offloads enabled.
- Select Create.
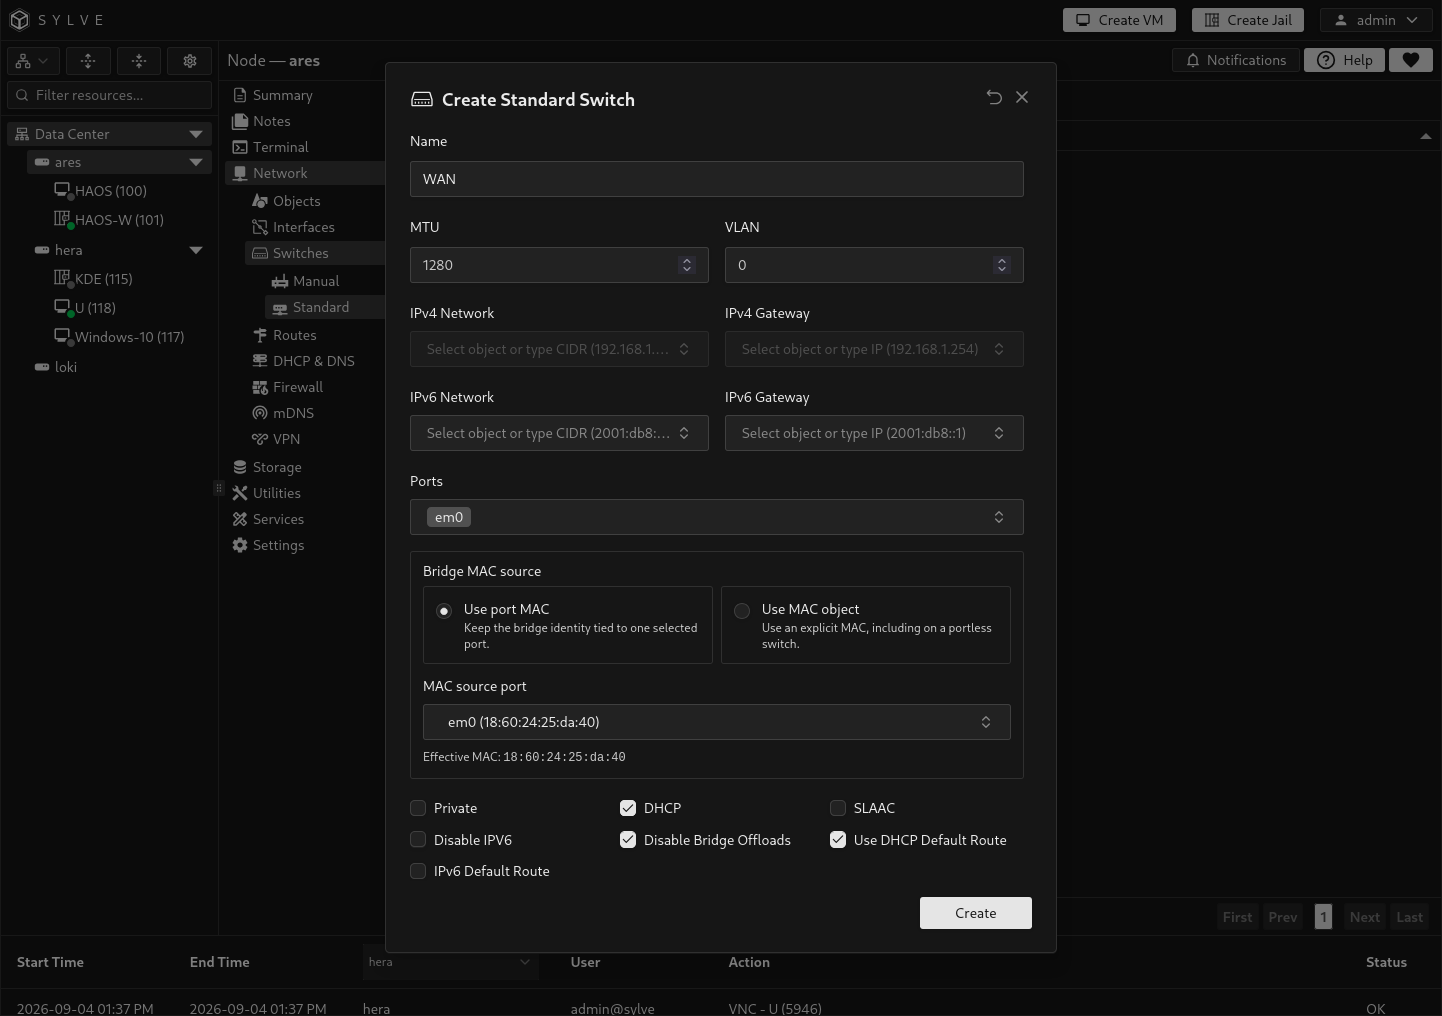
Because em0 still has its live management address, Sylve warns that converting it to a bridge member will remove that address. Confirm that the replacement configuration is present on the switch, then select Continue.
If a second warning says that em0 has configuration outside Sylve’s managed Standard Switches, select Cancel and check rc.conf again. Do not continue until DHCP, static addresses, aliases, accept_rtadv, and ownership by any other bridge have been removed from the physical port. Sylve’s confirmation does not rewrite that external configuration. The example below reports that em0 is still assigned to bridge0.
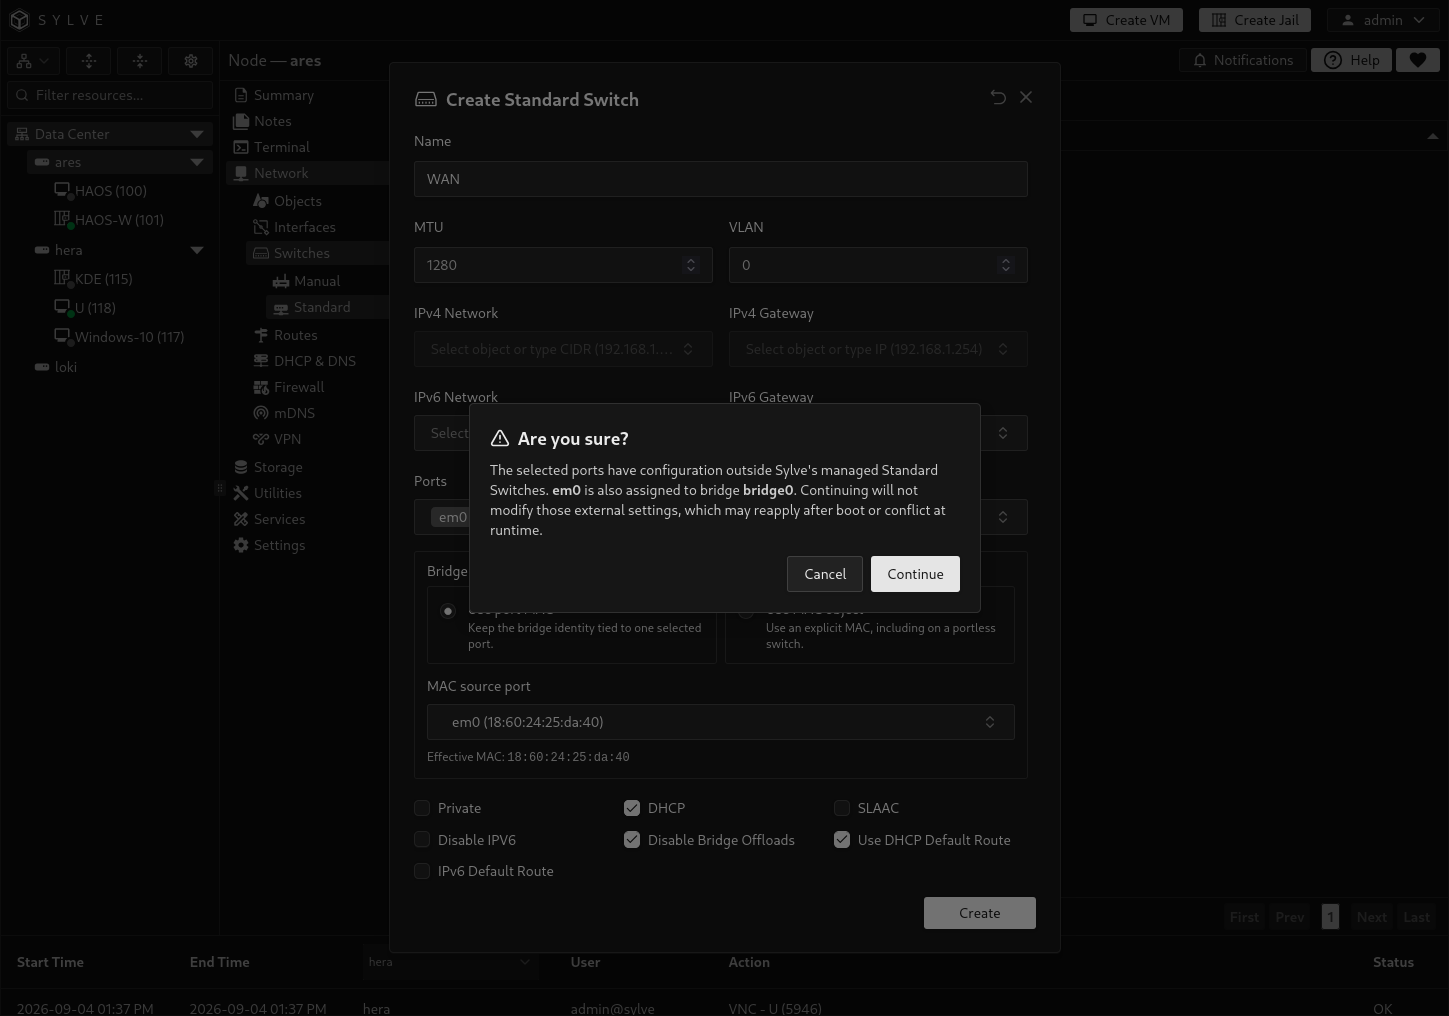
When the switch is created, Sylve clears the live addresses from em0, attaches it to a managed FreeBSD bridge, and applies the selected network configuration to that bridge. Keep layer-3 configuration off em0, and do not add the Sylve-managed bridge to rc.conf. Sylve manages the bridge from the saved Standard Switch configuration.
After connectivity returns, confirm that the WAN switch appears in the Standard Switches table. It should show em0 under Ports and either DHCP or the configured static address under IPv4. A DHCP lease is not guaranteed to reuse the node’s previous address, so reconnect using the address assigned to the bridge if it changes.
For a complete explanation of every field and network mode, see Standard Switches.
Bootstrap a FreeBSD jail base
Section titled “Bootstrap a FreeBSD jail base”A jail shares the host kernel, but it still needs its own FreeBSD userland. Sylve can prepare that userland as a reusable ZFS dataset through FreeBSD pkgbase. Each jail created from it receives an independent copy.
Select Create Jail, open the Storage tab, and select the ZFS pool that will contain the jail. Then select the download-box action beside Base to open Bootstrap Jail Bases.
Choose the newest Base release that is not newer than the host:
- On a FreeBSD 15.1 or newer host, select Bootstrap beside FreeBSD 15.1 Base.
- On a FreeBSD 15.0 host, select Bootstrap beside FreeBSD 15.0 Base.
The dialog only lists releases supported by Sylve and compatible with the current host. This guide uses the Base variant because its broader userland is a comfortable starting point for a first jail. The Minimal variant uses less storage and is useful when you already know which components the workload needs.
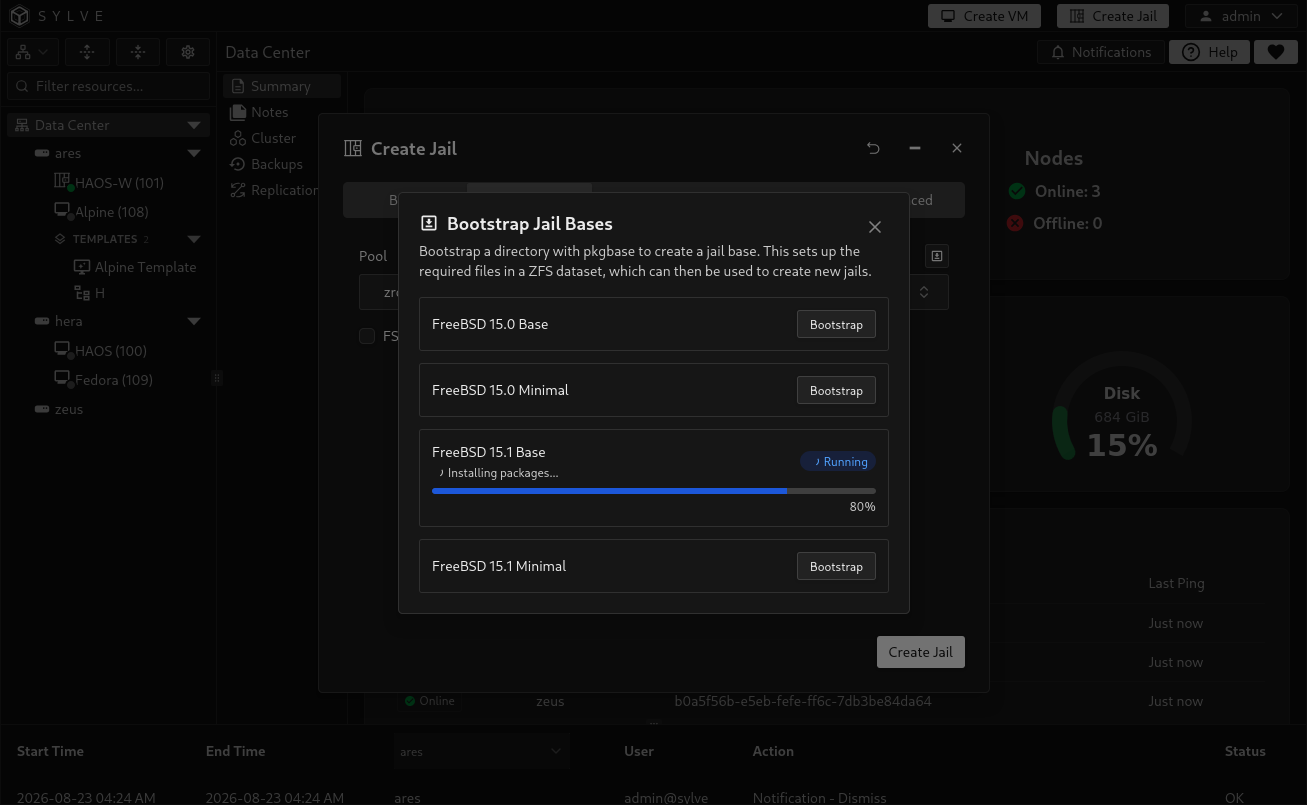
Bootstrapping creates a dataset below <pool>/sylve/bootstraps, retrieves the signed pkgbase repository metadata, installs the selected FreeBSD set and pkg, and writes the initial jail files. The package installation can take several minutes.
Keep the dialog open until the selected entry reports Installed. If it fails, read the reported phase and error, clear or retry the failed bootstrap, and do not select it as a base until installation completes.
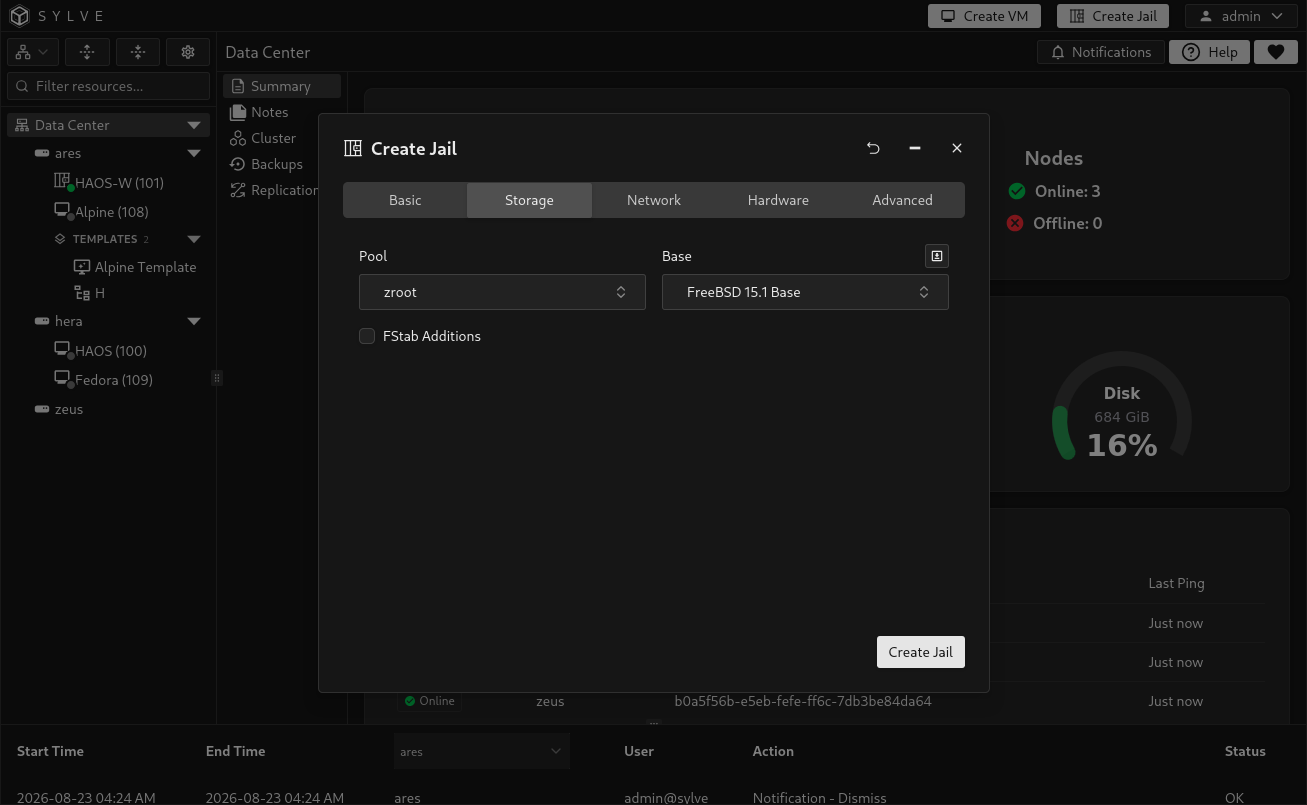
Close the bootstrap dialog, then select the installed FreeBSD Base in the Base field. Leave the Create Jail wizard open for the next section.
Create the jail
Section titled “Create the jail”The creation wizard groups the jail’s identity, root filesystem, network, resource limits, and runtime behavior into separate tabs. The values below create a small FreeBSD jail for AdGuard Home with one CPU core, 1 GiB of memory, and its own DHCP address on the WAN switch.
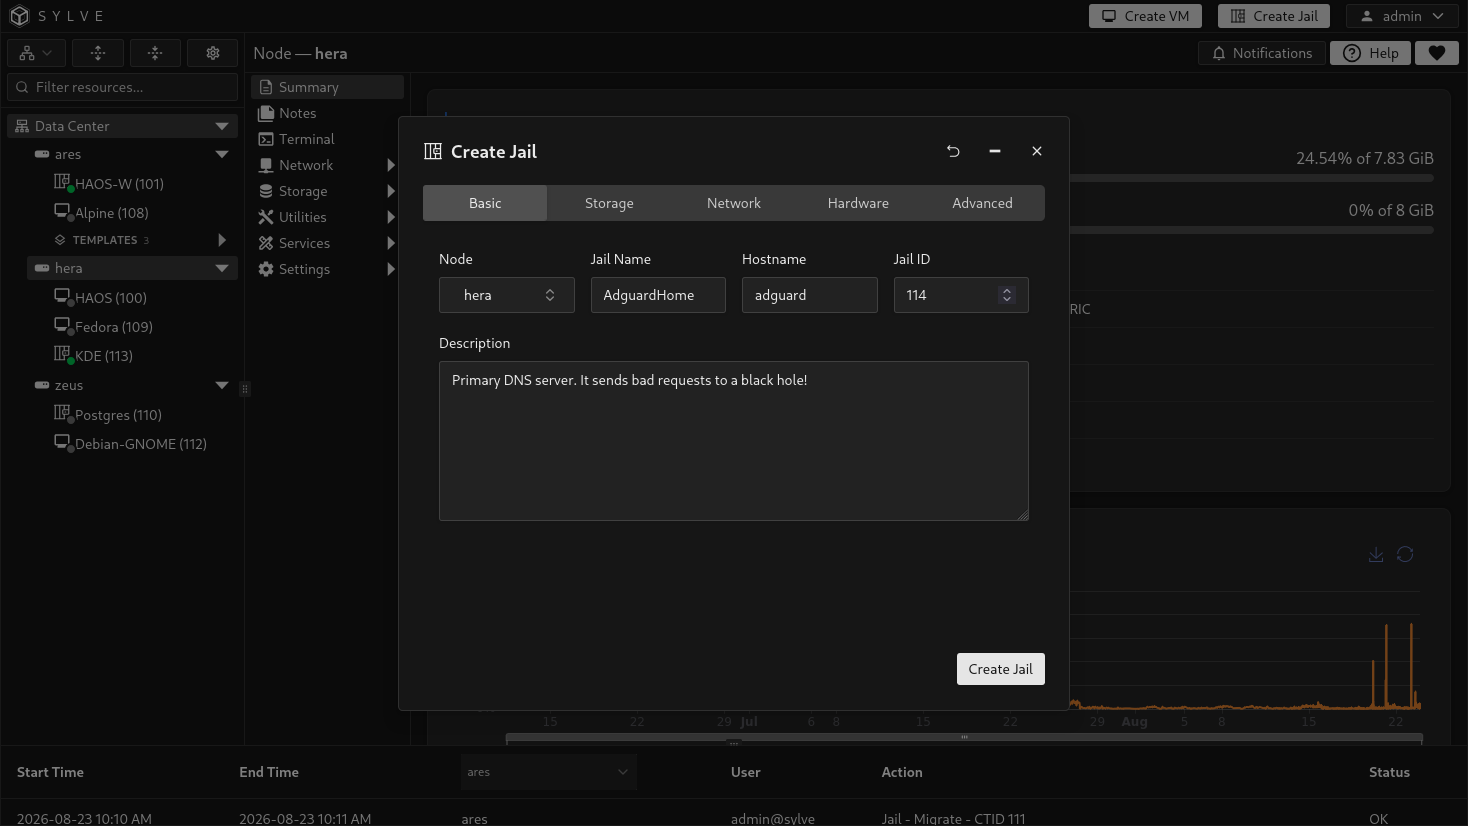
Open the Basic tab and identify the jail:
- Confirm that the correct Node is selected if the field is shown.
- Enter
AdguardHomeas the Jail Name. - Enter
adguardhomeas the Hostname. - Keep the suggested Jail ID unless you have a reason to use another available value.
- Enter
Primary DNS server, It sends bad requests to a black hole!as the Description.
The Jail ID, also called the CTID, must be from 1 through 9999 and unique across both VMs and jails in the cluster. The jail name may contain letters, numbers, hyphens, and underscores. The hostname follows the normal hostname rules used inside FreeBSD.
Storage
Section titled “Storage”Return to the Storage tab and confirm:
- The intended ZFS Pool is selected.
- The completed FreeBSD Base bootstrap is selected under Base.
- FStab Additions remains disabled.
Sylve creates the jail root at <pool>/sylve/jails/<Jail ID> and copies the selected bootstrap into it. Fstab additions are not needed because this jail does not mount any extra host storage.
Network
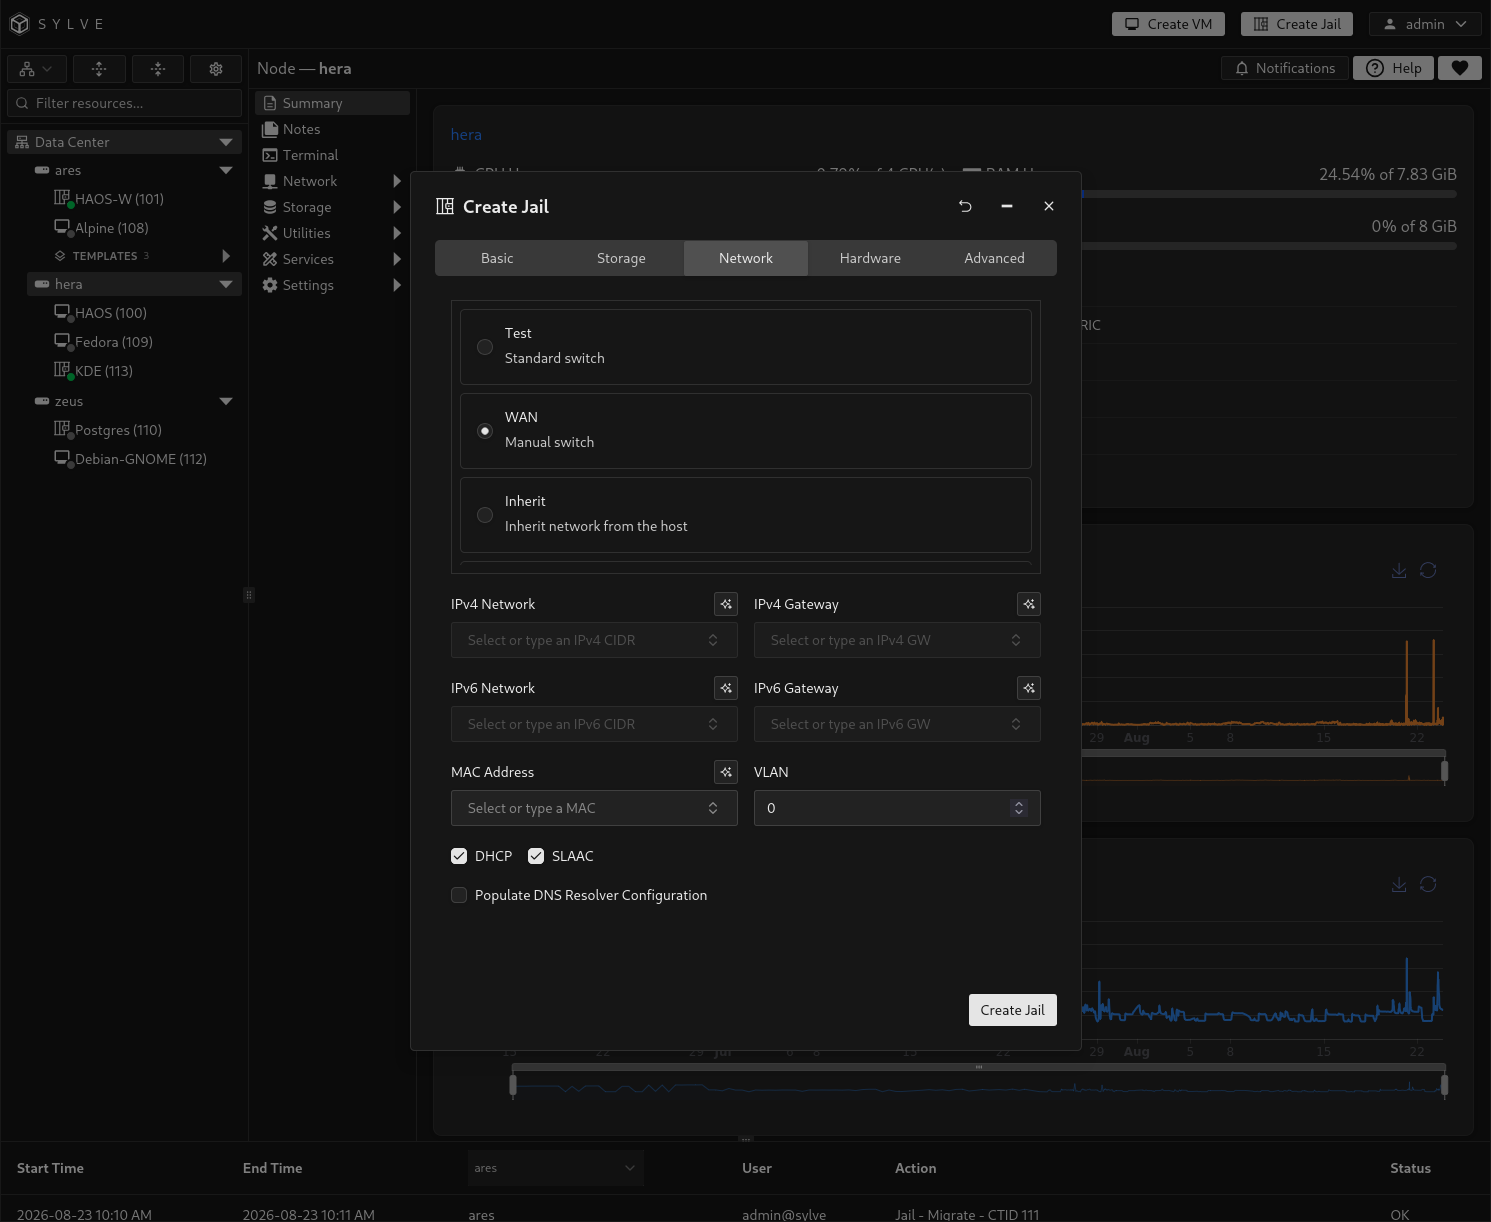
Section titled “Network”Connect the jail to the Standard Switch created earlier:
- Select
WAN, or the equivalent network-facing Standard Switch on your node. - Enable DHCP.
- Enable SLAAC.
- Leave IPv4 Network, IPv4 Gateway, IPv6 Network, and IPv6 Gateway empty.
- Leave MAC Address empty so Sylve generates a unique managed MAC object.
- Keep VLAN set to
0. - Leave Populate DNS Resolver Configuration disabled.
DHCP asks the upstream network for an IPv4 address, gateway, and DNS resolver information when the jail starts. Because this setup receives DNS servers through DHCP, Sylve does not need to write a separate resolver configuration into the jail. SLAAC allows the jail to configure IPv6 automatically when the upstream router advertises an IPv6 prefix.
If your network does not provide DHCP or IPv6 router advertisements, use static addresses and gateways appropriate for your network instead. If DHCP does not provide DNS servers, enable Populate DNS Resolver Configuration and enter a suitable resolver configuration. See Jail Creation for the manual network and resolver fields.
Hardware
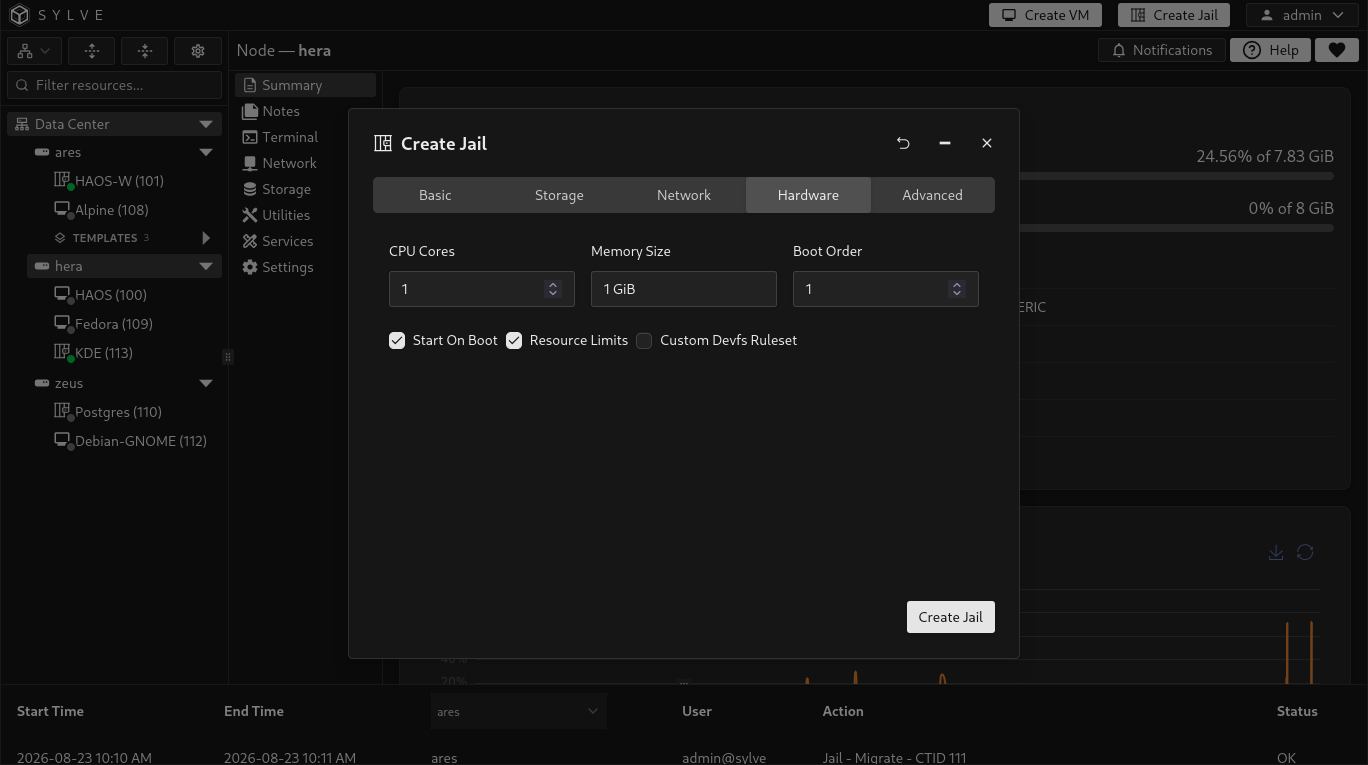
Section titled “Hardware”Apply modest limits for this first jail:
- Set CPU Cores to
1. - Enter
1 GiBfor Memory Size. - Set Boot Order to
1. - Enable Start On Boot.
- Keep Resource Limits enabled.
- Leave Custom Devfs Ruleset disabled.
Jails share the host kernel, so these values are enforced limits rather than emulated hardware or exclusive reservations. One core and 1 GiB are more than enough for AdGuard Home on a small network. You can change the limits later from the jail’s Hardware page.
Advanced
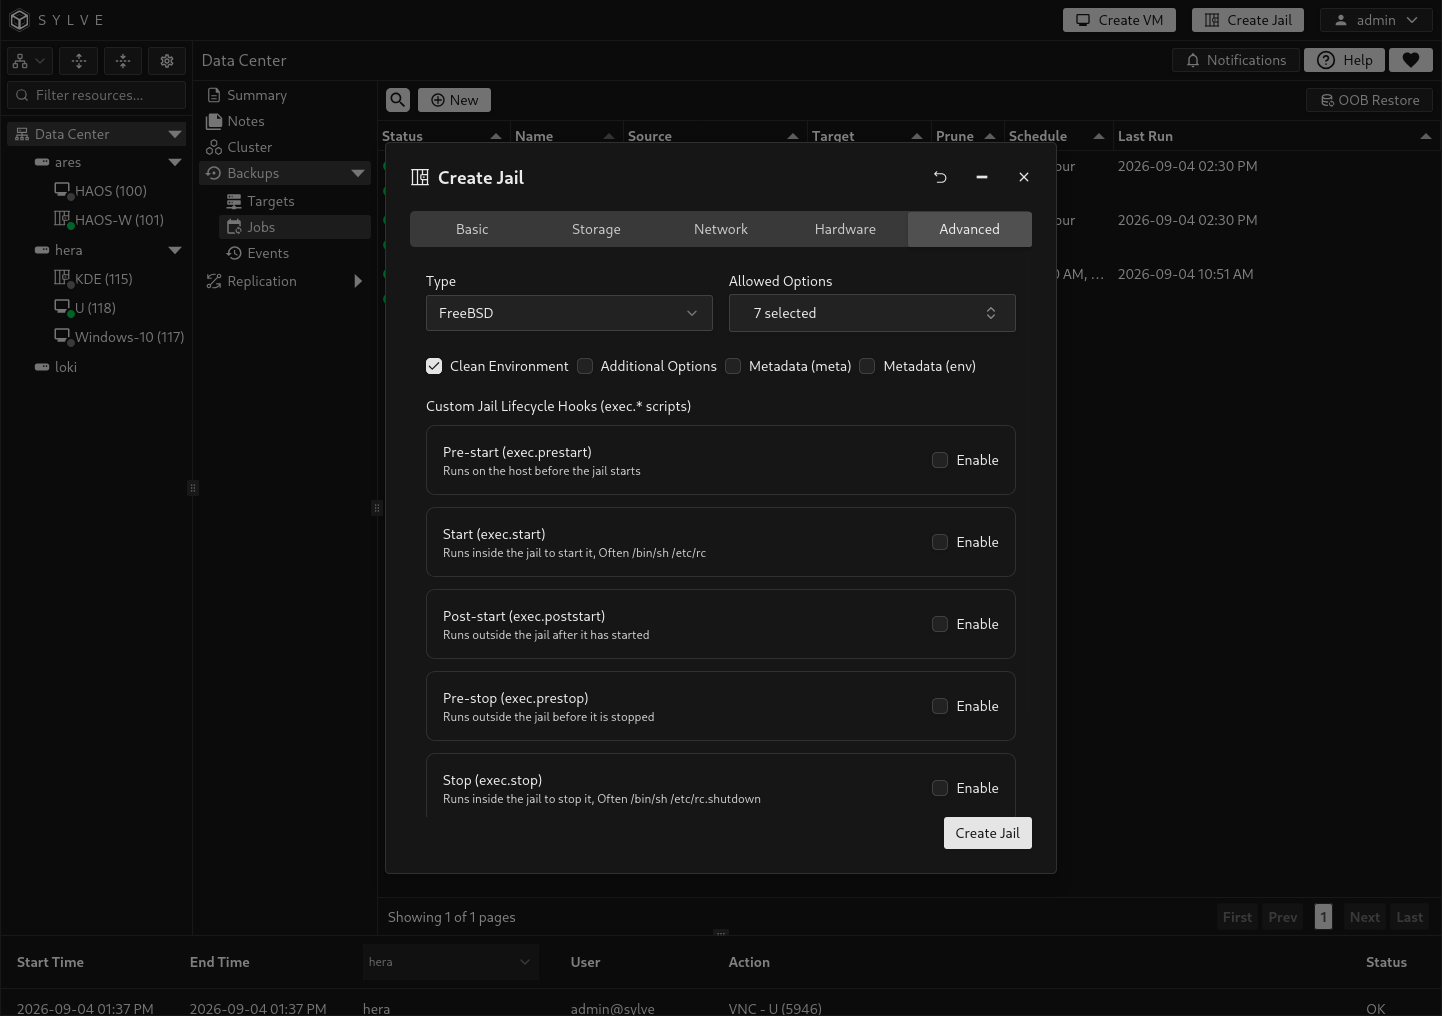
Section titled “Advanced”Keep the standard FreeBSD runtime configuration:
- Keep Type set to FreeBSD.
- Keep the default Allowed Options selected, including Mount devfs (
allow.mount.devfs). - Keep Clean Environment enabled.
- Leave Additional Options and both metadata fields disabled.
- Leave every lifecycle hook disabled.
The default devfs permission is important for DHCP because the FreeBSD DHCP client needs access to a BPF device. With the custom Start and Stop hooks disabled, Sylve automatically runs /bin/sh /etc/rc when this FreeBSD jail starts and /bin/sh /etc/rc.shutdown when it stops.
Finish creation
Section titled “Finish creation”Review every tab, then select Create Jail. Sylve verifies the identity, pool, bootstrap, switch, network settings, limits, allowed options, and lifecycle hooks before it creates the jail.
Creation can take time because Sylve creates a new ZFS dataset and copies the complete bootstrap into it. Keep the page open until the request finishes. When creation succeeds, AdguardHome appears beneath the selected node in the sidebar.
For a detailed reference covering every field in the wizard, see Jail Creation.
Start and verify the jail
Section titled “Start and verify the jail”Open the new jail’s Summary page, select Start, and wait for the lifecycle task to finish. Confirm that the status changes to Running before continuing. A successful queue response means the task was accepted, so wait for the final state rather than opening the console immediately.
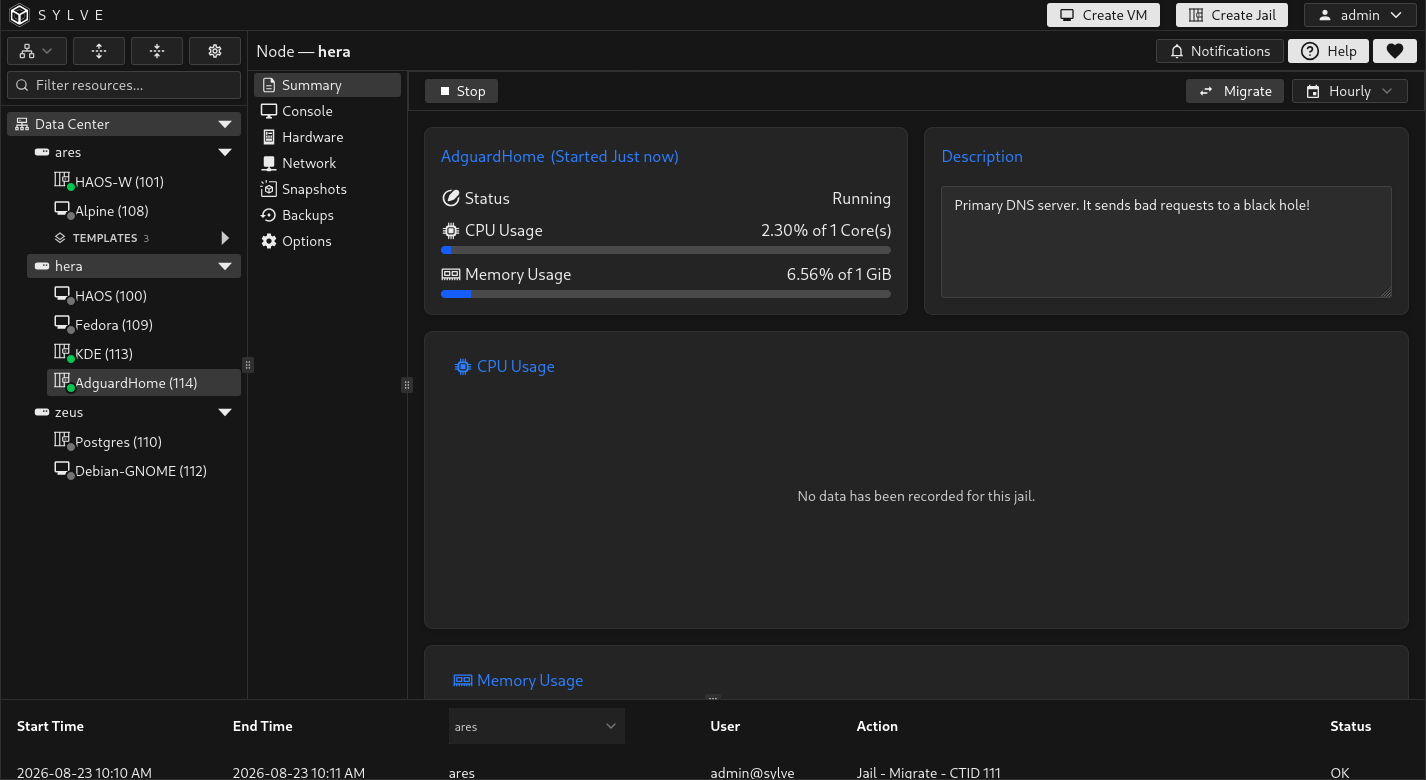
If the jail does not start, select View Logs on the Summary page and inspect the lifecycle output. The most common causes in this workflow are an incomplete bootstrap, an unavailable switch port, or DHCP failing because the default devfs permission was removed.
Open the console
Section titled “Open the console”Open Console beneath the running jail. Sylve connects the browser to an interactive root shell inside the jail.
Check the operating-system version and hostname:
freebsd-versionhostnameThe reported FreeBSD version should match the selected bootstrap, and the hostname should be adguardhome.
Inspect the network interfaces and routing table:
ifconfignetstat -rnFind the non-loopback interface and note its inet address. DHCP should also have installed a default IPv4 route. Then test the address path and DNS resolution separately:
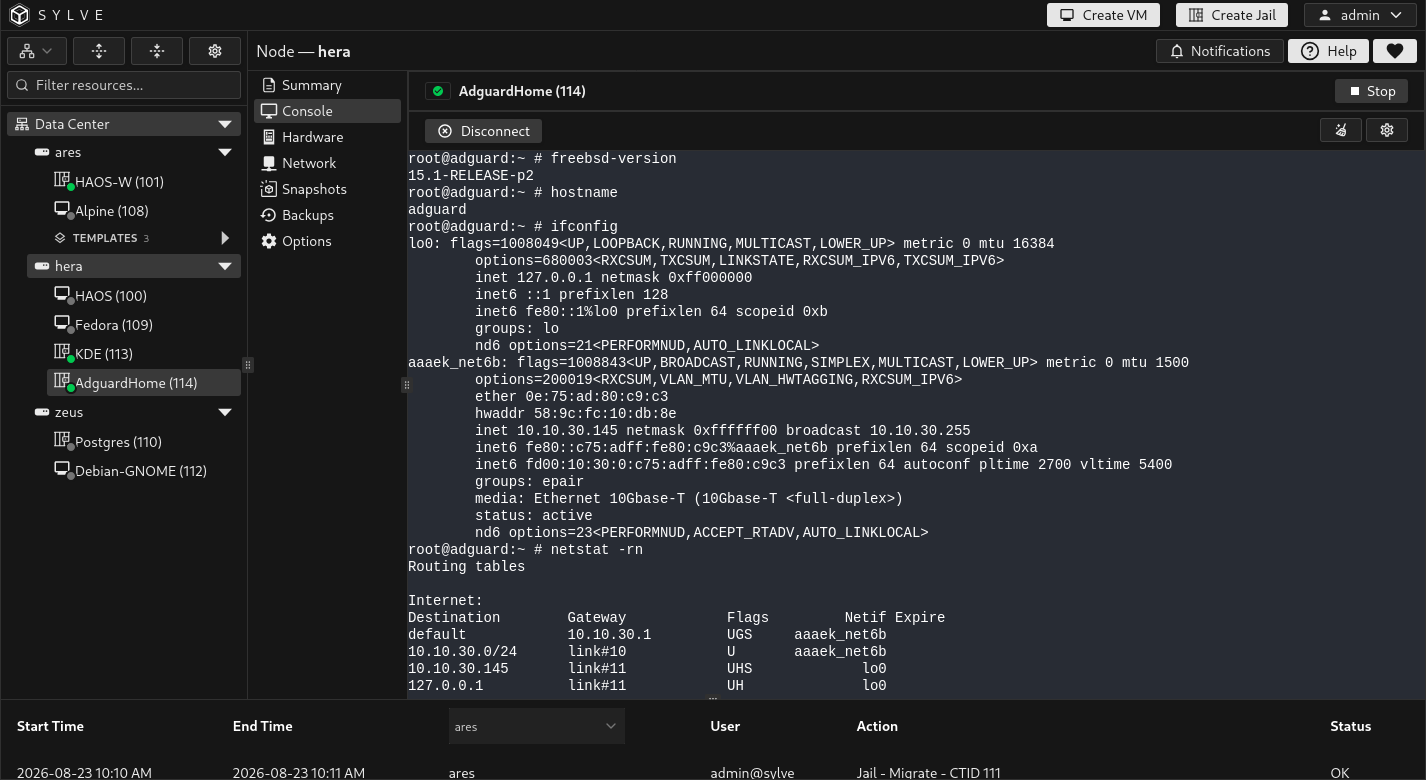
ping -c 3 1.1.1.1ping -c 3 freebsd.orgIf the first test fails, check the DHCP lease, switch, bridge port, and upstream network. If the first succeeds but the second fails, inspect /etc/resolv.conf and the DNS configuration chosen during creation.
For more detail about connection controls and the shared administrative shell, see Jail Console.
Install AdGuard Home
Section titled “Install AdGuard Home”AdGuard Home is a DNS server that blocks ads and trackers for devices that use it. The jail gives the service its own address on your network and keeps it separate from the FreeBSD host.
The bootstrap includes pkg, so the jail can install ordinary FreeBSD packages. Update the repository catalog and install AdGuard Home:
pkg updatepkg install adguardhomeThe FreeBSD package normally starts AdGuard Home as the unprivileged unbound user. AdGuard Home refuses its first launch as that user because the setup process requires administrator privileges. For this dedicated jail, configure the service to run as root, enable it so it starts with the jail, and then start it now:
sysrc adguardhome_user=rootsysrc adguardhome_enable=YESservice adguardhome startThis grants AdGuard Home root privileges inside the jail, not on the Sylve host. The default allow.reserved_ports jail option selected earlier permits the jail’s root user to bind DNS port 53. Running as unbound instead requires advanced host-level port access control, which is outside the scope of this first-jail guide.
Confirm that the service is running:
service adguardhome statusIf the service stops immediately, inspect its log:
tail -n 100 /var/log/adguardhome.logThe message this is the first launch of adguard home; you must run it as administrator means adguardhome_user=root was not saved before the service started.
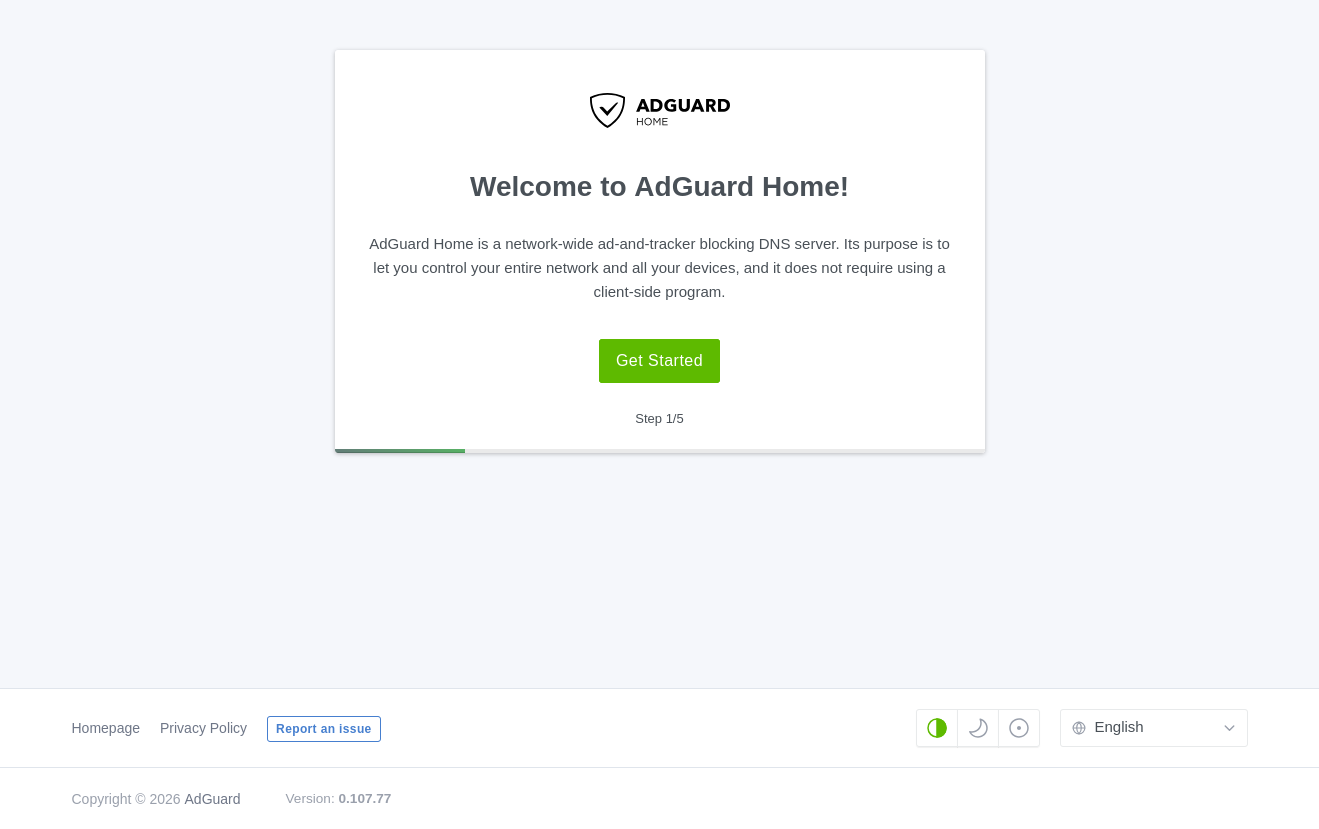
On its first start, AdGuard Home opens its setup interface on TCP port 3000. From another computer on the same network, open:
http://<jail-ip>:3000/You should see the AdGuard Home welcome page. If it does not open, confirm that the service is running and that you used the jail’s address rather than the Sylve node’s address. Then check the host firewall, upstream network policy, and client-to-jail routing.
Complete the setup wizard
Section titled “Complete the setup wizard”Select Get Started, then configure AdGuard Home:
- Keep the Admin Web Interface available on all interfaces. Use port
80unless another service in this jail already uses it. - Keep the DNS Server available on all interfaces and use port
53. - Create an administrator username and a strong, unique password.
- Review the device-configuration information and finish the wizard.
After setup, the service reloads with its saved configuration. If you selected port 80 for the admin interface, open the dashboard at:
http://<jail-ip>/Return to the jail console and confirm that AdGuard Home is listening for DNS requests on both TCP and UDP port 53:
sockstat -4 -6 -l | grep ':53'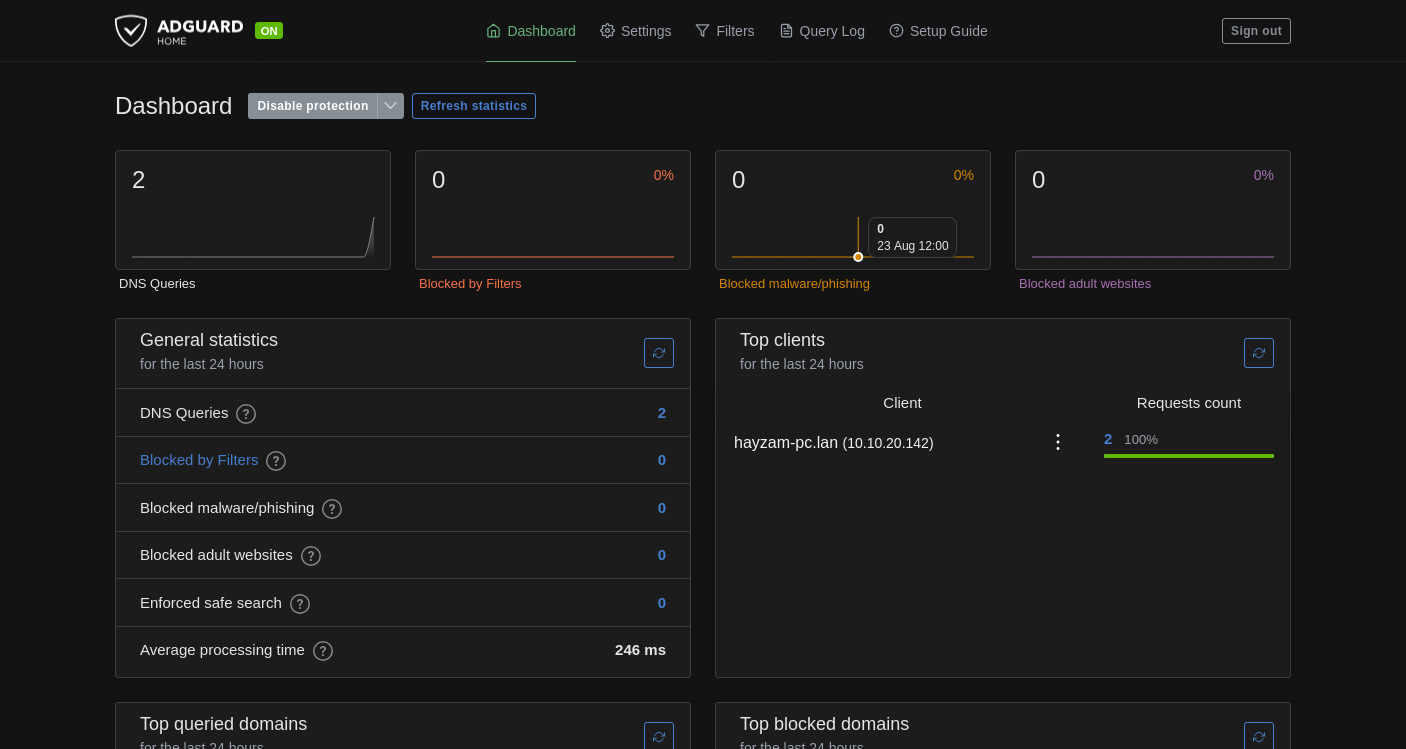
Send DNS queries through the jail
Section titled “Send DNS queries through the jail”For a safe first test, change the DNS server on one computer or phone to the jail’s IPv4 address. Browse normally, then refresh the AdGuard Home dashboard. The query and blocked-request counters should begin to increase.
The jail is now running AdGuard Home in an independently addressed FreeBSD userland on the WAN Standard Switch. Use its Summary page for lifecycle controls and logs, Network for later interface changes, and Snapshots or Backups before making important configuration changes.